Calibration Rod Dust-Free Cloth Calibration Plate
6.2 Removing the Chuck Fixing Rod
6.3 Equipment Calibration
The P55D device features intelligent automatic calibration, which enables easy
one-click precision calibration and compensation. To ensure the long-term
stable production of high-quality restorations, it is recommended to regularly
calibrate the equipment.
Cases requiring equipment calibration include:
1. After the device is first powered on to eliminate possible transportation
effects.
2. After long periods of high-intensity operation (after 3 months of high-intensi-
ty work).
3. When abnormal conditions occur during equipment processing (such as
cutting edges, blade marks, or tooth loss).
4. After significant relocation or movement of the equipment.
Before performing equipment calibration, you need to prepare the following
tools:
To ensure the stability of the chuck during transportation, a fixing rod is
equipped on the spindle. It needs to be manually removed during the initial
startup of the machine.
If the fixing rod is not removed, it may collide with machine parts, risking
damage to the spindle.
Please follow these steps to remove the fixing rod:
1. Open the equipment operating door.
2. Caution! Please wear gloves and place your hand under the spindle.
3. In UPCNC, click on the chuck release button. The fixing rod will fall into your
hand. Remove it.
27 28
Before calibration, please ensure the following preparations:
1. Clean the working chamber: Use a vacuum cleaner to remove dust from the
processing chamber, ensuring cleanliness and no debris.
2. Wipe key components: Use a lint-free cloth to wipe the tool holder and the surround-
ing area of the fixture, ensuring the surface is clean and free of dirt and dust.
3. Spindle cleaning: Use a brush and lint-free cloth to clean the bottom surface
of the air guide sleeve to ensure no dust affects it.
4. Spindle chuck cleaning: Loosen and remove the spindle chuck and clean it.
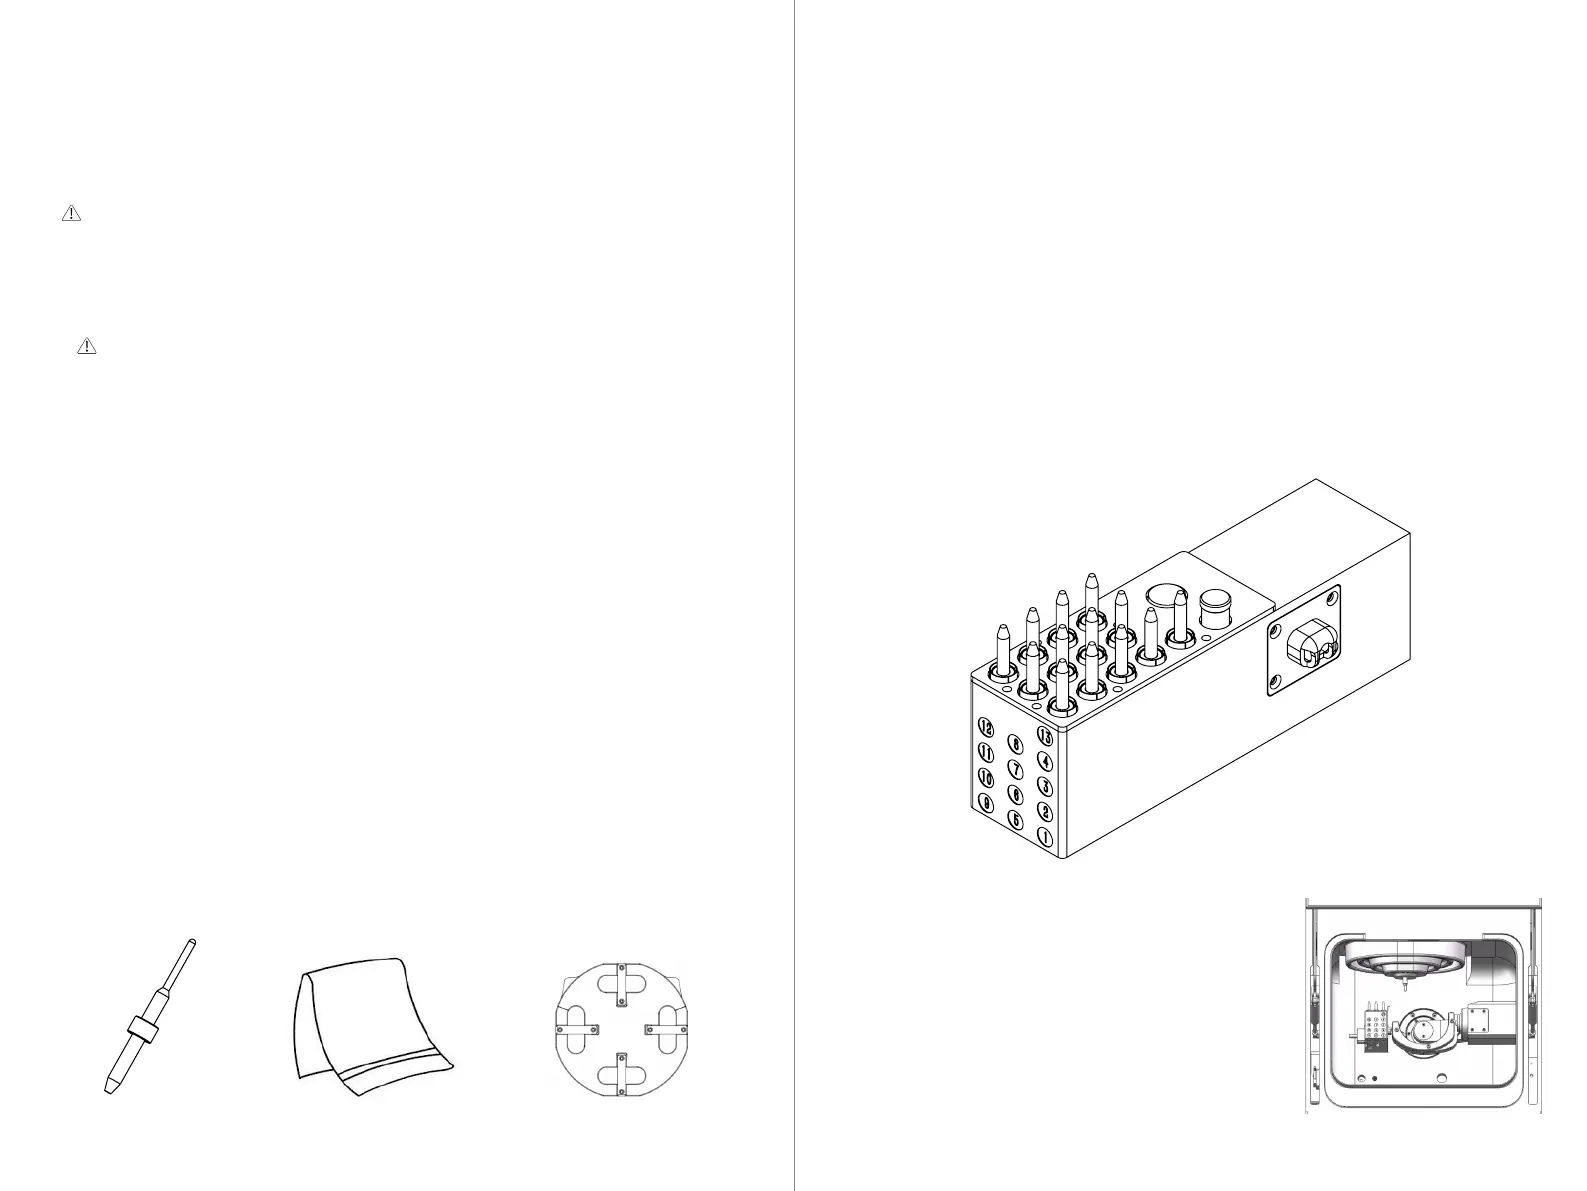
5. Install the calibration rod onto the 13th tool magazine, ensuring it is fully
inserted to ensure accuracy.
6.3.1 Installing the Calibration Rod
①. As shown in the figure, click on the material
removal position in CNC 3, and insert the automatic
calibration plate into the clamp of the P55D.
6.3.2 Installing the Automatic Calibration Plate