© UPLIFT Desk • 800-349-3839 • info@upliftdesk.com • upliftdesk.com
7
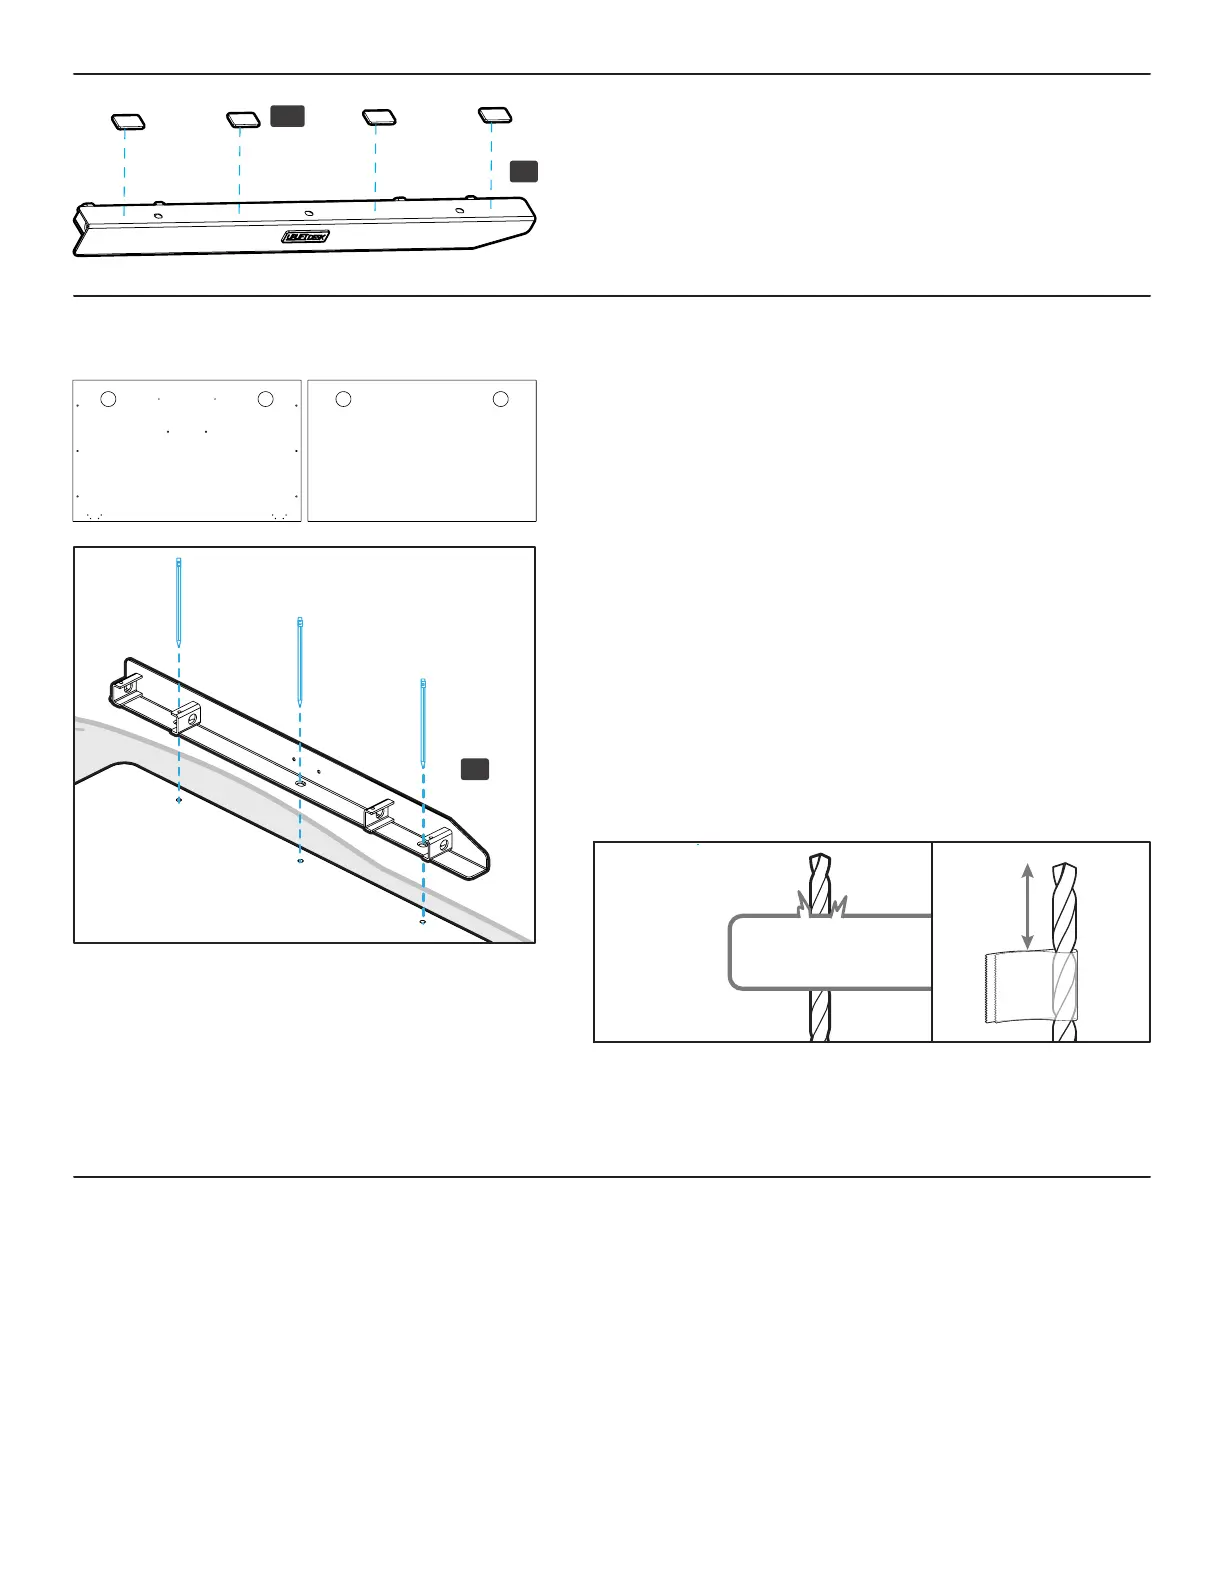
Step 4 (if applicable) - Drill Side Bracket Holes
Skip this step and proceed to Step 5 if your desktop has
threaded metal inserts or pre-drilled holes. See images showing
a desktop with pre-drilled holes and inserts and without pre-
drilled holes and inserts.
A. Select the top surface of your desktop and make sure that side
is facing down. Make sure you only drill into the bottom surface
of your desktop.
B. Place the left Side Bracket (P4) onto the desktop as shown so
it’s centered between the front and back edges of the desktop
and approximately 1/2” from the side edge of the desktop.
Make sure the tapered end of the Side Bracket is towards the
front of the desktop where the four Keypad attachment holes
are located and make a pencil mark in the center of each of the
three holes in the Side Bracket.
IMPORTANT: Don’t drill through your desktop top surface. DRILL
NO DEEPER THAN 1/2”. To ensure this, we recommend wrapping
a piece of tape around your drill bit 1/2” from the tip. Stop
drilling just before the tape touches the desktop.
C. Move the Side Bracket out of the way and drill pilot holes at
your pencil marks using a 1/8” drill bit.
D. Follow the same pre-drilling process with the other Side
Bracket at the other end of the desktop.
Step 3 - Adhesive Pad Application
A. Peel the backing off of four Adhesive pads (H12) and place onto
one of the Side Brackets (P4) on the side adjacent to the UPLIFT
DESK logo plate where shown.
B. Repeat for the second Side Bracket.
0.5”
Tape
left
with pre-drilled holes without pre-drilled holes
P4
P4
H12