6 Start-up
16 Installation and maintenance instructions atmoMAG 0020189893_03
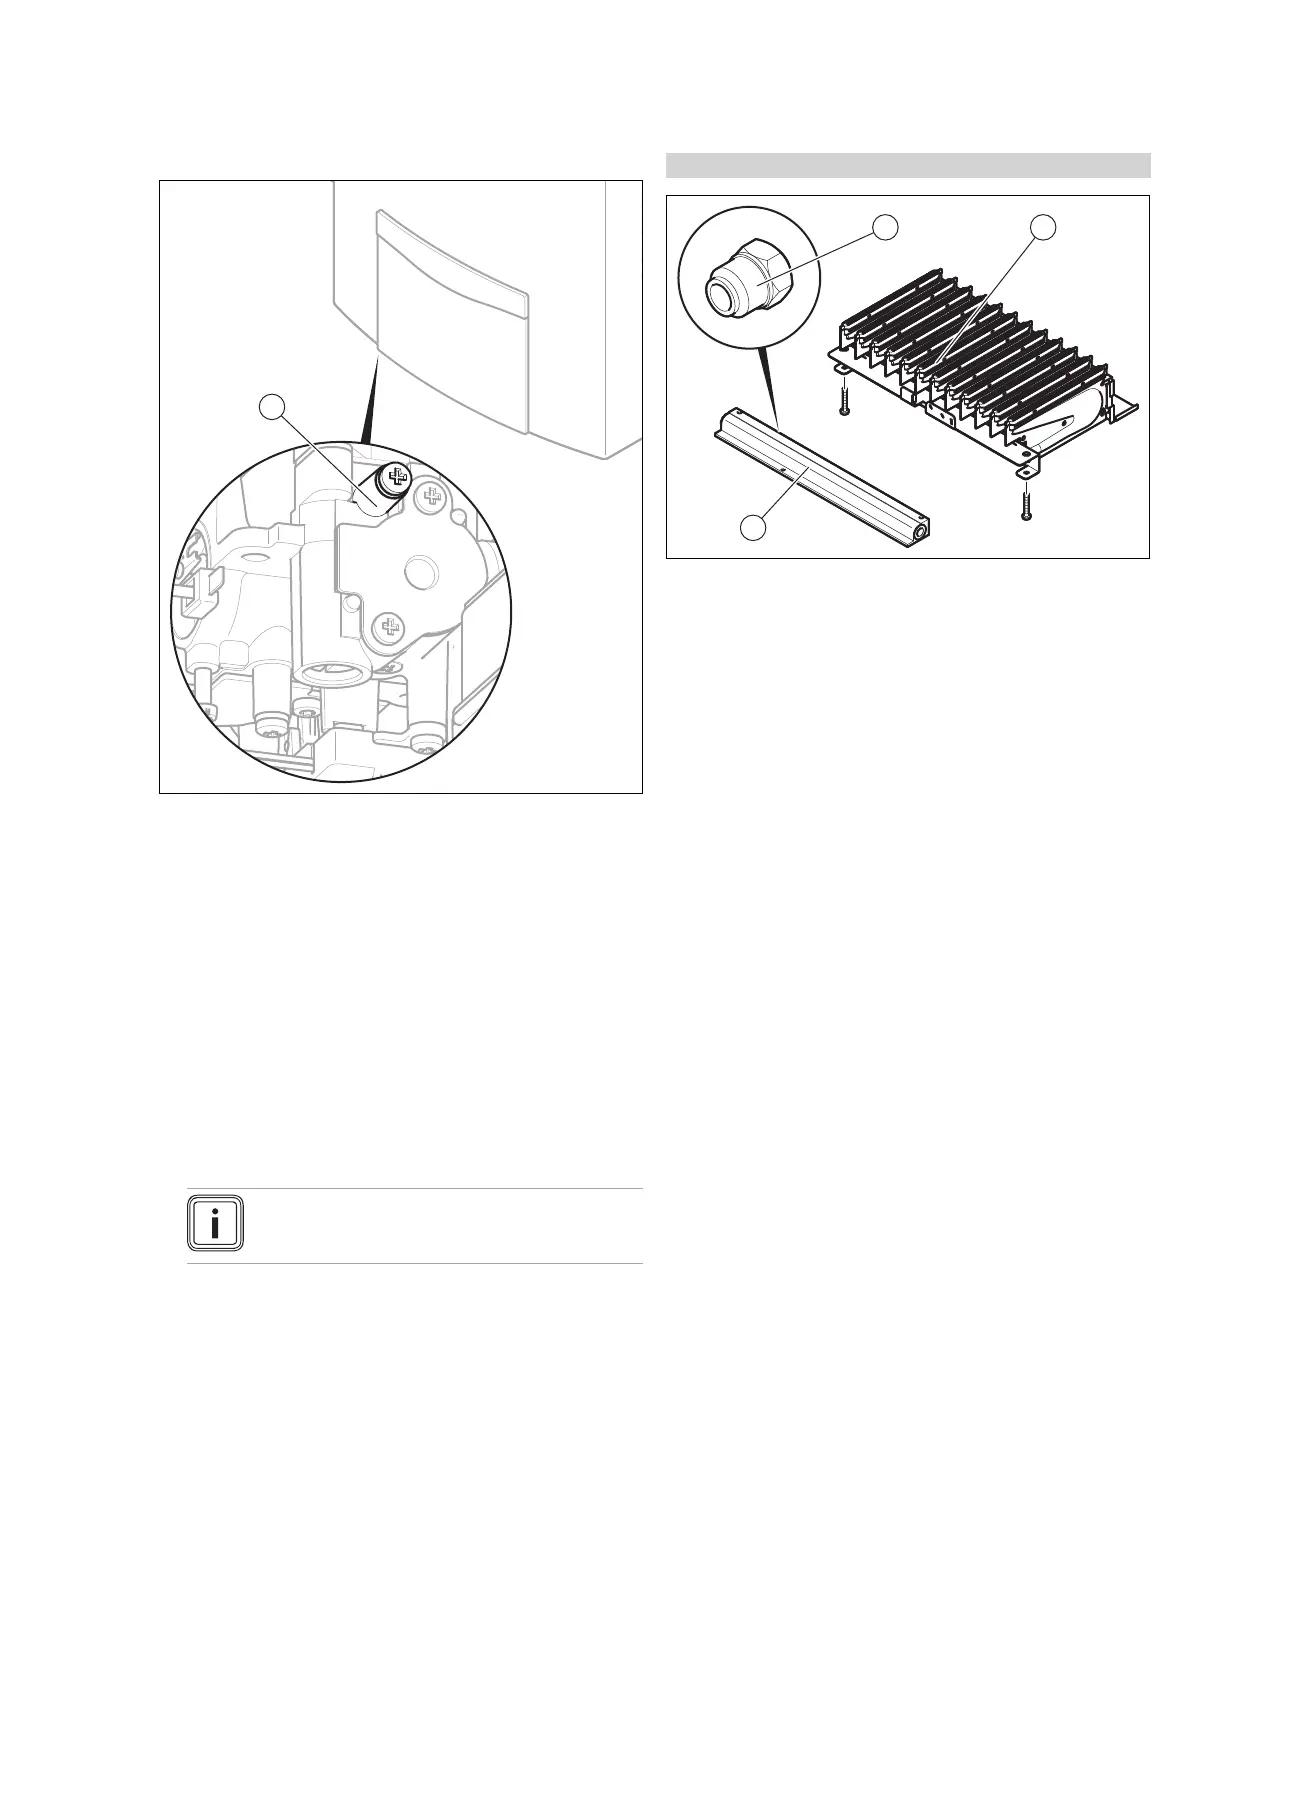
Burner working pressure test
▶ Unscrew the sealing screw from the measuring nipple (1)
for the burner pressure.
▶ Remove the seal.
▶ Connect a pressure gauge (resolution at least 0.1 bar).
▶ Start up the product.
▶ Turn the temperature selector clockwise as far as it will
go in order to reduce the water volume and set the max-
imum water temperature.
▶ Turn the power switch as far as it will go anti-clockwise to
set the maximum product output.
▶ Draw off hot water with the water tap fully open to enable
the nominal water volume (→ Page 25) to flow.
▶ Look up the required burner pressure in the Tables of
gas settings (→ Page 25) and compare the value with the
corresponding value in the table.
Note
Deviations of ±10% are permitted.
▶ Remove the pressure gauge.
▶ Place the sealing screw and the seal on the measuring
nipple, tighten the sealing screw and check that it is leak-
tight.
Conditions: The deviation is greater than ±10%
▶ Remove the burner. (→ Page 18)
▶ Remove the jet holder. (→ Page 18)
▶ Check whether the correct burner jets (1) have been
used in the jet holder (3) for the burner (2) by compar-
ing the labels on the burner jets with the specifications in
the Tables of gas settings (→ Page 25).
▶ If incorrect burner jets are used, contact Vaillant Cus-
tomer Service. Do not start up the product.
▶ If the correct burner jets are being used, continue with
the following steps.
▶ Clean the burner. (→ Page 19)
▶ Refit the burner assembly in the reverse order.
▶ Repeat the check of the heat input.
▶ If the deviation continues to be greater than ±10%, adjust
the product load (→ Page 17).

 Loading...