EasyManua.ls Logo

Valeport DataLog x2 - User Manual

Default Icon
40 pages
Print Icon
To Next Page IconTo Next Page
Loading...
DataLog x2 and Terminal x2
Installation and User Guide
Document ID
MANUAL-1899207337-17
Date:
August 2021
This confidential document was prepared by the staff of Valeport Limited, the Company, and is the
property of the Company, which also owns the copyright therein. All rights conferred by the law of
the copyright and by virtue of international copyright conventions are reserved to the Company.
This document must not be copied, reprinted or reproduced in any material form, either wholly or in
part, and the contents of this document, and any method or technique available there from, must
not be disclosed to any other person whatsoever without the prior written consent of the Company.
© 2021 Valeport Ltd
Valeport Ltd
St Peter's Quay
Totnes TQ9 5EW
United Kingdom
Phone:
email:
Web:
+44 1803 869292
sales@valeport.co.uk
www.valeport.co.uk
As part of our policy of continuous development, we reserve the right to alter, without prior notice,
all specifications, designs, prices and conditions of supply for all our equipment
Question and Answer IconNeed help?

Do you have a question about the Valeport DataLog x2 and is the answer not in the manual?

Overview

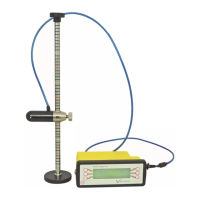
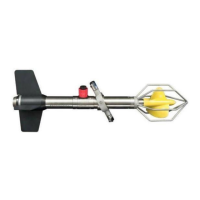
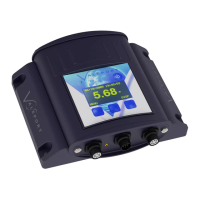
The Valeport DataLog x2 and Terminal x2 are software packages designed to interface with, configure, and download data from Valeport instrumentation. Terminal x2 is a lightweight terminal program for serial communication, configuration, and control of Valeport Instruments, intended as a direct replacement for Hyper Terminal on Windows PCs. DataLog x2 builds upon Terminal x2's capabilities by adding extensive graphing and data analysis tools.

Function Description:

Terminal x2:

Terminal x2 serves as a serial communication interface for Valeport instruments. Its primary functions include:

  • Serial Communication: Facilitates direct communication with instruments via serial RS232.
  • Instrument Configuration: Allows users to configure instrument settings through a wizard-based interface.
  • Data Logging: Enables the logging of data received from connected instruments.
  • File Downloads: Supports downloading data files from instrument memory.
  • Multiple Port Connections: Capable of handling connections to multiple serial ports.
  • TCP-IP Serial Connection: Provides functionality for connecting to instruments over internet connections.
  • Command Line Interface: Users can send commands directly to the instrument via a command line or command toolbar.
  • Connection Status Monitoring: Displays the current port, baud rate, protocol, and connection status.
  • Connection Window: Shows all communications between the PC and the instrument, with time stamping, scrolling for large data sets, and the ability to highlight, select, copy, and paste data.
  • Command History: The command toolbar stores a history of issued commands for easy recall.
  • Data Reception Monitoring: The status toolbar indicates the volume of data received, number of lines, and data reception rate.

DataLog x2:

DataLog x2 encompasses all the features of Terminal x2 and adds advanced data management and analysis capabilities:

  • Communication, Configuration, and Control: Provides a comprehensive suite for interacting with Valeport Instruments.
  • Graphing and Data Display: Offers basic graphing and data display functions for both internally recorded and real-time data.
  • File Manager: Automatically loads recorded and downloaded data files into a dedicated window.
  • Workspaces: Allows users to save configurations of files, graphs, and tables as workspaces for later loading.
  • Time Series Chart: Displays single or multiple parameters against time (X-axis), with multiple Y-axes for multiple parameters.
  • Profile Chart: Plots single or multiple parameters against depth/pressure (reversed Y-axis).
  • Scatter Chart: Enables plotting one parameter against another, useful for applications like T-S plots in oceanography.
  • Polar Chart: Designed for displaying vector type data, such as water current direction and speed, or wind speed and direction.
  • Terminal Window: Similar to Terminal x2, it shows all communications and allows manual interaction with the instrument, providing access to all Terminal x2 functionalities.
  • Table View: Displays the data contained in a highlighted file in a tabular format, with filtering tools available.
  • Calculated Density and Salinity: Automatically calculates Practical Salinity and Density from uploaded Sound Velocity, Pressure, and Temperature data using Valeport's proprietary computational techniques.

Important Technical Specifications:

System Requirements:

  • Operating Systems: Tested on Windows 8, 8.1, and 10.
  • Basic Requirements:
    • Processor: 800MHz
    • RAM: 512MB
    • Screen Resolution: 1024 x 768
    • Free Disk Space: 20MB (excluding data)
    • Browser: IE6+ installed
  • Recommended Requirements:
    • Processor: 1 gigahertz (GHz) or faster 32-bit (x86) or 64-bit (x64)
    • RAM: 2 GB (32-bit) or 4 GB (64-bit)
    • Screen Resolution: 1280 x 1024
    • Free Disk Space: 20MB (excluding data)
    • Browser: IE9+ installed

Compatibility:

  • Terminal X2: Works with any Valeport Instrument communicating via serial RS232, though functionality may be limited with older instruments.
  • DataLog X2: Not fully compatible with TideMaster, MIDAS DWR, MIDAS WTR, MIDAS Surveyor, MIDAS BathyPack, MIDAS CTD+, and Model 803. Specific software packages (TideMaster Express, WaveLog Express, SurveyLog, BathyLog, DataLog Pro, ROVLog) are recommended for these instruments.

Salinity and Density Calculation Accuracy (DataLog x2):

  • Salinity: ±0.05 PSU
  • Density: ±0.05 kg/m³

Usage Features:

Installation:

  • Run Setup.exe from the installation directory.
  • May require accepting Windows security warnings.
  • The setup wizard guides through the process, including selecting additional tasks like creating a desktop shortcut.
  • Installation can be terminated at any time by pressing "Cancel."

Uninstallation:

  • Navigate to Windows "Control Panel" and select "Remove Program."
  • DataLog X2 can be selected from the program list and uninstalled.

Starting DataLog X2/Terminal X2:

  • Navigate to the "All Programs" link under the Windows "START" menu.
  • Navigate to the folder "Valeport Software."
  • Click the icon "DataLog X2" or "Valeport Terminal X2."
  • Alternatively, if a desktop icon was created, double-click it.

Establishing a Connection:

  • Connection Wizard: Click the "Connect" icon to open the wizard. Select the instrument type from a dropdown list. Connection settings will default to factory settings but can be changed if needed.
  • Settings Toolbar: Alternatively, set up the connection using the settings toolbar by selecting the appropriate port and baud rate, then press the "Connect" icon.
  • TCP-IP Connection: Select "TCP-IP Client" from the port dropdown and enter the IP address and port in the "Host" settings.
  • Connection Status: Once connected, the status bar will display connection details and communications will appear in the window.

Configuring an Instrument:

  • Click the "Configure" tool to open the configuration wizard.
  • Select the instrument type and connection settings.
  • Select the COM port and click "Next."
  • The first wizard window shows instrument information (serial number, firmware, calibration date, memory, voltages), which is read-only.
  • The next screen allows pressure sensor configuration, including output units (e.g., dBar) and Tare settings (manual or measured). A "Set TARE Now" button is available to take a measured Tare.
  • Latitude value can be set for pressure-to-depth conversion.
  • If the instrument has a Real Time Clock, it can be synchronized to PC time.
  • A free text field is available for a header to be inserted into every recorded file.
  • Sampling modes can be selected, depending on the instrument.
  • The final screen summarizes commands to be sent to the instrument. If no changes were made, the "Finish" button will be greyed out; typing '#' into the command window will enable it.
  • Once configured, the instrument will be in a paused state and needs to be prompted to run (e.g., by selecting the RUN button in the instrument tab, entering command #028, or cycling power).

Downloading a File:

  • Click the "Download" icon to invoke the Download Wizard.
  • The first stage identifies the connected instrument and comms settings.
  • Ensure the instrument is switched on and connected. Extend the interrupt timeout if in burst mode.
  • Define the location for downloaded files; subfolders by instrument and date are automatically created.
  • For instruments supporting individual file downloads (mini and 400 series), a file list with checkboxes is displayed. For older instruments (106/108/308, 740), the entire memory is downloaded at once.
  • A status window shows download progress and estimated completion time.
  • Downloaded files are automatically loaded into the File Manager in DataLog X2.

Recording a File (DataLog x2):

  • Click the "Record" icon to open the Recording Wizard.
  • Set up instrument type and communications settings.
  • The recording wizard in DataLog X2 interprets and parses incoming serial port data into the current workspace for real-time display and plotting.
  • The next screen sets interrupt settings, selects data format, and allows filtering of incoming strings.
  • If the data format is unknown, select "generic instrument" to define the format.
  • For instruments without a Real Time Clock, an option to append a timestamp to each record is available.
  • Files are saved to a selected location, with automatic naming and numbering.
  • Data continues to be recorded until the record button is clicked again, or Terminal is closed.

Instrument Tools (DataLog x2):

  • A shortcut to carry out tasks like interrupting a running instrument, setting a pressure Tare, clearing memory, and setting the instrument into run mode.
  • For certain instruments (e.g., model 740), a calibrate button is available.

Chart Toolbar (DataLog x2):

  • Allows basic filtering to be applied to datasets in the workspace.
  • Date and Depth filters can be applied using toolbar buttons.
  • Additional filters can be added using the "Add" button, with dialogs for setting upper/lower limits.
  • Filters can be cleared using the "Clear" button.

Recording Toolbar (DataLog x2):

  • The recording toolbar becomes active when the "Record" button on the Home Toolbar is clicked.
  • Clicking the record button activates the Recording Wizard.
  • The toolbar informs on the location that files are being saved to, the file increment, and the port settings.
  • To start a new file while actively recording, press the "Next File" button.
  • Resetting any graphs or charts currently active.

Calibrating a 740 Tide Gauge:

  • Two routes for calibration: DataLog X2 or Instrument Tools.
  • Three options for calibration:
    • No Calibration: Pressure readings returned as raw pressure in dBar.
    • Site Calibration: Derive offset and gain by measuring pressure.
    • User Calibration: Specify a specific DATUM OFFSET and GAIN FACTOR.
  • Offset is the height of the pressure transducer relative to a known datum point.
  • Gain is a factor to compensate for water density in pressure-to-depth conversion (e.g., 1.025 for fresh water, 0.993 for sea water).
  • Click "Next" to commit settings to the model 740.

Calculated Density and Salinity (DataLog x2):

  • Upload a data set containing Sound Velocity, Pressure, and Temperature.
  • DataLog x2 automatically calculates Practical Salinity and Density at each point in the profile.

Maintenance Features:

File Management:

  • Downloaded and recorded files are automatically loaded into the file manager window.
  • Previously downloaded or recorded files can be added by clicking the "Add Files" button.
  • Files are sorted in the order they are added.
  • The "select" button activates or deactivates a file.
  • Files can be deleted by clicking the bin icon. Warning: There is no recycle bin; deleted files are permanently gone from the instrument.

Instrument Clock Synchronization:

  • For instruments with a Real Time Clock, the internal clock can be manually set or synchronized to the PC time. This ensures the time zone of the PC is correctly applied.

Saving Configurations:

  • During instrument configuration, there is an option to "Save this configuration to a file for use later." This allows users to store and reuse specific instrument settings.

Valeport DataLog x2 Specifications

General IconGeneral
BrandValeport
ModelDataLog x2
CategoryMeasuring Instruments
LanguageEnglish

Related product manuals