18.5 To remove the burner unit.
1. Complete section 18.4.
2. Isolate the gas supply at the inlet isolating ‘T’ connector.
3. Support the inlet ‘T’ connector to avoid straining the pipework and disconnect the
appliance from the inlet ‘T’ connector.
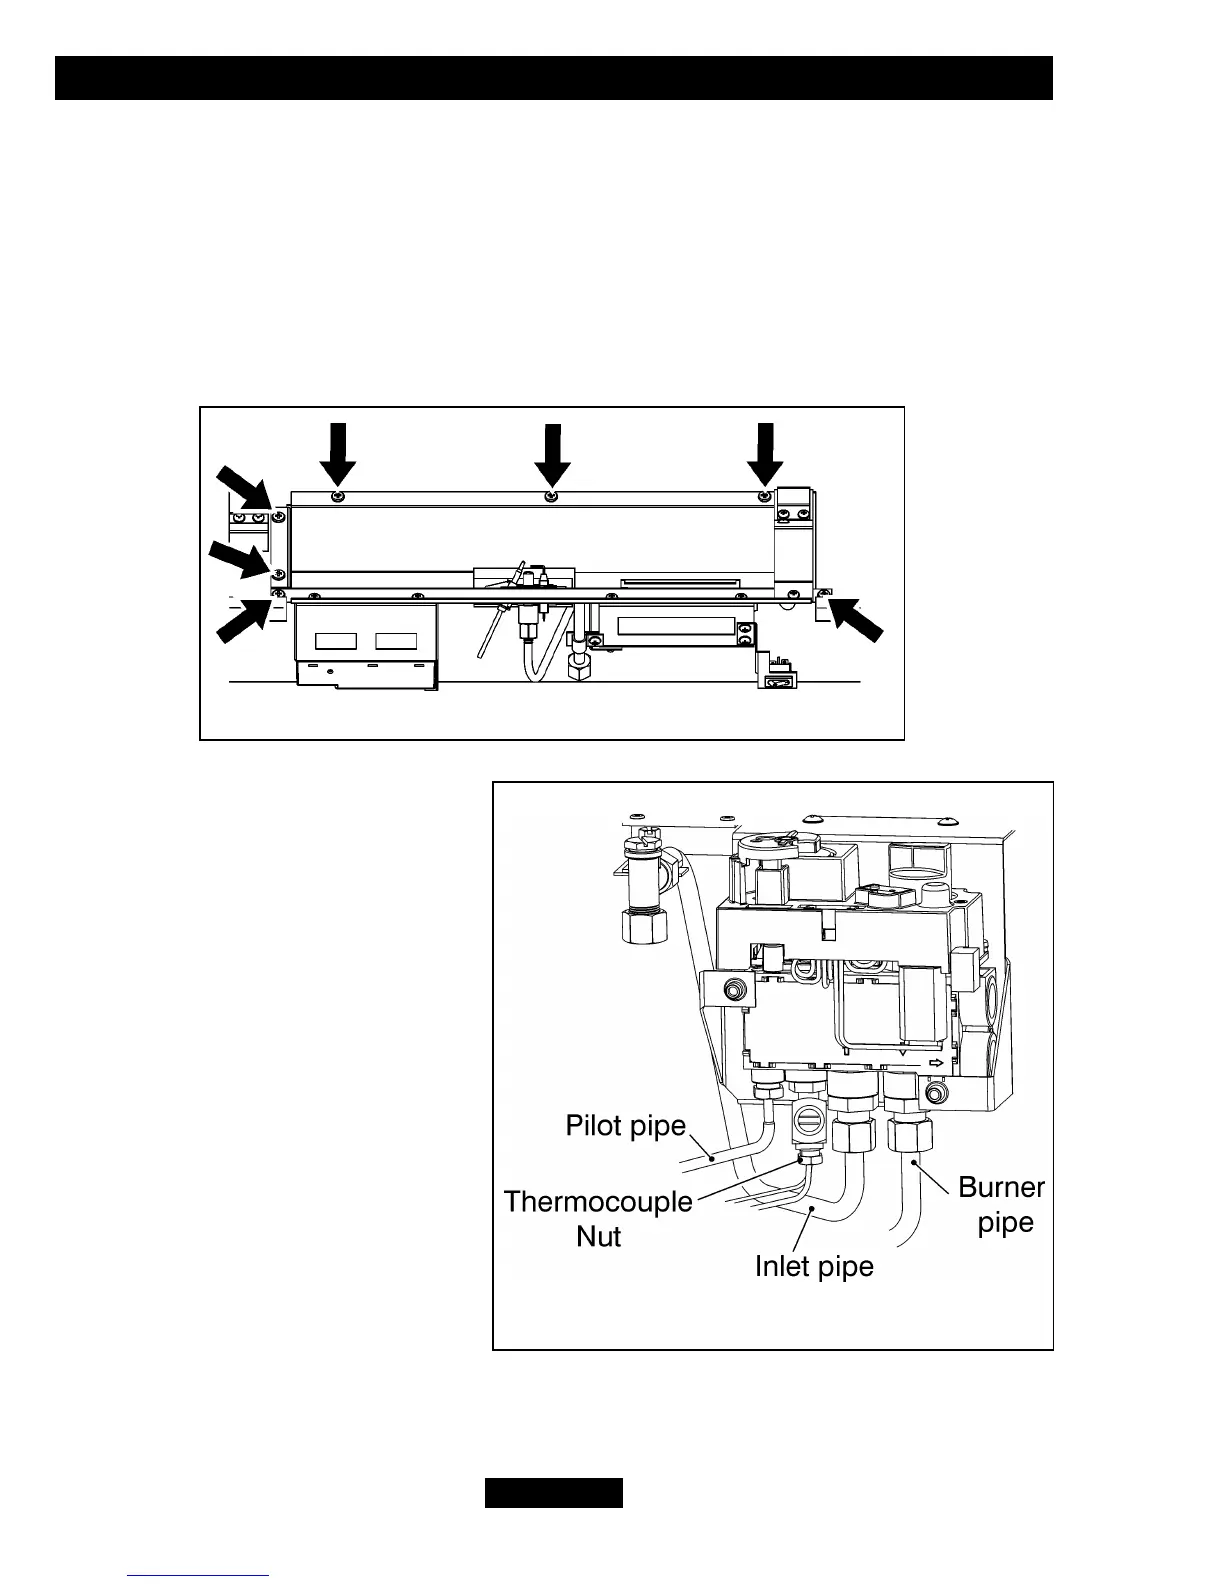
4. Unscrew and remove the seven screws from the top of the burner (See figure 31).
5. Slide the burner unit clear of the support tray.
6. Replace in the reverse order.
18.6 To remove the pilot unit.
1. Remove the burner assembly (See
section 18.5).
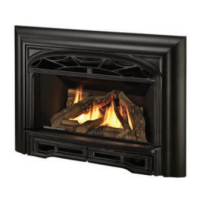
2. Detach the pilot pipe from the pilot
unit.
3. Detach the electrode lead from the
underside of the electrode tab.
4. Detach the thermocouple by
unscrewing the thermocouple nut at
the interrupter block (See figure 31).
5. Remove the two screws from the
pilot bracket (See figure 32).
6. Remove the pilot bracket and pilot
assembly.
7. Remove the two screws securing
the pilot unit to the bracket.
8. Refit in the reverse order.
Note: The pilot unit is an atmosphere sensing device. It must be replaced as a whole
assembly. Its individual components are not separately replaceable.
© GDC Group Ltd. 2013
Page 37
INSTALLER GUIDE
Figure 31. Burner removal
Figure 32. Gas valve (Viewed from underside)