Preparing The TLS-450 Console For Upgrade Installing New TLS-450PLUS Display Door
18
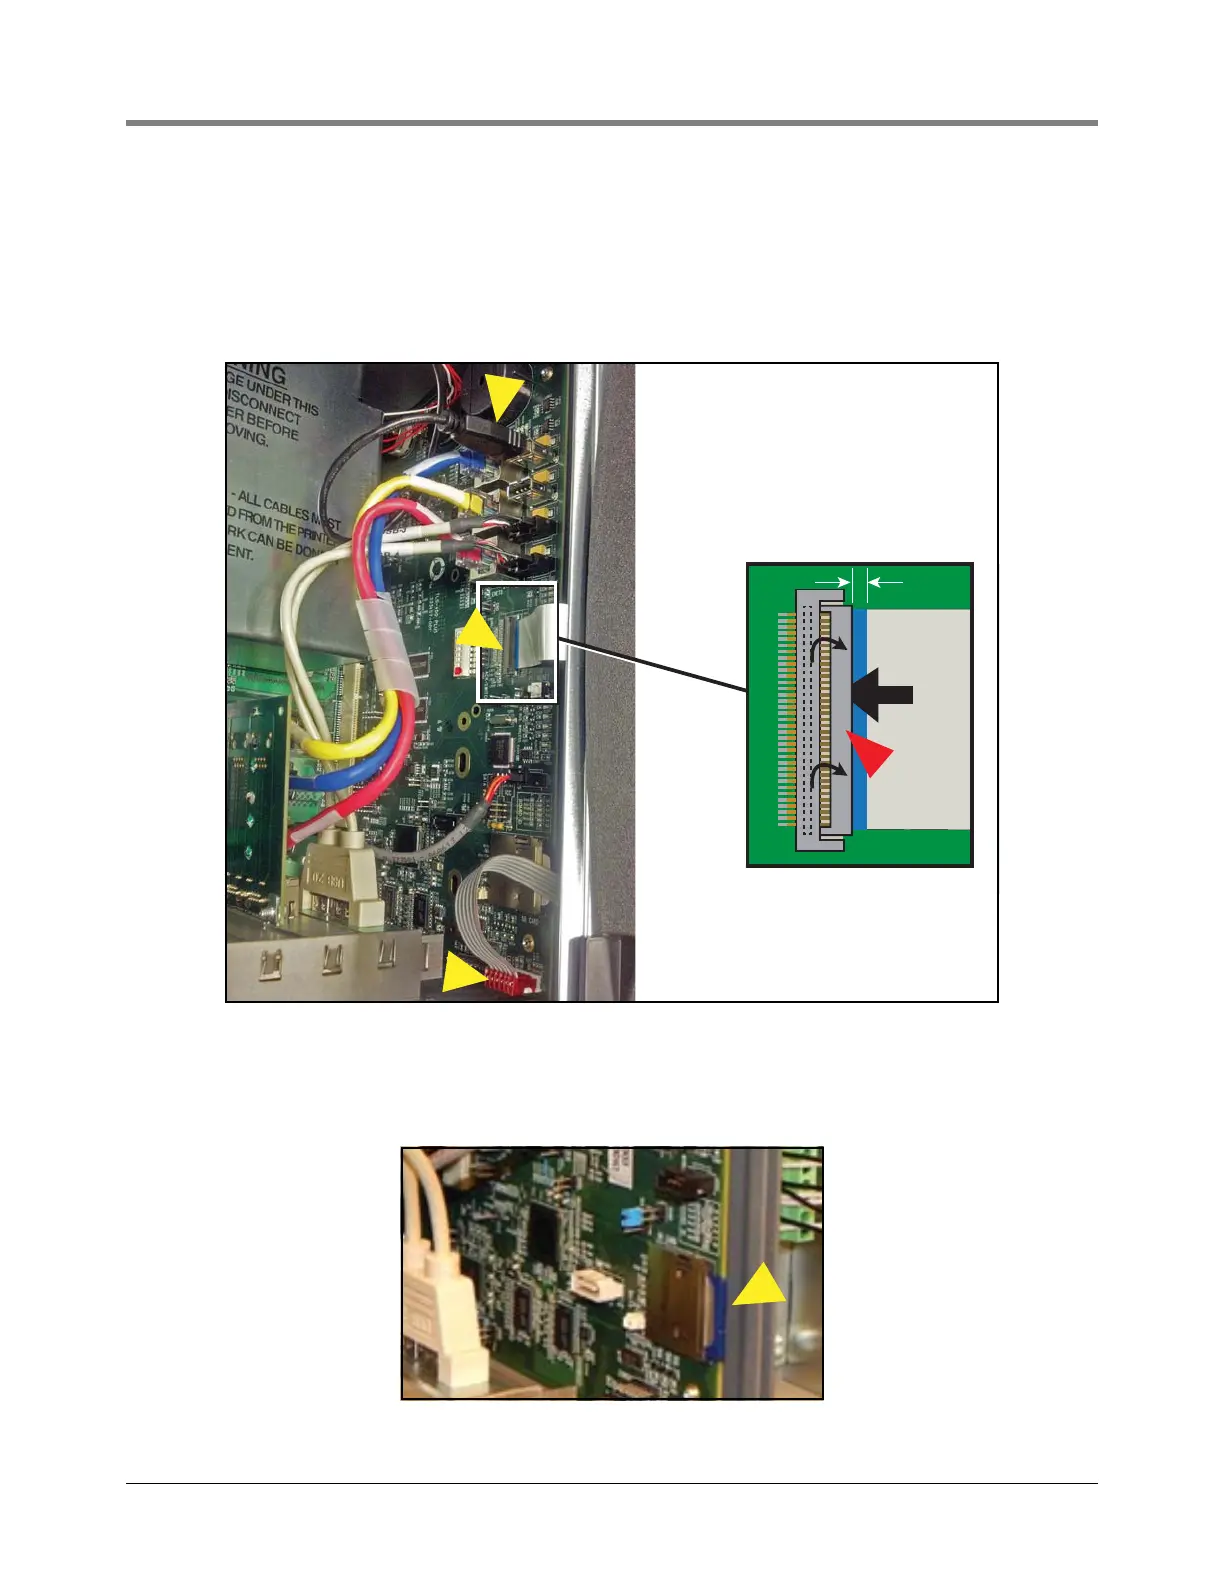
3. Connect the Display door Display Data cable (pointer 1) and the LED Backlight cable (pointer 2) to their CPU
board connectors (see Figure 23). If necessary rotate the Display Data cable’s locking flap (1a in Figure 23) up
from the CPU connector and insert end of the Display Data ribbon cable fully into the connector then push
down on the flap (1a) until it rests against the connector. Verify the Display Data ribbon cable is securely
seated in the connector and that the flap is down against the connector as shown in the enlarged section. If
inserted fully, the blue end of the cable will be no more than 3/16” (4.8mm) out of the connector as shown.
Figure 23. Connect Data Display And LED Backlight Cables To CPU Board
4. Prior to closing the console doors, check the SD card on the CPU board to confirm that the SD card is fully
engaged into it’s slot and is facing the correct direction (see Figure 24).
Figure 24. Locating SD Card On CPU Board