10
6. VELTIUM APP
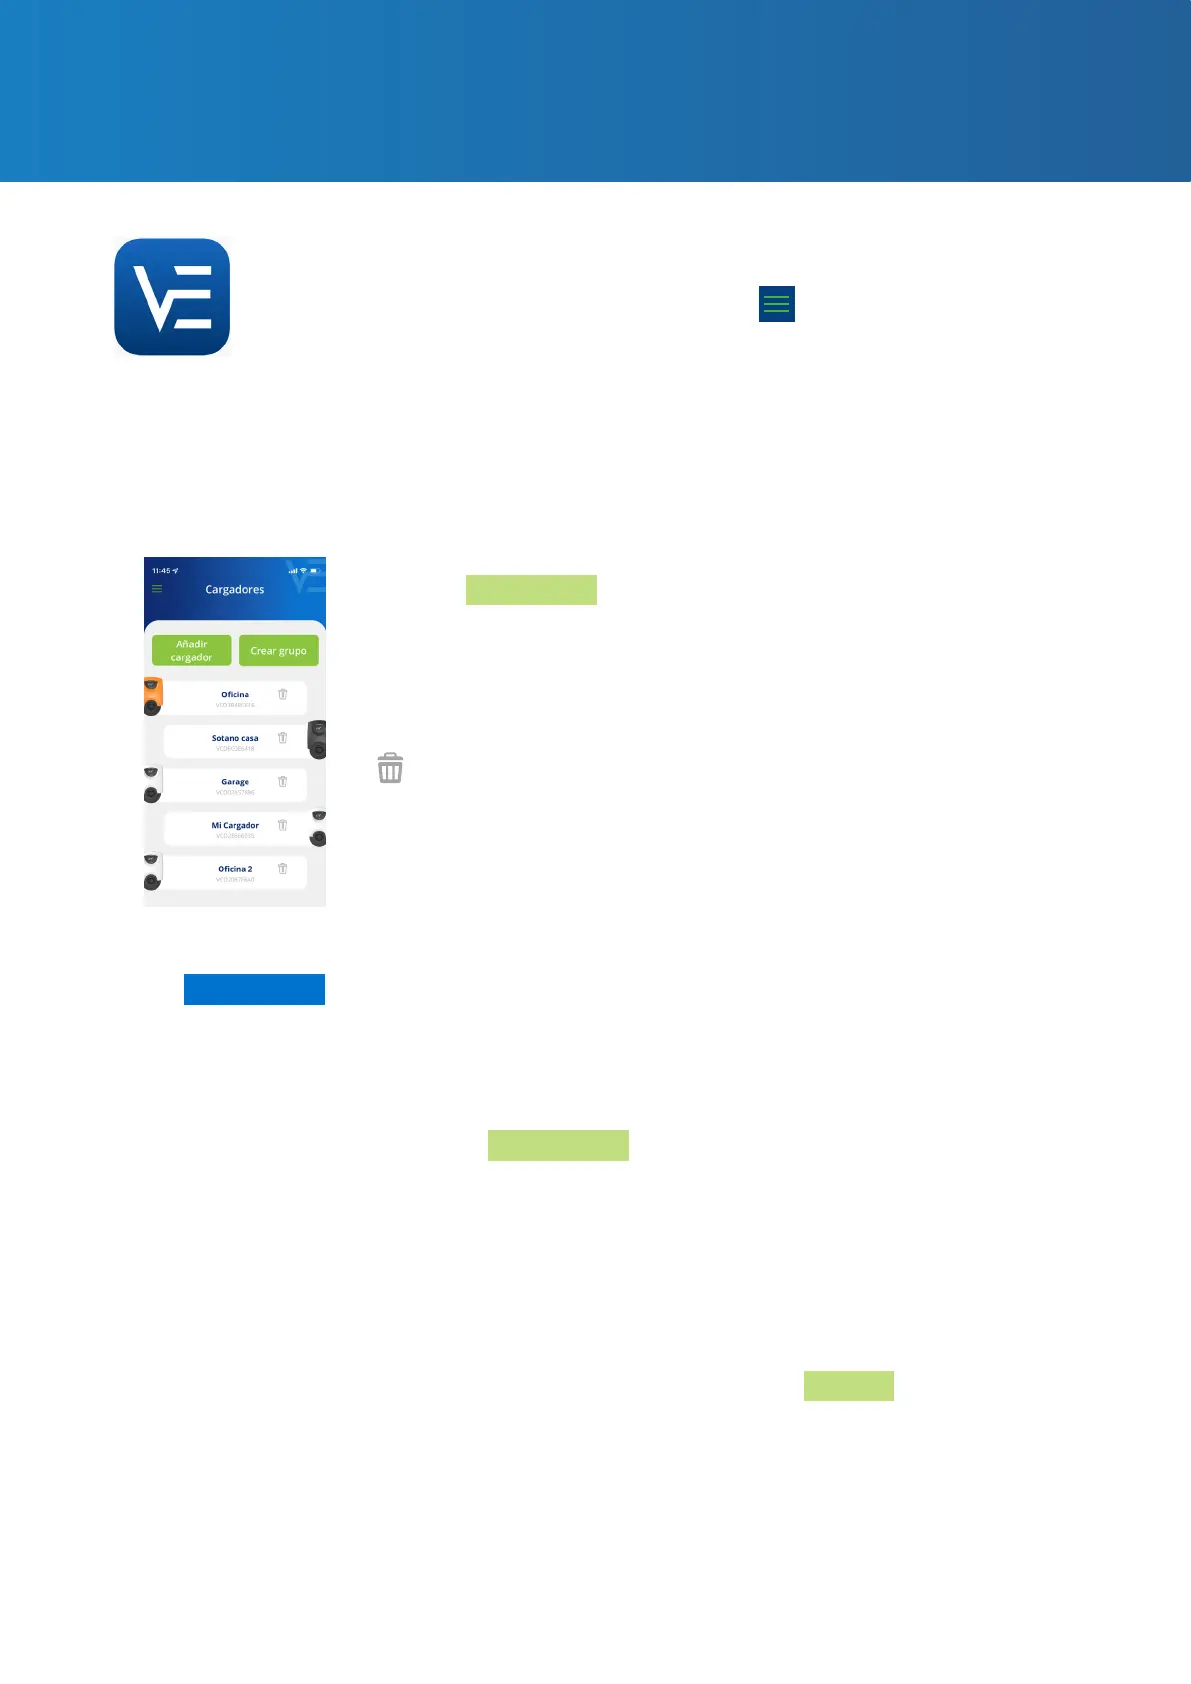
CHARGERS
This area shows the chargers associated to your user account. Each charger will appear on the
list according to the name you have assigned to it along with its serial number and picture. From
here you can:
1. ADD CHARGER
Click the Add charger button and follow the App instructions on
how to associate chargers to your account. Consult the 1. GETTING
STARTED section of this USER GUIDE for instructions on how to
proceed with this operation
2. DELETE CHARGER
You can delete any chargers associated to your account by pressing
.
3. MANAGE CHARGER
By clicking on any charger associated to your account you can
browse the screens that allow you to manage it. Consult the 7.
MANAGING THE CHARGER FROM THE VELTIUM APP section of this
USER GUIDE to see everything you can do with your charger.
4. CREATE GROUP
The rst step is to associate all of the chargers that will belong to
the group to your account. Consult the 1. GETTING STARTED section
of this USER GUIDE for instructions on how to proceed with this
operation.
· Make sure that all chargers are connected by Ethernet cable.
· Press the Create Group button.
· Next, place your mobile phone next to any charger and select the
chargers you want to add to the group.
· Give the group a name, congure the maximum power, the
intensity and, if you have a dynamic power control, select the meter.
· Finally, congure the location of the measuring device and the
contracted power.
· Return to the previous screen and press Conrm.
The VELTIUM App allows you to congure, operate and consult your charger,
thereby enabling the smart management of your electric vehicle charges. The
menu, which you can open by clicking on the icon at the top left of your
screen, will allow you to browse the dierent areas of the application:
Only LITE Uno and
LITE Kubo chargers
*