30
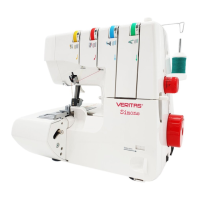
2. STARTING TO SEW
THREADING YOUR MACHINE
Wrong threading may cause skipped stitches,
breaking threads, or other problems.
Try to master the correct threading before moving
on to test sewing.
Threading must be carried out in the sequence of
Lower Looper
-
Upper Looper
-
Needle.
Open the looper cover and the working table.
Raise needle to its highest point by turning hand
wheel towards you, and raise the presser foot.
Before re-threading lower looper, remove thread
from needle eye rst, then re-thread the lower
looper. This will prevent tangling.
NOTE : Thread tension is released when the
presser foot is lifted up.
THREADING LOWER LOOPER
1. Feed the thread through the thread guide as
illustrated.
2. Pull the lower thread through tension slot.
Holding the thread with your left hand, pull
down with right hand rmly.
3. Draw the thread through thread guide as
illustrated.
4. Pass the thread through lower looper eye,
and hook it around part A as indicated by the
arrow. Leave about 10 cm extra thread.
2. COMMENCER A COUDRE
ENFILAGE DE LA MACHINE
Un mauvais enlage causera des points de manque,
des casses de l ou autres problèmes.
Essayer de bien maîtriser l'enlage avant de
poursuivre avec le test de couture.
L'enlage doit être eectué dans l'ordre suivant :
boucleur inférieur-boucleur supérieur-aiguilles.
Ouvrir le capot frontal et la table de travail.
Relever l'aiguille dans sa position la plus haute
en tournant le volant vers soi, et relever le pied
presseur.
Avant de réenler le boucleur inférieur, retirer le l
du chas d'aiguille en premier, puis enler le boucleur
inférieur, ceci évitera la formation de noeuds.
NOTE: La tension des ls est automatiquement
relâchée lorsque le pied presseur est relevé.
ENFILAGE DU BOUCLEUR INFERIEUR
1. Passer le l dans le guide-l comme illustré.
2. Tirer le l vers le bas avec la main droite, la main
gauche le soutenant en avant des tensions et en
le tirant vers le bas avec la main droite.
3. Passer le l dans les guides-l comme illustré.
4. Passer le l dans le chas du boucleur inférieur
après l'avoir passé dans son support, d'avant
vers l'arrière. Laisser 10 cm de l supplémentaire.