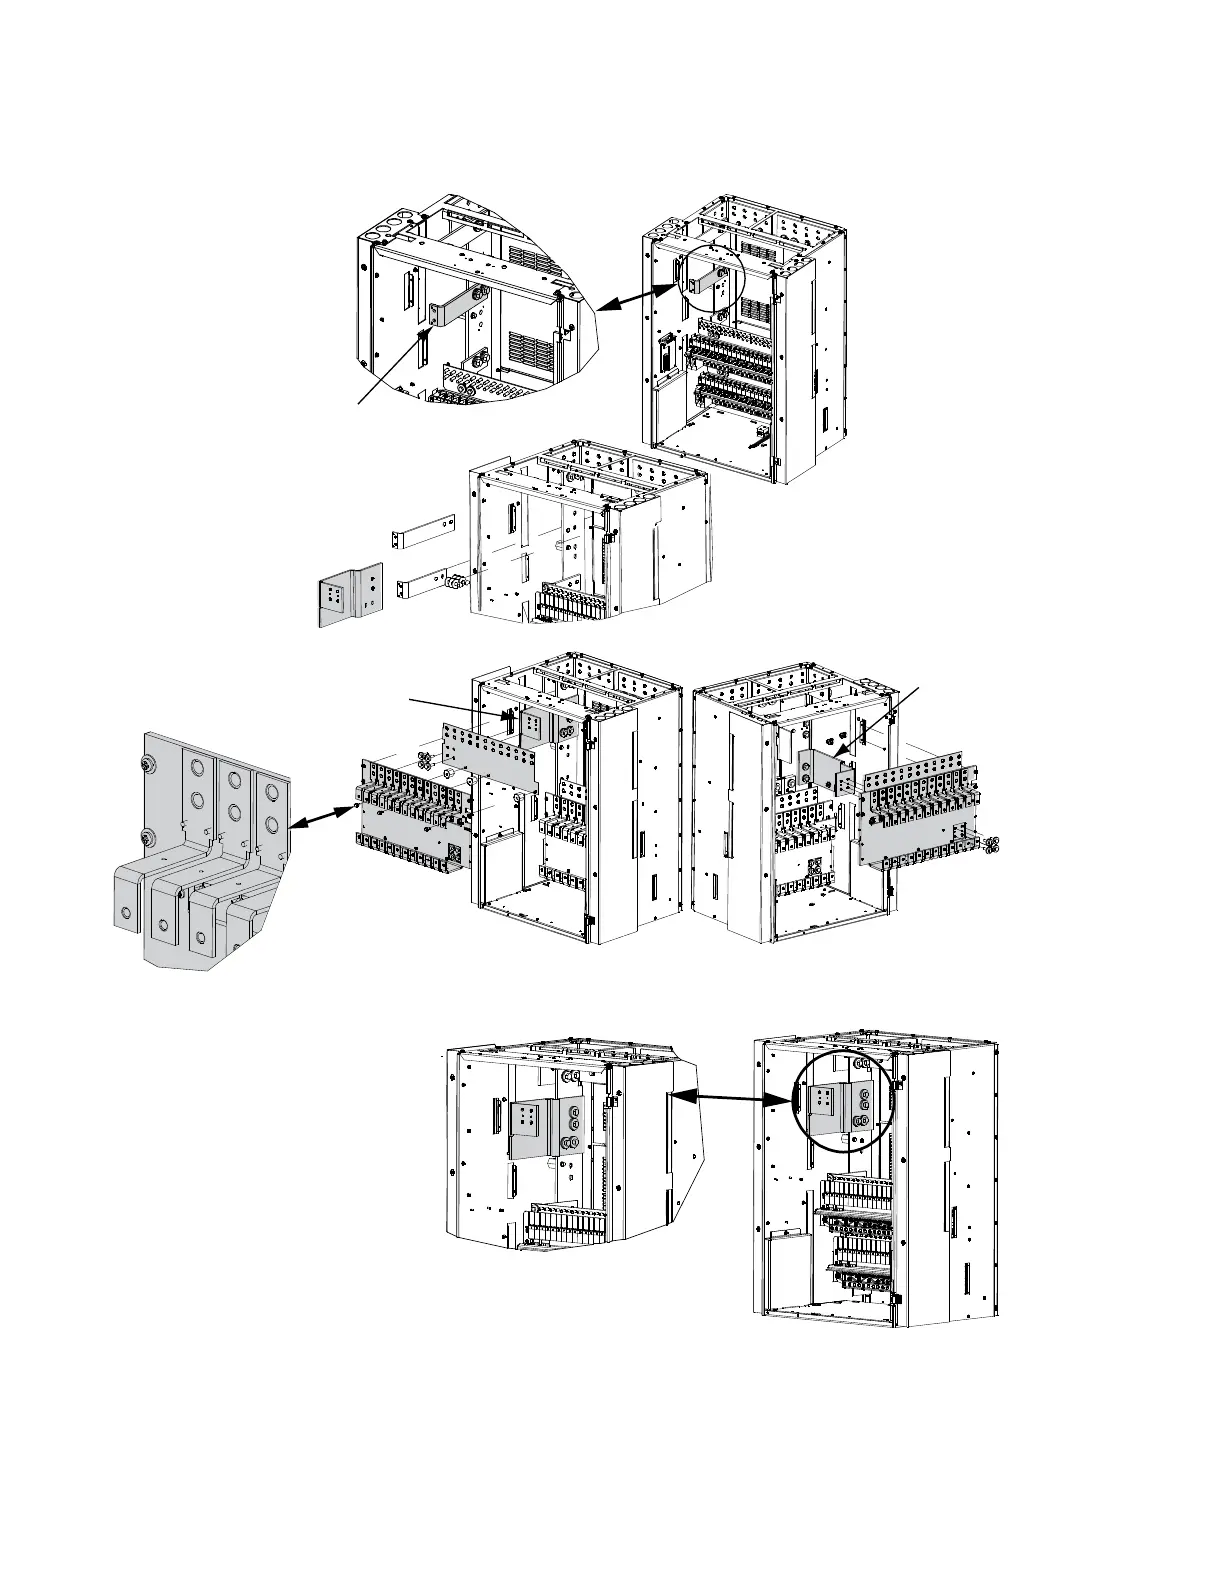
3. New busbar installed view.
/-48V/ jumpers.
Assembly order is:
lug, 1/4” flat washer,
1/4” lock washer, 1/4-20 bolt.
Torque to 84 in-lbs.
/-48V/ jumpers.
Assembly order is:
lug, 1/4” flat washer,
1/4” lock washer, 1/4-20 bolt.
Torque to 84 in-lbs.
New
Busbar
New
Busbar
Apply electrical anti-oxidizing
compound to busbar mating surfaces.
4-row distribution cabinet shown.
1, 2, or 3-row cabinet similar.
1. Remove this busbar.
Existing busbar
New busbar
2. Replace with new busbar.
See SAG582127000 for part
number.
3/8-16 x 1-1/4” Bolt
3/8" Belleville Lock Washer
3/8" Belleville Lock Washer
(concave side of Belleville
Lock Washers face each other)
3/8" Hardened Flat Washer
(2 places)
Torque to 180 in-lbs.

 Loading...


