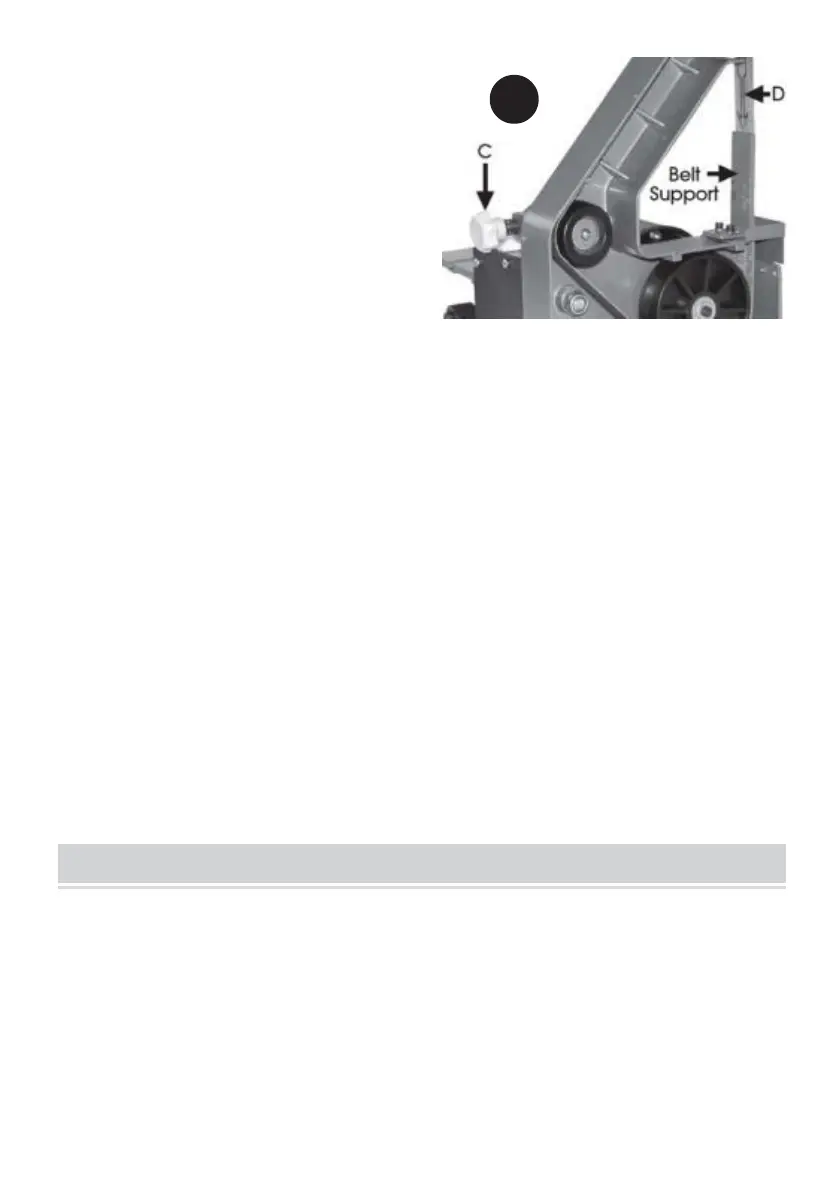
tracking correctly. If it moves sideways,
turn the adjuster - 10C, so that it
stabilises over the middle of the support.
At this point the belt is tracking properly .
The belt is tensisioned automatically and
cannot be adjusted .
NOTE: Turning the adjuster clockwise
will cause the belt to move one
way...turning it anticlockwise and it will have the opposite effect.
2. Changing the Disk
2. 1 Remove the disk table and lower cover/dust extraction port (see fig.5)
2.2 Slacken the two screws securing the upper disk cover and slide it backwards.
2.3 Using a sharp instrument, tease off a portion of the sanding disk, sufficient for
it to be grasped by hand and peeled off.
Remove all residual adhesive, and finally clean the disk with a solvent.
2.4 Peel the backing from the replacement sanding disk and fix to the disk
ensuring it is centralised. Press it firmly to ensure it is secure.
2.5 Replace the table and lower disk cover, and adjust gap between table and
disk, by positioning abd securing the upper disk cover.
WARNING: The use of spare parts, other that those supplied by VEVOR
International or one of its recognised dealers, may be hazardous and could
invalidate the guarantee.