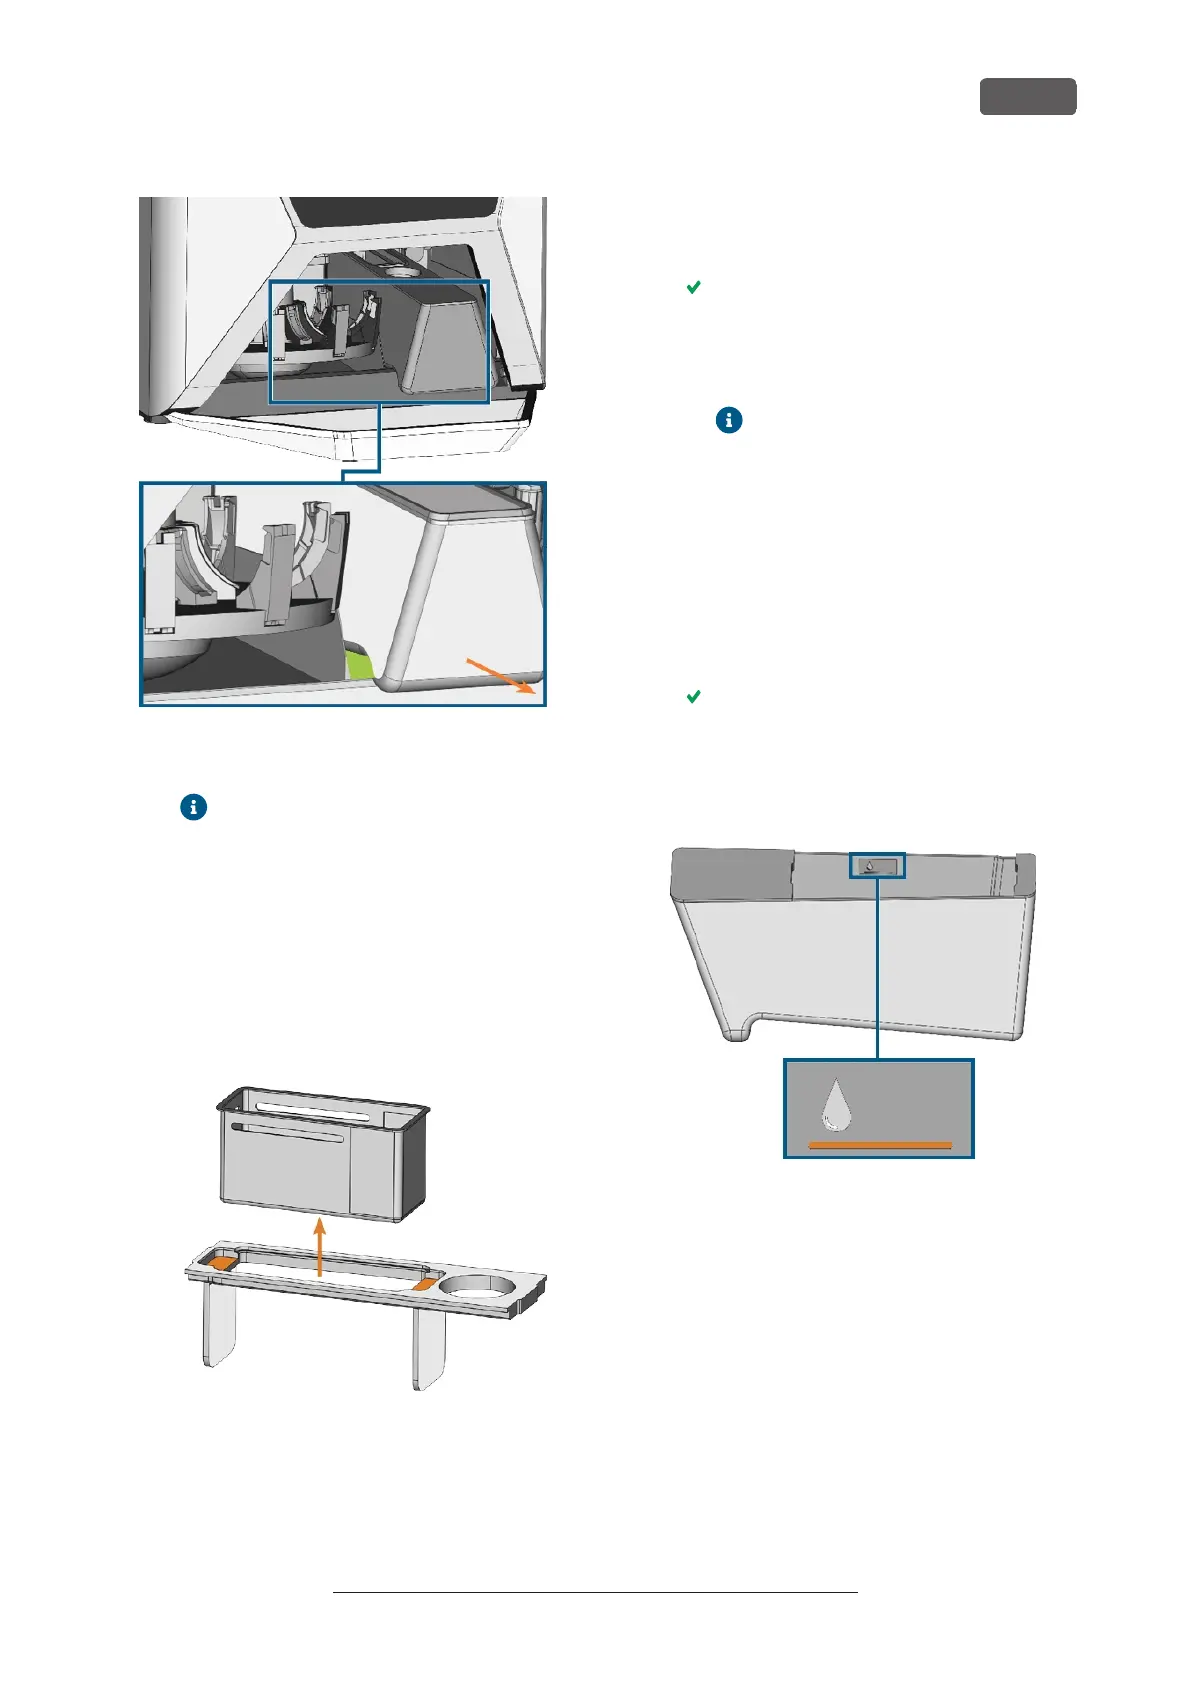
FIG. 37 REMOVING THE COOLING LIQUID TANK FROM THE MULTI-
PURPOSE COMPARTMENT; GRAB TANK AT THE GREEN AREA
Information on the disposal of cooling
liquid and machining residues: Disposal –
on page74
6. Lift the cover off the tank.
7. If there is cooling liquid in the tank:
a. Pour the cooling liquid into the collecting
container.
b. Use the recessed surfaces at the sides of the
strainer basket to pull it upwards.
FIG. 38 REMOVING THE STRAINER BASKET (RECESSED
SURFACES COLORED ORANGE)
c. Tap out the strainer basket into the collecting
container. You can use water or compressed
air to further clean the strainer basket.
The strainer basket is completely void of
machining residues.
d. Rinse the filter in the cooling liquid tank
under running water.
If necessary, you can disassemble the
cooling liquid filter to clean it thor-
oughly. Operation: Preparing jobs –
on page31
e. Thoroughly clean the tank with the cleaning
brush. Pour the cleaning water into the col-
lecting container.
f. If you have used a cleaning agent, ensure that
no residues of it remain in the cooling liquid
tank.
The cooling liquid tank is completely void of
liquid, machining and cleaning agent
residues.
8. Fill the cooling liquid tank with cooling liquid until
it reaches the max mark.
FIG. 39 THE MAX MARK (COLORED ORANGE) ON THE LABEL INSIDE
THE TANK
9. When processing titanium blanks: Add the cooling
lubricant Tec Liquid Pro to the cooling liquid. The
mixing ratio is indicated on the bottle label.
Determine the pH value of the cooling liquid.
Determining the pH value of the cooling liquid with
test strips – on the previous page
10. Insert the strainer basket into the tank cover and
put the cover onto the tank.
11. Remove dirt and foreign bodies from the coupling
of the cooling liquid tank and the counterpart in
the machine.
R5 – Operation: Preparing jobs
EN 35
Original Operating Instructions:R5
Version: 12/16/2021