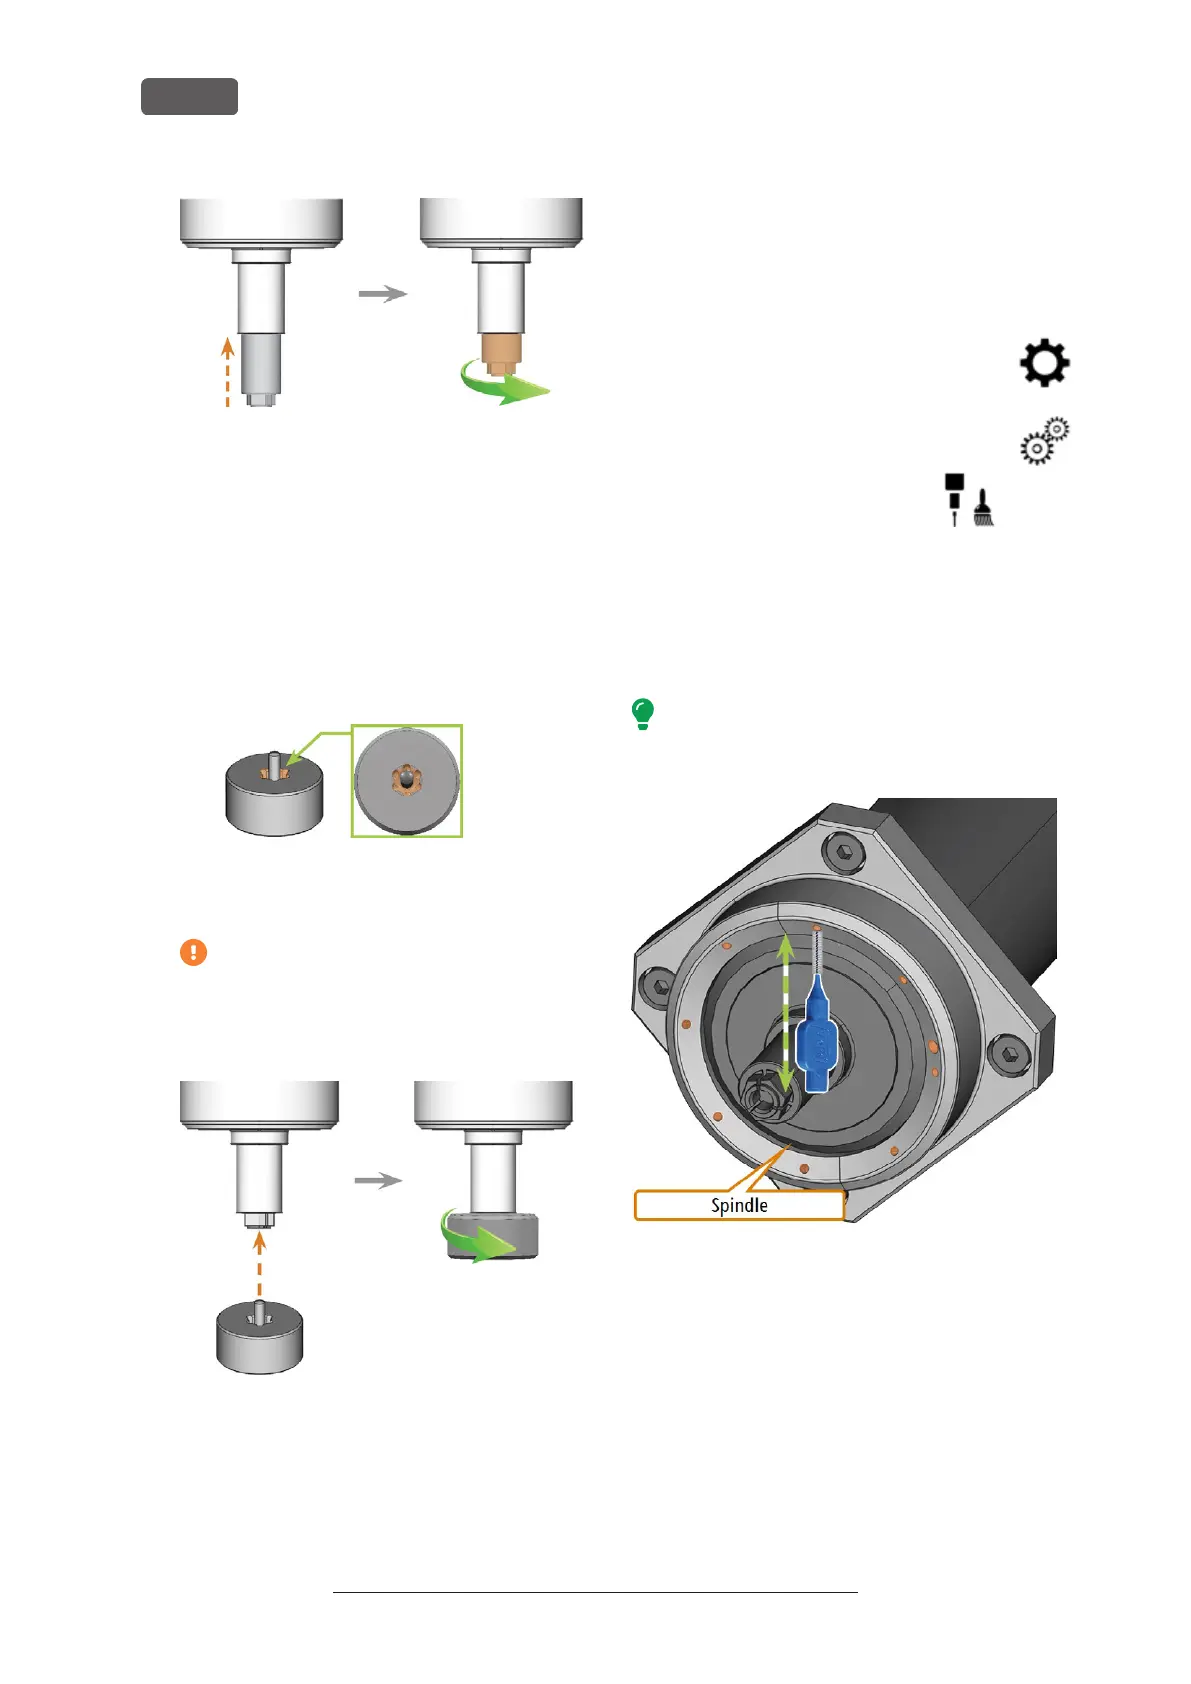
FIG. 88 SCREWING IN THE COLLET CHUCK (MARKED ORANGE IN THE
RIGHT ILLUSTRATION) INTO THE SPINDLE WITH YOUR HAND
16. Insert the pin of the knurled nut into the collet
chuck. Ensure that the collet chuck is properly
seated in the recess of the knurled nut.
17. Tighten the collet chuck with the knurled nut:
a. Insert the pin of the knurled nut into the col-
let chuck.
b. Ensure that the collet chuck fully sits in the
recess of the knurled nut.
FIG. 89 RECESS IN KNURLED NUT (MARKED ORANGE)
c. Twist the knurled nut clockwise.
The collet chuck must be screwed in tightly.
Otherwise rotational imperfections can
occur during operation which will worsen
your processing results
FIG. 90 TIGHTENING THE COLLET CHUCK WITH THE KNURLED NUT;
RECESS IN KNURLED NUT MARKED ORANGE
18. Store the spindle service set in a safe place.
19. Close the working chamber door.
20. Clean the nozzle plate.
8.10 Cleaning the nozzle plate
You should clean the holes in the nozzle plate every
time you clean the collet chuck.
1. Have the interdental brush ready.
2. Open DENTALCNC‘s general application
settings with the depicted icon in the
main icon bar.
3. Open the Machine parameters view with
the depicted icon in the local icon bar.
4. Move the axes into the tool
change position by selecting
the depicted icon in the Machin-
ing view in DENTALCNC.
5. Open the working chamber door.
6. Clean the ring of 9 holes in the inner area of the
nozzle plate. For this, move the interdental brush
up and down.
If necessary, apply some water with a cleaning
agent and let it sit for some minutes.
FIG. 91 CLEANING THE NOZZLE PLATE; NOZZLES MARKED ORANGE
Original Operating Instructions:R5
Version: 12/16/2021
R5 – Maintenance and do-it-yourself
EN 60