7
4. OPERATION lNSTRUCTIONS
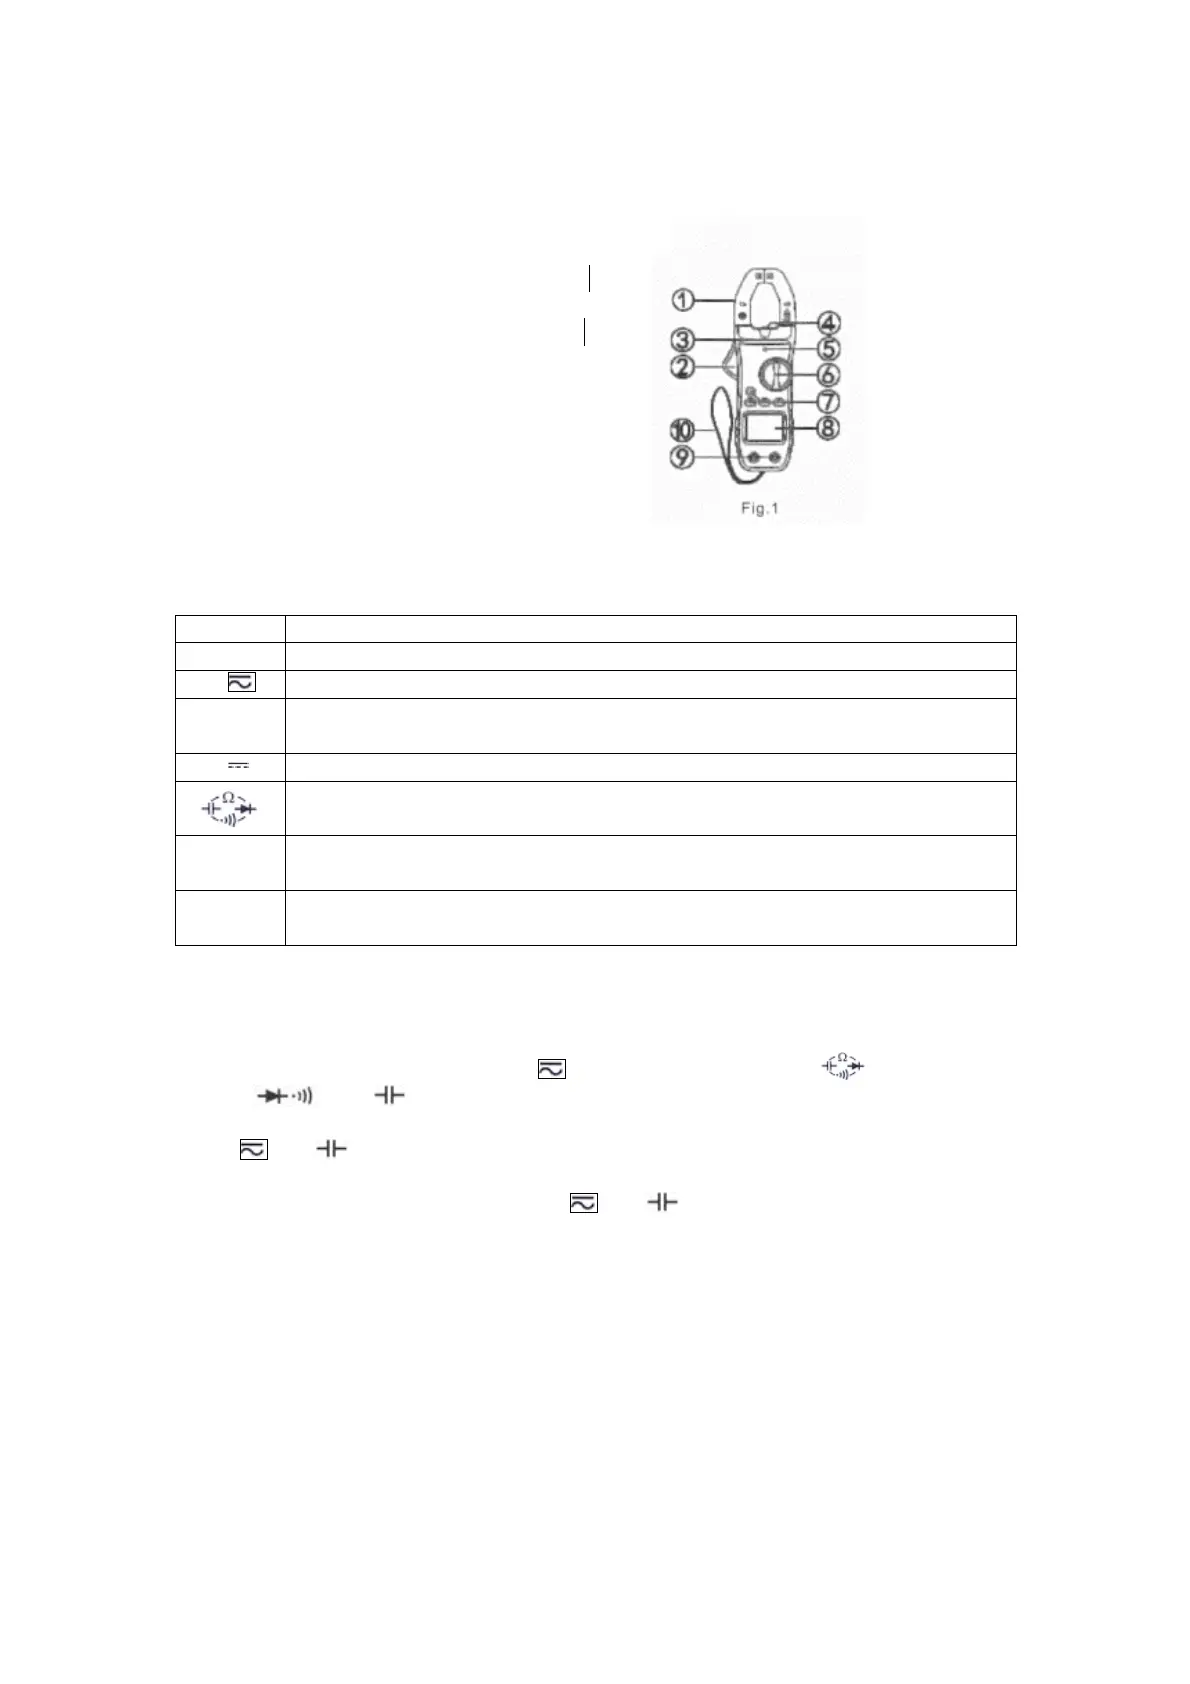
4.1. PANEL lLLUSTRATON (Fig.l)
1)Clamp jaw:0-600A DCcurrent, ACcurrent
and NCVdetecting device.
2)Clamp gunlock:Press the gunlock to open
clamp jaw.
3)Hand protection: A safe design to protect
users from touching the dangerous area.
4)Clamp light:Turn on the clamp light to light
up the tested area in the dark to prevent danger.
5)NCV indicator: Detect the existence of high
voltage nearby to prevent electric shock.
6)Function rotary switch: Select functions and ranges;
Turn on or turn off the clamp meter.
Function
Description
NCV Non Contact Voltage detection.
A DC A and AC A measurement. Press SELECT key to switch measurements
V~
AC Vmeasurement.Press Hz/DUTY key to switcb measurement between
frequency and duty ratioin high voltage amplitude
V DC Vmeasurement.
Press SELECT key to switch measurement between resistance, diode,
continuity and capacitance.
Hz
Frequency measurement. Press Hz/DUTY key to switch measurement
between frequency and duty ratio in low voltage amplitude
°C/°F Temperature measurement. Press SELECT key to switch between °C and
°F
7) FUNCTlON KEYS
SELECT key: This is a key to select functions, working in response to trigger. Switch
between AC or DC measurement in A Or select Ω function from . Or switch
between , and measurements. Or switch between·°C/°F measurements.
REL/RANGE key:
1.ln A and measurements, it is REL function. Press this key to clear "of reading"
and enter relative value measurement. REL symbol will appear on the LCD. Press this
key again to exit REL measurement. In A and measurements, if the display dose
not return to zero before measurement, press this key to return to zero before
measurement.
2.In voltage and resistance measurements, it is RANGE function, to choose from auto
range or manual range. The meter is default in auto range. Tbe symbol "AUTO" appears
on LCD. Press this key for one time to switch to manuaI range. Press it again for one time
to increase on step from low to high. Press it for more than two seconds to return to
AUTO range.