6
Initial Setup
M6-LHS Software Installation
InserttheM6-LHSsoftwareCDintothePC.Iftheinstallationdoesn’tbegin
automatically,browsetheCDanddoubleclickonthelecalledsetup.exe.
The installer will place an icon for M6-LHS on the Windows desktop.
COM Port Assignment
1. DoubleclicktheicononthedesktoptostarttheM6-LHSsoftware.
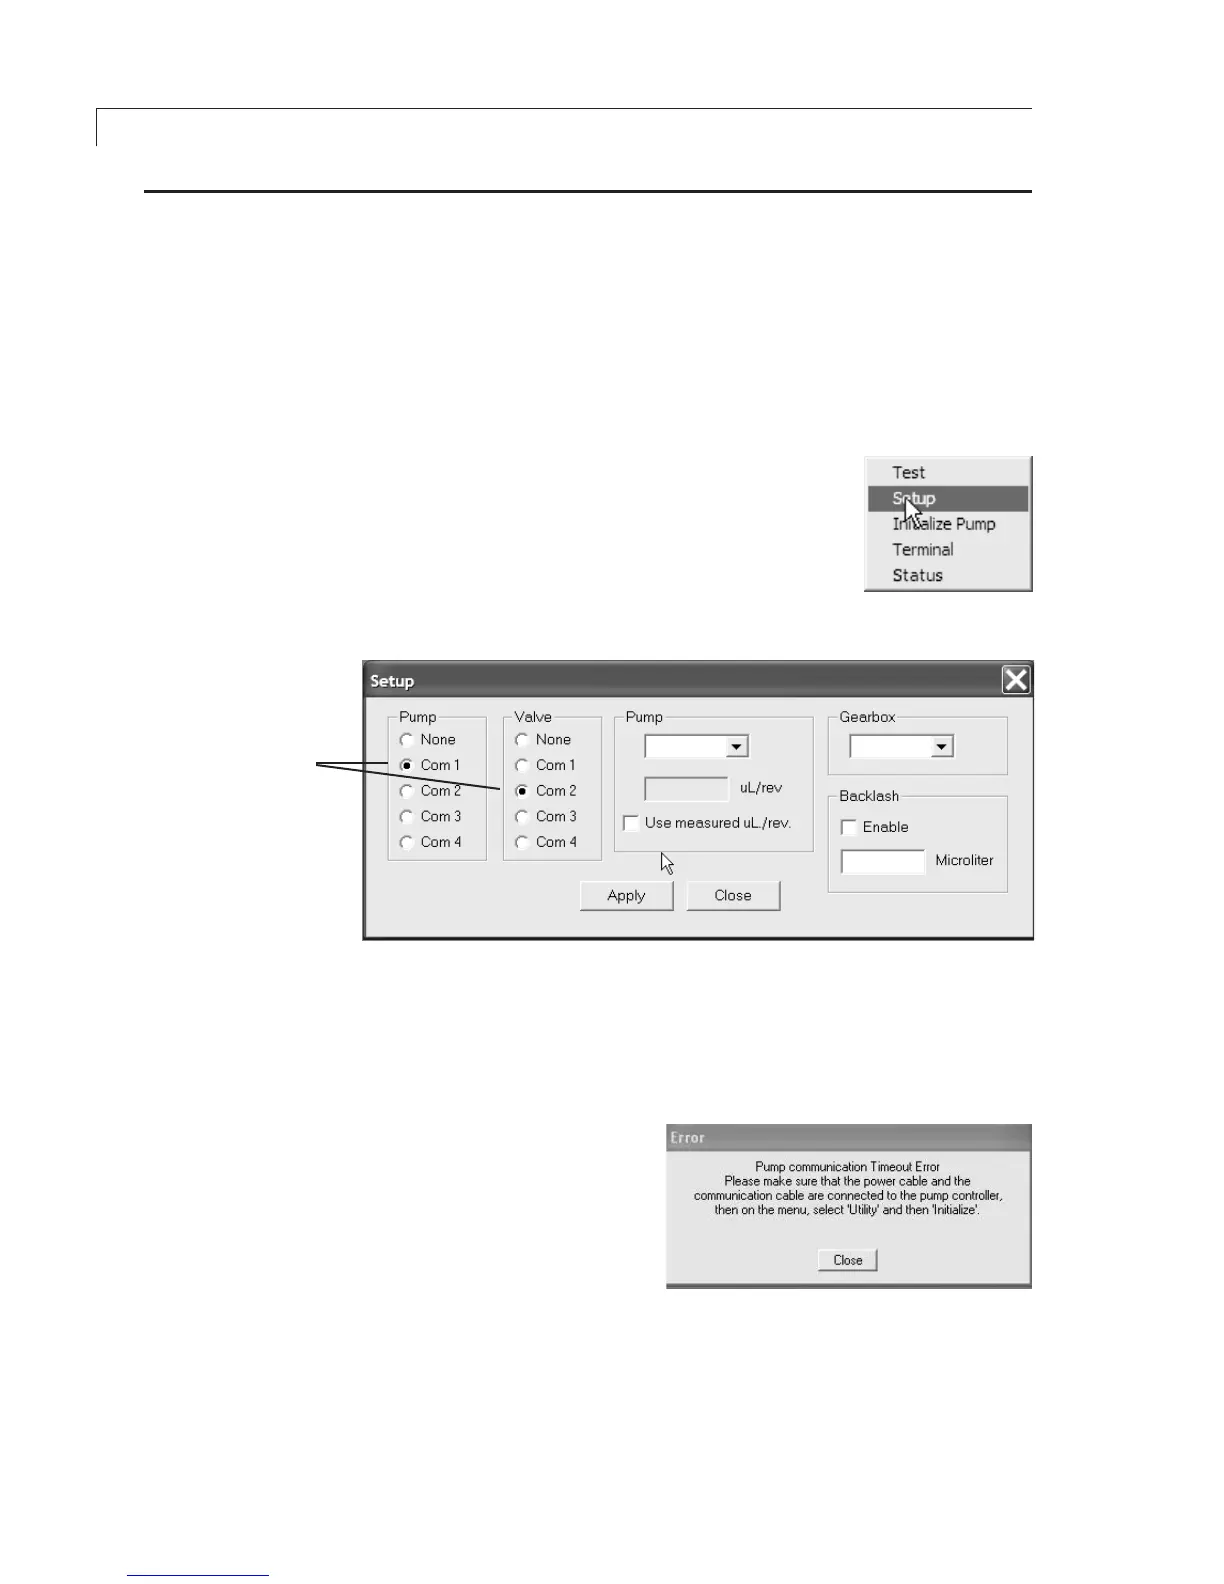
2. On main menu, choose Utility > Setup, as in
Figure 4.
3. Select the correct COM port for the pump and
valve. If no valve is being used, select None.
(Figure 5)
4. Click Apply, then Close.
Figure 4: Select “Setup”
Initialization
1. Onthemainmenu,chooseUtility>InitializePump.Ifinitializationis
successful, proceed to the next section, “Setting the Backlash and
Volume/RevolutionValues”.
2. If the error message in
Figure 6 appears, close the
window, then check that all
the connectors are com-
pletely plugged in and make
sure all the dip switches on
the controller are in the “up”,
or OFF position. Repeat
Step1.
3. Ifinitializationissuccessful,proceedtothenextsection,“Settingthe
BacklashandVolume/RevolutionValues”.
4. If the error message persists, make sure that the COM port assignments
correspond to the ports to which the cables are physically connected.
RepeatStep1.
Figure 5: Select COM ports for pump and valve
ASSIGNCOMPORT
VALUESFORPUMP
ANDVALVE
Figure 6:Initializationerrormessage