INITIAL SYSTEM SETUP
NOTICE
Before proceeding with initial system setup, verify that the following steps have been completed:
• Verify that the system air feed piping is connected to the location indicated on the trim drawing.
• Verify that an approved control panel is installed for proper system operation.
THE FOLLOWING INSTRUCTIONS APPLY TO SOLENOIDS THAT ARE CLOSED (DE-ENERGIZED). IF THE SOLENOIDS ARE OPEN (ENERGIZED),
RESET THE CONTROL PANEL BEFORE ATTEMPTING TO PLACE THE SYSTEM IN SERVICE.
Step 1:
Confirm that all system drains are shut and that the system is free of leaks.
Step 2:
Confirm that the system has been depressurized. The gauges should indicate zero pressure.
Step 2a: If a Series 746-LPA Dry Accelerator is installed, confirm that the isolation ball valve is closed.
Step 2b: If a Series 746-LPA Dry Accelerator is installed, open the ¼-turn vent ball valve.
Step 3:
Confirm that the alarm test ball valve is closed.
Step 4:
Charge the system with air by turning on the compressor or by opening the fast-fill ball valve on the air maintenance trim assembly (AMTA).
Charge the system to 13 psi/90 kPa/0.9 Bar minimum.
Step 5:
When the system reaches approximately 10 psi/69 kPa/0.7 Bar, and no additional moisture is being released from the Auto Vent, pull up on the Auto
Vent Sleeve of the Series 776 Low-Pressure Actuator. NOTE: The Auto Vent Screw should seal and remain in the set (“UP”) position.
Step 6:
When system air pressure is established, close the fast-fill ball valve on the AMTA.
Step 7:
Open the slow-fill ball valve on the AMTA. NOTE: Failure to leave the slow-fill ball valve open may allow system pressure to drop, resulting in valve
operation in the event of a system leak.
Step 8:
Open the charge line ball valve. Allow water to flow through the auto drain tube.
Step 9:
Open the manual pull station valve to bleed off any air that is present, then close the manual pull station valve. Verify that the charge line pressure is
equal to the supply pressure and that the auto drain is set by pulling up on the auto drain sleeve. Verify that no water is draining from the Series 776
Low-Pressure Actuator or any solenoid actuators.
Step 9a: If a Series 746-LPA Dry Accelerator is installed, close the ¼-turn vent ball valve.
Step 9b: If a Series 746-LPA Dry Accelerator is installed, open the isolation ball valve. This will set the accelerator.
Step 10:
Open the water supply main drain valve.
Step 11:
Open the water supply main control valve slowly until water flows steadily from the open water supply main drain valve.
Step 12:
Close the water supply main drain valve when a steady flow of water occurs.
Step 13:
Open the water supply main control valve fully.
Step 14:
Confirm that all valves are in their normal operating positions (refer to the table below).
NORMAL OPERATING POSITIONS FOR VALVES
Valve Normal Operating Position Valve Normal Operating Position
Water Supply Main Control Valve Open Slow-Fill Ball Valve of the Victaulic AMTA (if applicable) Open
Water Supply Main Drain Valve Closed Fast-Fill Ball Valve of the Victaulic AMTA (if applicable) Closed
System Main Drain Valve Closed
Isolation Ball Valve for Series 746-LPA Dry Accelerator
(if applicable)
Open
Charge Line Ball Valve of the Priming Manifold
Assembly
Open
¼-Turn Vent Ball Valve for Series 746-LPA Dry
Accelerator (if applicable)
Closed
Alarm Test Ball Valve of the Priming Manifold
Assembly
Closed
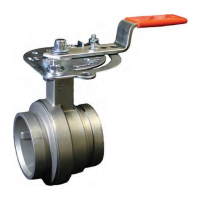
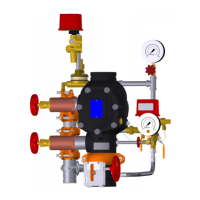
SERIES 769N FIRELOCK
NXT
™
ACTUATED VALVE
WITH ELECTRIC AUTOCONVERT DRY RELEASE
PREACTION TRIM
THIS QUICK REFERENCE SECTION IS FOR PLACING THE SYSTEM IN SERVICE AND FOR PERFORMING WATER FLOW ALARM TESTS.
AN EXPERIENCED, TRAINED INSTALLER MUST READ AND UNDERSTAND THE FULL CONTENTS OF THIS MANUAL AND ALL WARNING
MESSAGES BEFORE ATTEMPTING TO PLACE THE SYSTEM INTO SERVICE.
 Loading...