CYLINDER & PISTON
8.10
© Copyright 2012 Polaris Sales Inc.
9924047 - 2012-2013
VICTORY Cross Roads / Cross Country Service Manual
Cylinder Installation
NOTE: Be sure all top end parts are ready for assembly.
Sealant on crankcase parting line must not be allowed to
dry before top end is assembled and torqued.
1. First wash cylinders with clean solvent, then with hot
soapy water.
2. Rinse the cylinders with clear water and immediately
dry with compressed air. Cylinder bore should be
wiped with a clean white shop towel and engine oil.
3. Apply a light coat of engine oil to piston and rings.
4. Ensure cylinder alignment dowel pins are in place and
gasket surfaces are clean and oil-free.
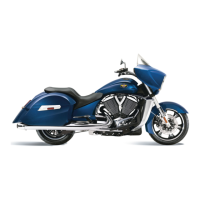
5. Apply a small amount of crankcase sealant to the
crankcase parting lines on base gasket surface (A).
6. Install new cylinder base gaskets onto crankcase.
NOTE: Inspect all sealing surfaces carefully for
scratches or imperfections. DO NOT allow oil or grease
to contact gaskets or sealing surfaces during the
assembly process.
7. Apply a small amount of engine oil to inside surfaces
of a piston ring compressor band.
Piston Ring Compressor Band:PV-43570-2
Piston Ring Compressor Pliers PV-43570-1
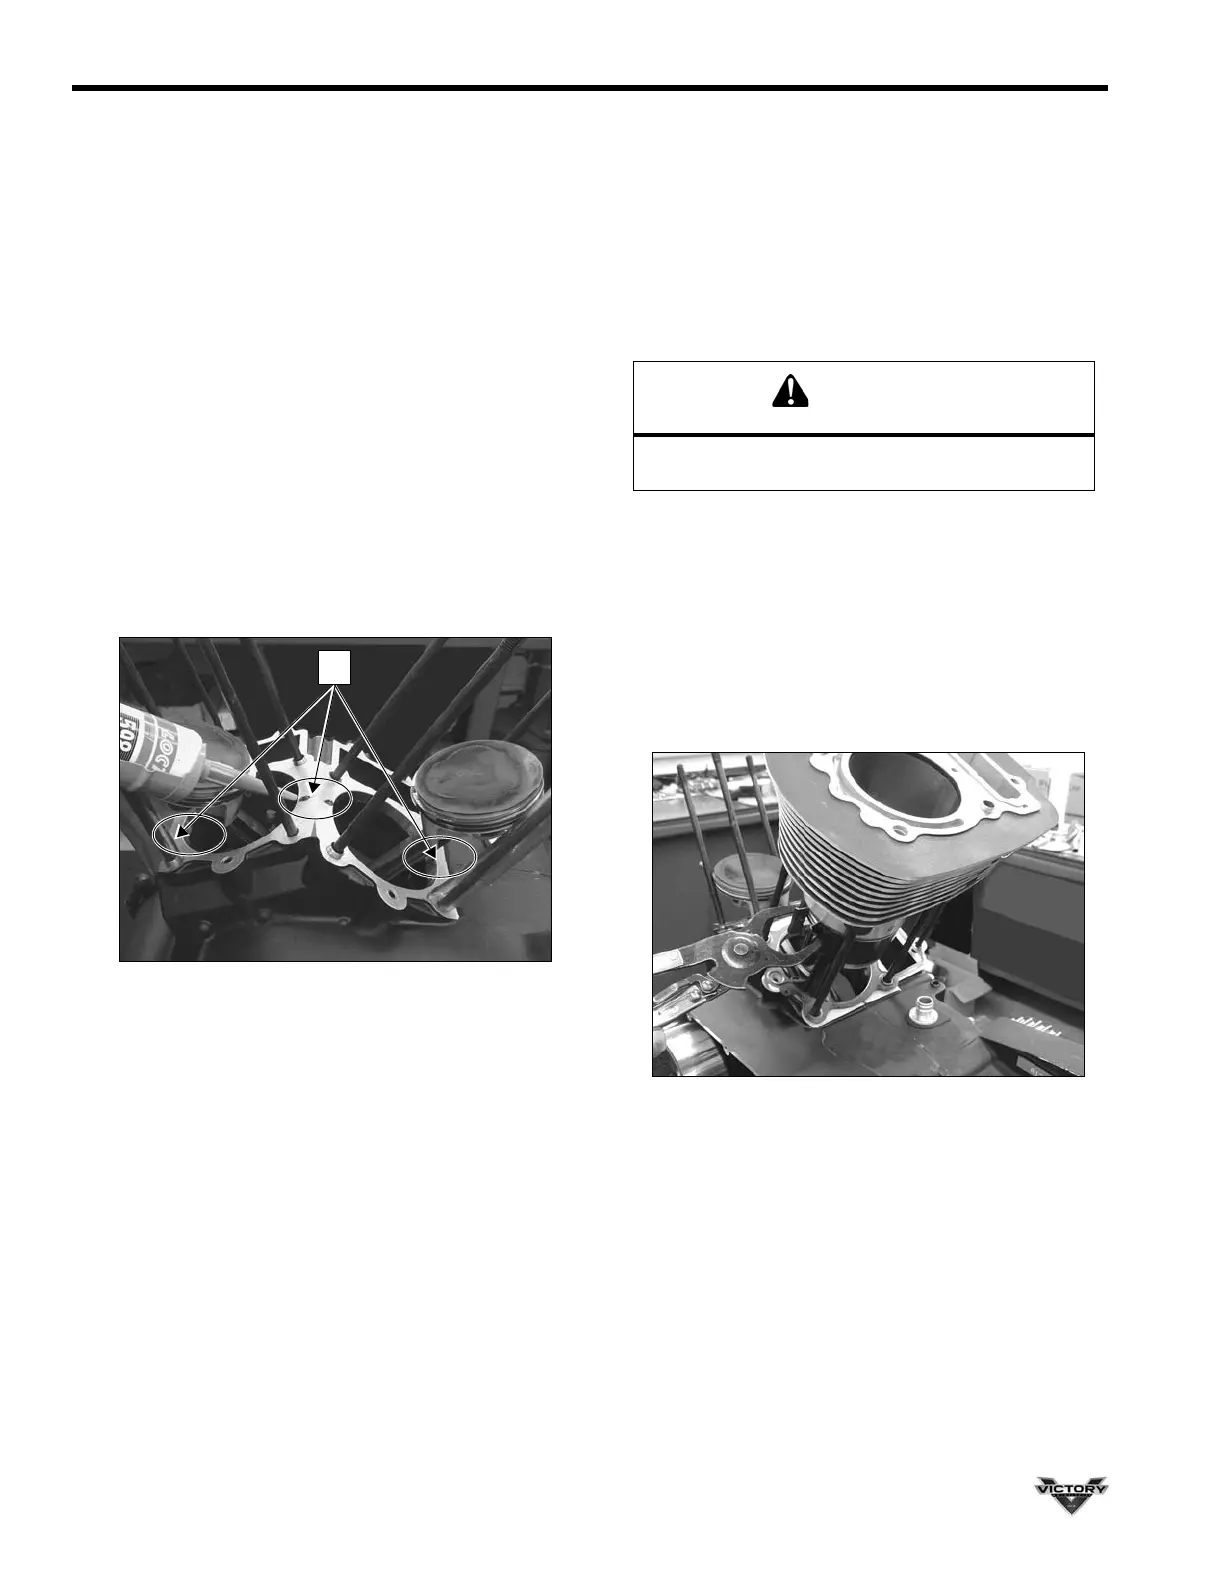
8. Install piston ring compressor over rings and compress
rings into ring grooves.
NOTE: Install cylinders in their original locations.
9. Remove protective covering from crankcase.
10. Carefully install cylinder(s) over piston/ring assembly.
Do not force cylinder over piston. Monitor rings
carefully. If a piston ring becomes dislodged from the
ring compressor; remove cylinder, inspect ring
carefully for damage.
11. Remove piston ring compressor when rings are fully
captive in cylinder.
12. Slide cylinder down over piston until seated to base
gasket and crankcase surface.
13. Repeat for other cylinder.
14. Install cylinder head(s). (Chapter 7).
Be sure compressor band end gap does not align
with any ring end gap when compressing the rings.