28
DIP switches ds2 and ds1 are reserved for the selection of stand-alone, parallel
or
3-phase operation
Stand-alone operation
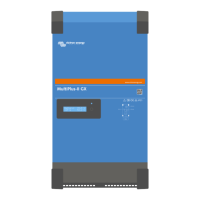
Step 1: Setting ds2 and ds1 for stand-alone operation
DS-8 AC input Set as desired
DS-7 AC input Set as desired
DS-6 AC input Set as desired
DS-5 AES Set as desired
DS-4 Charging current Set as desired
DS-3 Charging current Set as desired
DS-2 Stand-alone operation off
DS-1 Stand-alone operation off
Examples of the other DIP switch settings for stand-alone mode are given below.
Example 1 shows the factory setting
Note: since factory settings are entered by computer, all DIP switches of a new product are set to
‘off’ and do not reflect the actual settings in the microprocessor.
Four examples of stand-alone settings:
DS-8 AC input on
DS-7 AC input on
DS-6 AC input off
DS-5 AES off
DS-4 Ch. current on
DS-3 Ch. current off
DS-2 St.-alone mode
off
DS-1 St.-alone mode
off
DS-8 on
DS-7 on
DS-6 off
DS-5 off
DS-4 on
DS-3 on
DS-2 off
DS-1 off
DS-8 off
DS-7 on
DS-6 on
DS-5 off
DS-4 on
DS-3 on
DS-2 off
DS-1 off
DS-8 on
DS-7 off
DS-6 on
DS-5 on
DS-4 off
DS-3 on
DS-2 off
DS-1 off
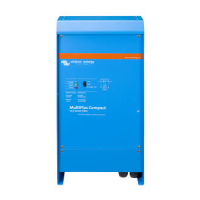
Step1, stand-alone
Example 1 (factory setting):
8, 7, 6 AC-in: 50A
5 AES: off
4, 3 Charging current: 75%
2, 1 Stand-alone mode
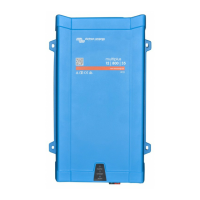
Step1, stand-alone
Example 2:
8, 7, 6 AC-in: 50A
5 AES: off
4, 3 Charge: 100%
2, 1 Stand-alone
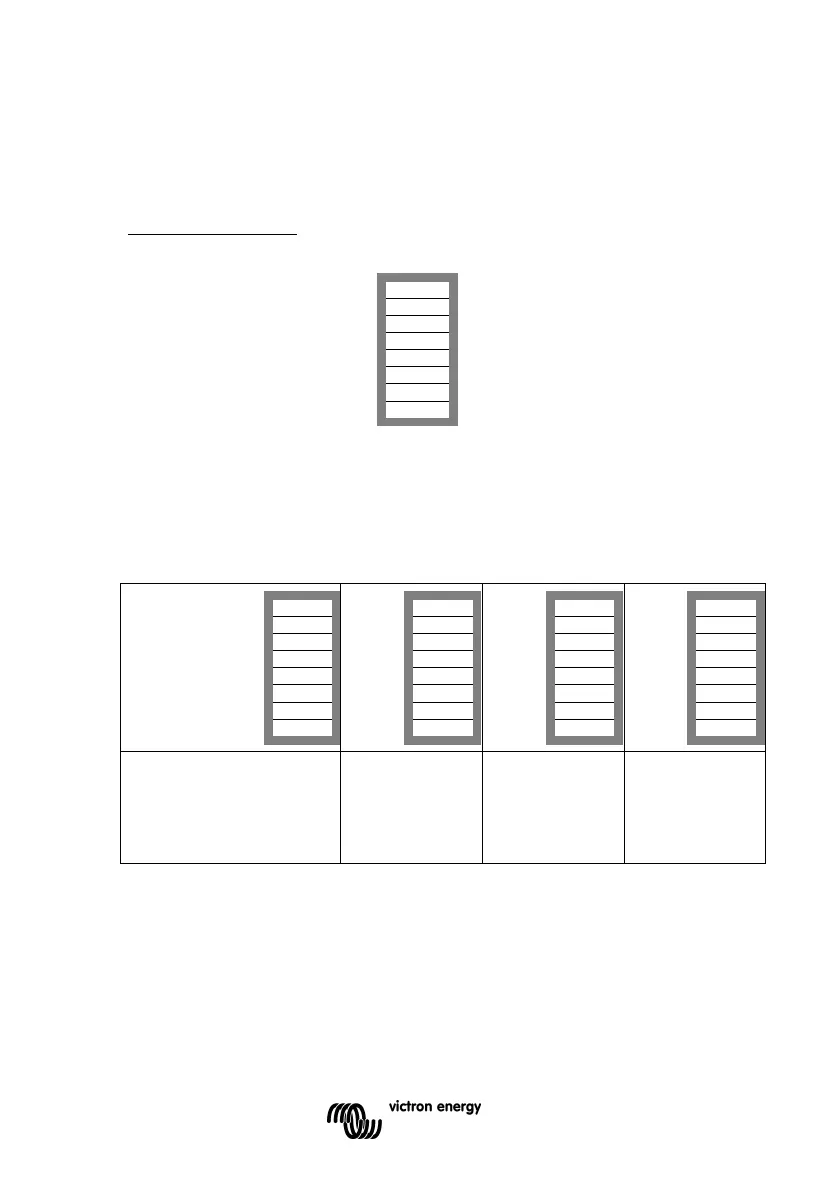
Step1, stand-alone
Example 3:
8, 7, 6 AC-in: 30A
5 AES: off
4, 3 Charge: 100%
2, 1 Stand-alone
Step1, stand-alone
Example 4:
8, 7, 6 AC-in: 40A
5 AES: on
4, 3 Charge: 50%
2, 1 Stand-alone
To store the settings after the required values have been set: press the 'Up' button for 2 seconds
(upper button to the right of the DIP switches, see appendix A, position J). The overload and low-
battery LED’s will flash to indicate acceptance of the settings.
We recommend making a note of the settings, and filing this information in a safe place.
You can now re-use the DIP switches to apply the remaining settings (step 2).

 Loading...