PAGE 4 VIDEONICS TITLEMAKER 2000
Chapter 2 • QuickStart
Whether you’re a video expert looking for just the basic steps or a
beginner who wants instant gratification, this chapter will have you
titling in minutes!
This chapter describes just the basics. Many features and applications are
skipped or mentioned only briefly. For more information, or if you encounter
problems, refer to the table of contents or the index to locate a more complete
discussion.
IN
LRV
OUT
LRV
PREVIEW
OUT
POWER
CONTROL
(
GPI
)
POWER CONTROL PREVIEW RLVS RLVS
INOUT
AB C
VIDEO
IN
AUDIO
IN
VIDEO
OUT
AUDIO
OUT
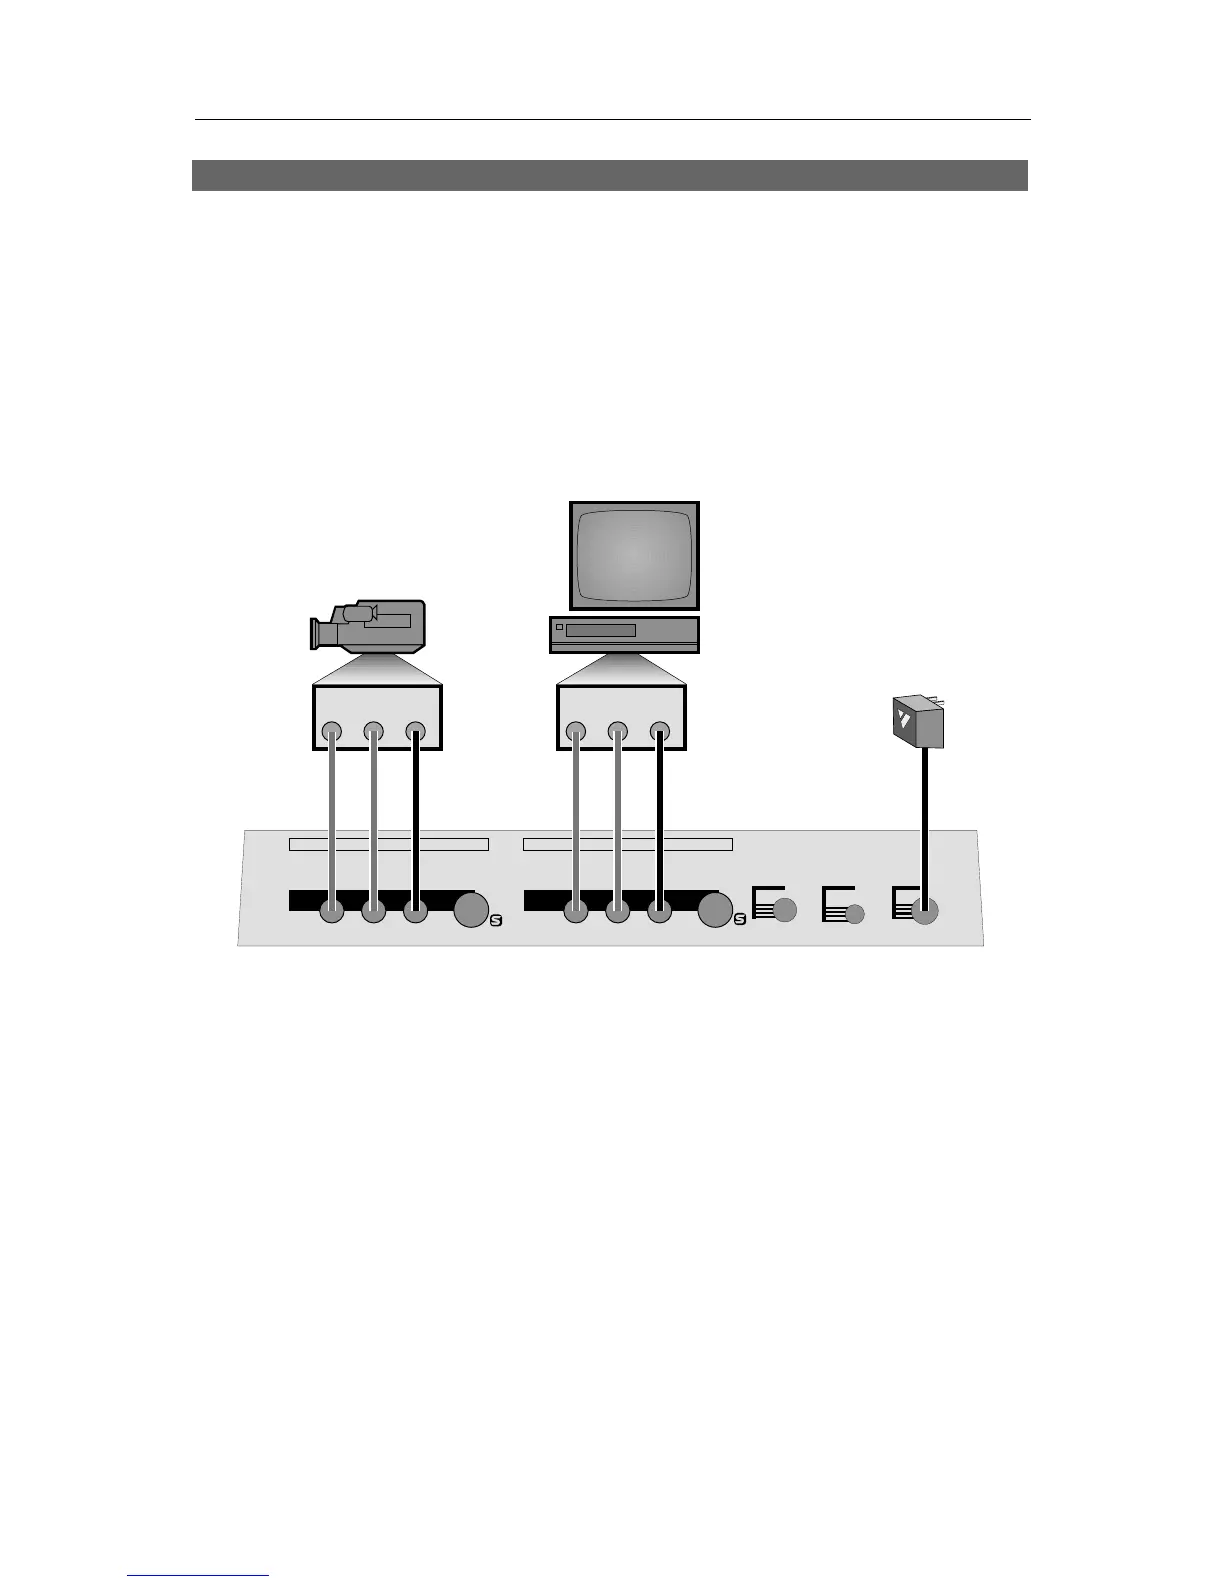
Typical TitleMaker 2000 connection
Connections
Connect the power supply (C) to a working wall outlet and connect the other end to the
TitleMaker 2000’s POWER jack. The POWER light comes on for a moment, then goes out.
Connect the TitleMaker 2000’s OUT jacks to the VIDEO and AUDIO IN jacks of a VCR (B).
Connect a television/monitor to the VCR in the normal fashion, so you can see the VCR’s
output. Leave the PREVIEW OUT jack unconnected unless you are using a PREVIEW monitor
(Chapter 21). Turn the television and VCR on.
If you plan to superimpose titles over video, connect a camcorder, VCR or other source (A)
to TitleMaker 2000’s video and audio IN jacks. Turn on the video source and start the tape
rolling.
Note: The illustration shows the use of composite (RCA-style) jacks for the video connections.
You can use S-video (Y/C) jacks instead. It is important to use the same type of jacks for the
input and the output. In other words, if your input is connected via the S-video jack, the output
should also use S-video; if it uses the composite jack, the output should use composite too. An
on-screen warning will alert you if you attempt to use the S-video output and composite input.
Note: The audio connections are for convenience only — the audio signals are not affected by
the unit.