EasyManua.ls Logo

Videonics TM-3000 User Manual

Videonics TM-3000
103 pages
To Next Page IconTo Next Page
Page #1 background imageLoading...
Page #1 background image
TM-3000 Video TitleMaker 3000 Instruction Manual MANL-0612-02 ©1996 Videonics, Inc.
The Videonics logo, Thumbs Up, and Videonics Video TitleMaker are registered trademarks of
Videonics, Inc. TM-3000, MX-1 Digital Video Mixer and Edit Suite are trademarks of Videonics,
Inc. Product and brand names may be trademarks or registered trademarks of their respective
companies and are hereby acknowledged. Television screens are simulated. Subject to change
withoutnotice.Thisdevice isnot tobe usedfor theunauthorized copyingof copyrightedmaterial.
Videonics, Inc. 1370 Dell Avenue Campbell, CA 95008 USA 408-866-8300
Model TM-3000
Instruction Manual

Table of Contents

Question and Answer IconNeed help?

Do you have a question about the Videonics TM-3000 and is the answer not in the manual?

Videonics TM-3000 Specifications

General IconGeneral
BrandVideonics
ModelTM-3000
CategoryAccessories
LanguageEnglish

Summary

CONTROLS

POWER

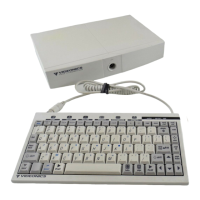
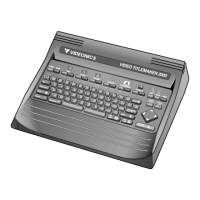
Turns on the keyboard when the rear panel POWER SWITCH is in the ON position.

MENU KEYS

Accesses menus to change color, font, style, etc., of text or pages.

COPY and MOVE

Allows copying or moving of marked text to a new location.

MARK START and MARK END

Used to mark text for modification, deletion, copying, or moving.

UNDO

Restores text deleted by the last press of the DELETE key.

DELETE

Erases marked text or the character before the cursor.

POSN (POSITION)

Positions text at the top, bottom, or center of the page or line.

PLAY

Plays created titles for display or recording.

Chapter 2 • QuickStart

Connections

Explains basic setup procedures for connecting the unit.

Power On/Off

Details the steps for turning the TitleMaker 3000 on and off.

Demo

Describes how to activate and use the built-in demonstration.

Instant Titles

Guides users through creating simple titles quickly.

Editing the Text

Details on how to insert and delete text.

Superimposing Titles on Video

Explains how to place titles over live video footage.

Connecting a Video Source

Instructions for connecting external video inputs.

Troubleshooting Hints

Provides solutions for common operational problems.

Chapter 4 • Connecting Editing Equipment

Chapter 5 • Using the Demo

Using the Demo

How to activate and view the product demonstration.

Using the Demo to Create Titles

Utilizing the demo as source material for creating new titles.

Chapter 6 • Typing Titles

The Editing Screen and Cursor

Overview of the text entry interface and cursor.

Typing Titles

Basic instructions for entering text and titles.

Typing Special and Accented Characters

How to input non-standard characters.

Chapter 7 • Pages

Deleting a Page

Procedures for removing pages and their content.

Moving and Copying Pages

Transferring entire pages between projects.

Chapter 8 • Projects

Removing a Project or Erasing its Contents

Procedures for deleting projects or clearing their content.

Copying or Moving Text Between Projects

Transferring pages or text between projects.

Chapter 9 • Changing Titles

Undo

Restores text deleted by the last DELETE key press.

Marking Text for Major Changes

Selecting blocks of text for operations like copy or delete.

Marking Whole Lines and Pages

Selecting entire lines or pages for modification.

Deleting Marked Text

Removing selected text.

Replacing Marked Text

Overwriting selected text with new content.

Moving and Copying Text

Relocating or duplicating text blocks.

Chapter 10 • Positioning Text

Positioning Horizontally Left, Right, Center

Aligning text along the horizontal axis of the screen.

Positioning Vertically Up, Down, Center

Aligning text along the vertical axis of the screen.

Chapter 11 • How to Use Menus

Using the Menus

Step-by-step guide to interacting with menus.

Chapter 13 • Fonts, Sizes, and Styles

Font and Size

Choosing font types and adjusting their size.

Font Style

Applying styles like shadow, outline, and bold.

Chapter 14 • Colors

Creating a New Color

Customizing colors using HLS controls.

Chapter 15 • Patterns

Mixing Video into a Background Pattern

Creating transparent video effects.

Chapter 17 • Effects, Scrolls, and Crawls

Transition Effects: Cuts, Fades, Slides, and Wipes

Explanation of various transition types.

Scroll and Crawl

Creating moving text effects like scrolls and crawls.

Chapter 18 • Clock and Date Features

Setting the Clock and Date

Entering the current time and date.

Displaying a Project at a Pre-Determined Date and Time

Automating project playback at a specific time and date.

Repeating Triggers

Setting timed triggers to repeat automatically.

Displaying the Real Time Clock and Date

Showing live time and date on pages.

Chapter 19 • Superimposing Titles

Superimposing Titles on Video

Overlaying titles onto live video sources.

Superimposing Titles on Video with a Transparent Pattern

Creating see-through title effects using patterns.

Chapter 20 • Playing Pages

Playing All Pages

Running all pages in a project sequentially.

Playing Some Pages

Playing a selected range of pages.

Continuous Play (Video Billboard)

Repeatedly playing a sequence of titles.

Chapter 21 • Editing, Presentations, and Other Applications

Video Editing

How the unit assists in video editing.

GPI Trigger

Automating title playback with external controllers.

Presentations

Creating and delivering title-based presentations.

Live Titles

Using titles in live video applications.

INSTRUCTIONS FOR MAKING REMOTE TRIGGER BUTTON

Instructions

Step-by-step guide to building the remote trigger button.

Chapter 22 • Preview

About Preview

Purpose and benefits of using a preview monitor.

Using a PREVIEW Monitor

How to connect and utilize a preview monitor.

Appendix A • Advanced Techniques, Shortcuts, and CMD (Command) Keys

Erasing Memory and Resetting Unit

How to clear data and reset the device.

Related product manuals