PAGE 58 VIDEONICS TITLEMAKER 3000
Chapter 16 • Borders
Borderscanbeusedtoseparatetitlesortoaddaninterestinggraphic
element.TheycanuseanyofTitleMaker3000’scolorsandpatterns.
You can place a horizontal border line above or below any
line of text. You can create a box that surrounds a block of
titles. Each page’s borders can use a different color and pat-
tern.
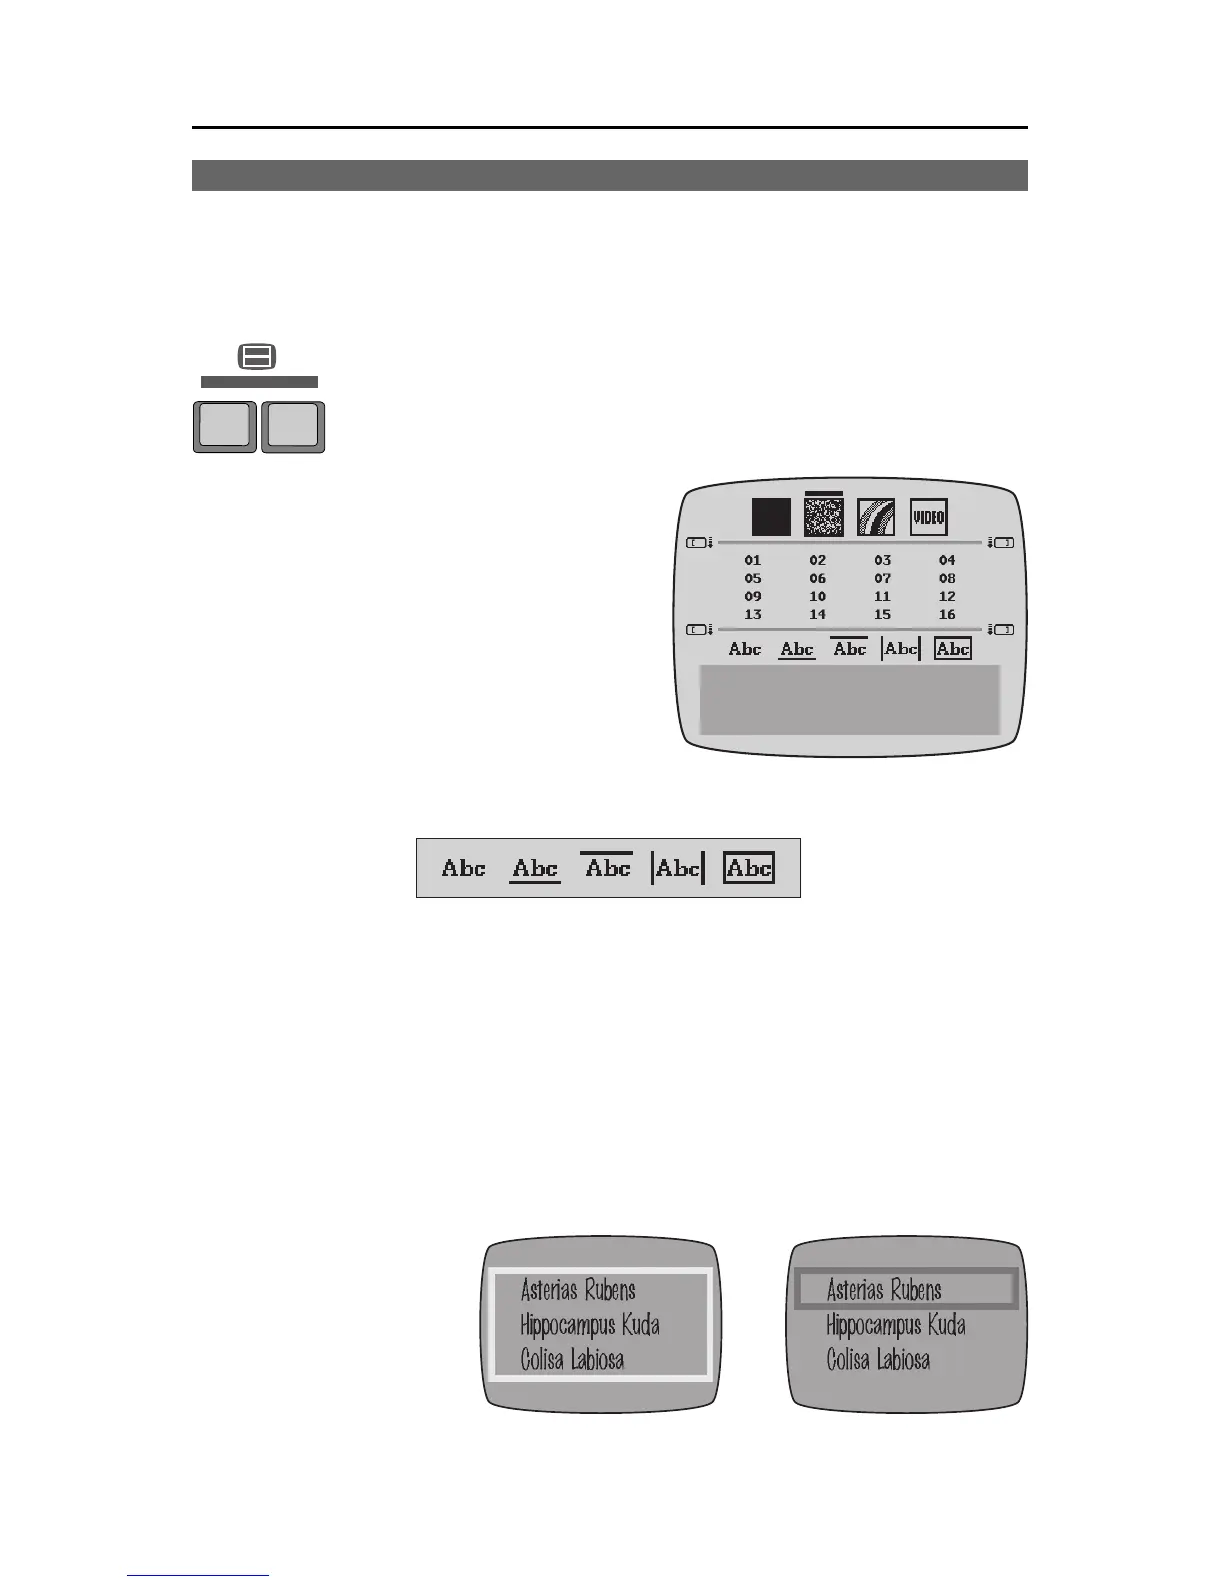
BorderStyleMenu
The top parts of the menu determine
the border pattern. They work the same
way as the other Pattern menus. Use
MARK START to determine which sub-
menu is active and the arrow keys to se-
lect the desired pattern and/or pattern
style. Note the “one pattern per page”
rule, discussed in Chapter 15, “Patterns.”
To create the border, use MARK START to make the last sub-menu active
and use the arrow keys to choose the type of border you want:
Using these choices, you can place a box around the text (E) or you can
place a border line above (C), below (B), or along both sides (D). Borders are
always applied to the entire line (that is, you can’t border part of a line). To
turn the border off, select (A).
PlacingaBoxAroundText
To wrap a box around some lines of titles, mark the text as described in the
section, “Marking Text for Major Changes” in Chapter 9. In the Border Style
menu, choose the box symbol from the bottom sub-menu (E). The selected
pattern will be wrapped all the way around the text lines that include the
marked text. Note that
if part of a line is
marked, the entire line
will be included.
You can box a single
line without marking
text: With no text
marked, simply leave the cursor anywhere in the line and use the menu to
select the box. A box will appear around that line.
COLOR STYLE
BORDERS
ABCDE