66250756-EN - V2.1 - 05/11/19
- 23 -
4000 Series GSM Lite Audio Intercom - Technical Manual
4000 Series GSM Lite Audio Intercom
General Directions for Installation
CONNECTION TO MAINS, SAFETY AND GUIDANCE NOTES
IMPORTANT: PLEASE READ THESE INSTRUCTIONS CAREFULLY BEFORE COMMENCING WITH THE INSTALLATION.
IMPORTANT: IT IS RECOMMENDED THAT ANY CABLING AND VIDEX PRODUCTS BE INSTALLED BY A COMPETENT
AND QUALIFIED ELECTRICIAN, SECURITY INSTALLATION SPECIALIST OR COMMUNICATIONS ENGINEER.
• DO NOT install any Videx product in areas where the following may be present or occur:
• Excessive oil or a grease laden atmosphere.
• Corrosive or ammable gases, liquids or vapours.
• Possible obstructions which would prevent or hinder the access and/or removal of the Videx product.
MAINS CONNECTION
The system MUST be installed in accordance with the current I.E.E. regulations (in particular I.E.E. Wiring regulations BS7671 for the
UK), or the appropriate standards of your country if installing overseas, in particular Videx recommends:
• Connecting the system to the mains through an all-pole
circuit breaker (refer to Fig.25) which shall have contact
separation of at least 3mm in each pole and shall disconnect
all poles simultaneously.
• That the all-pole circuit breaker shall be placed in such a
way to allow for easy access and the switch shall remain
readily operable.
• Ensuring that the mains supply (Voltage, Frequency and
Phase) complies with the product rating label (this is usually
located on the topside of the power supply).
• Isolating the mains before carrying out any maintenance
work on the system.
1 PHASE
SUPPLY
(220 - 240Vac,
50/60Hz)
FUSE
N
L
SWITCHED
FUSE SPUR
Fig. 25
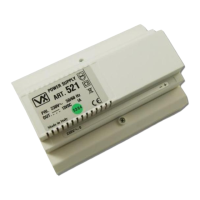
POWER SUPPLY INSTALLATION
Follow the steps below when tting the HDR-15-12 (12Vdc 1.25A) power supply.
• Fix the power supply to a DIN rail (following Fig.26, Fig.27 and Fig.28).
• Switch OFF the mains using the circuit breaker (mentioned previously) and then make the connections as required shown on
the various wiring diagrams throughout this manual.
• Check the connections and secure the wires into the terminals ensuring that the low voltage (signal) cables are routed separately
from the high voltage (mains) cables.
• If applicable replace the terminal covers and x them back into place using the relevant screws.
• When all connections are made restore the mains supply.
Fig. 26 Fig. 27 Fig. 28

 Loading...