© 2010 Viking Preferred Service
22
Service Diagnostics and Procedures
Door Disassembly (cont.)
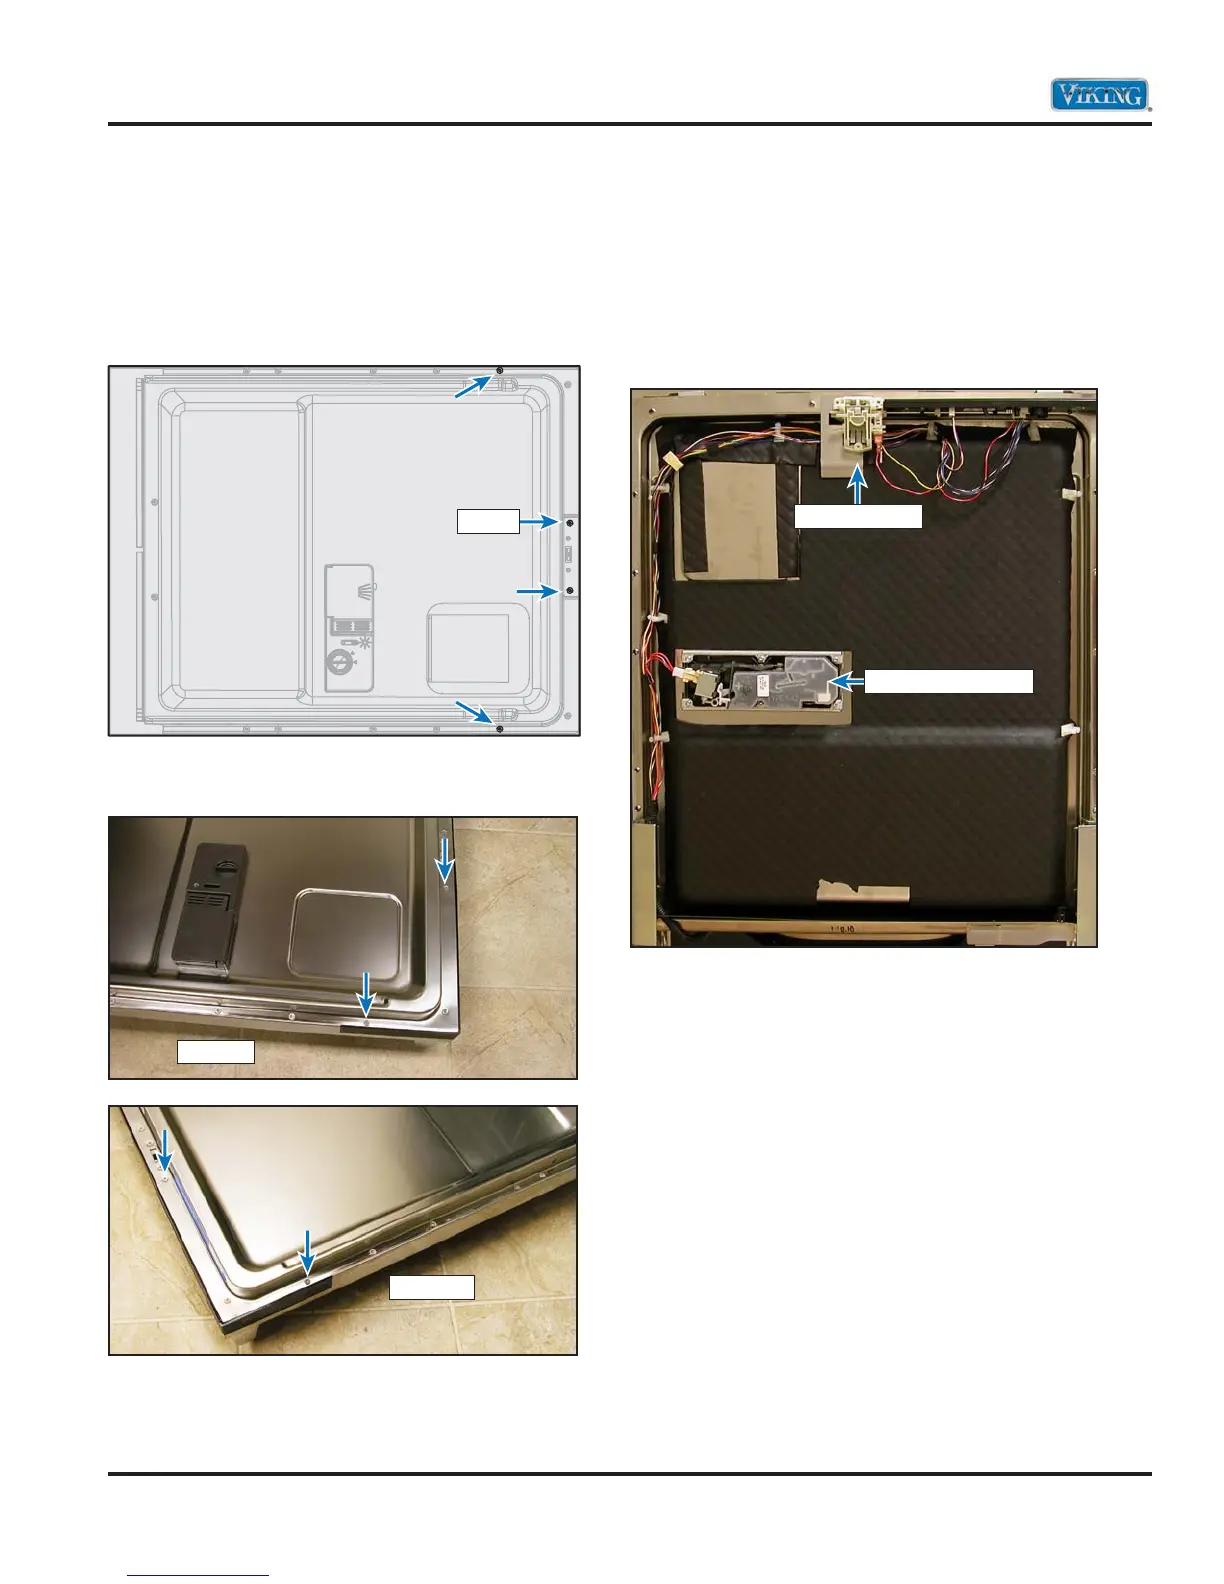
Control Panel Removal
After removing the outer door panel, the next step
is to remove the control panel assembly. There are
four T15 TORX® screws that hold the control panel
in place. Using a T15 TORX® screwdriver, remove
the screws shown.
The following images show the actual location of
the screws.
Note: With the outer door panel and the control
panel removed, access to the user interface is gained.
Inner Door Components
With the center door panel and control panel
removed, you now have access to the inner door
components.
The following image shows the inner door with all
the panels removed.
From here you can test the door interlock switch
and the detergent dispenser.
Screws
Left Side
Right Side
Interlock Switch
Detergent Dispenser