3
ASSEMBLY STEPS
STEP 1
Measure the required mounting height using the
chart below. Ensure the front edge of the mantel
does not exceed 110°F (43°C).
STEP 2
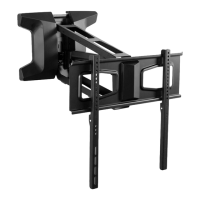
Remove pre-installed nuts (A1), metal washers
(A2) and plastic washers (A3) from the mount (A)
using the wrench (I).
STEP 3
OPTION A: Wood Wall Installation
Align the bottom edge of the stencil (C)
with the measured height from step
1 and mark drilling locations using a
pencil. Use of a stud finder and level
is recommended. Remove stencil and
drill 2.2” (55mm) deep holes using a
1/4” (6mm) drill bit. Attach the mount
(A) to the wall using screws (W-A) and
washers (W-C).
TOOLS NEEDED
3/8” Drill Pencil
Phillips
Drill
3/16” Drill
Hammer Ruler
Stud Finder
≤ 13-3/4” (350mm)
≤ 4” (100mm)
≤ 7-7/8” (200mm)
≤ 11-3/4” (300mm)
≥ 9-7/8” (250mm)
≥ 7-7/8” (200mm)
≥ 3-1/8” (80mm)
≥ 11-3/4” (300mm)