Do you have a question about the Vivo STAND-V001O and is the answer not in the manual?
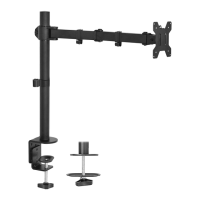
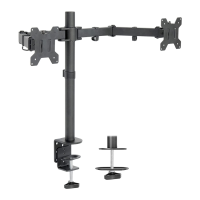
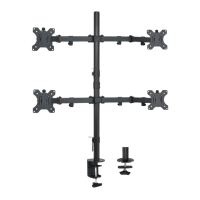
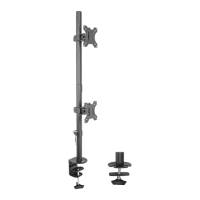
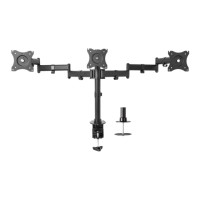
Details clamp installation for different desktop thicknesses using specific hardware.
Instructions for installing the mount using a desk grommet hole.
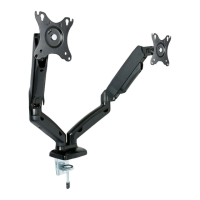
Procedure for attaching the lower and upper arms to the base.
Guidance on attaching the VESA plate to the monitor arm.
Steps for securing the monitor to the VESA plate using screws.
Instructions for routing cables neatly through the monitor arm.
Guide to adjusting the monitor's tilt angle using the provided wrench.
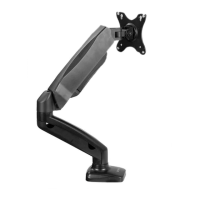
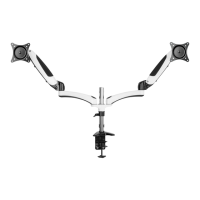
This document describes the assembly and use of a pneumatic arm single monitor desk mount, designed to enhance workspace ergonomics and flexibility. The mount allows users to position their monitor at an optimal height and angle, reducing strain and improving productivity.
The primary function of this device is to securely hold a single monitor and provide a wide range of adjustability through its pneumatic arm mechanism. This allows for effortless movement of the monitor up, down, forward, backward, and to various tilt and swivel angles. The mount is designed to be attached to a desk either via a clamp or a grommet installation, offering versatility based on the user's desk setup.
The monitor mount offers several features that contribute to its ease of use and adaptability:
Desk Attachment Options: The mount can be installed using two primary methods:
Arm Assembly: Once the base is secured, the lower arm is placed onto the base, followed by the upper arm onto the lower arm. Set screws are then tightened using a 4mm Allen wrench to ensure the arms are firmly connected.
VESA Plate Attachment: The VESA plate, which connects to the monitor, is attached to the upper arm using an M8x30mm screw and a 5mm Allen wrench. This connection forms the interface between the monitor and the adjustable arm.
Monitor Installation: Installing the monitor involves a two-step process to ensure security and ease. First, two screws (M-A or M-B) and M5 washers (M-C) are partially installed into the top VESA holes on the monitor, leaving a small clearance (at least 3mm) between the screw head and the monitor. The monitor is then slid onto the VESA plate, ensuring these screws sit within the plate's slots. Finally, the top two screws are tightened, and the remaining screws and washers are installed into the bottom VESA holes and tightened. This method allows for easy placement and removal of the monitor while ensuring a robust connection.
Cable Management: The mount incorporates a cable management system to keep the workspace tidy. Plastic covers on the lower and upper arms can be removed using a Phillips screwdriver end of a 5mm Allen wrench. Cables from the monitor can then be routed through the bottom of the arms, and the plastic covers reattached, concealing the cables and preventing clutter.
Adjustability: The pneumatic arm provides extensive adjustability for optimal viewing:
The device is designed for relatively low maintenance, with key aspects focused on ensuring safety and proper function:
The design prioritizes user safety and product longevity through clear instructions for installation, adjustment, and maintenance. The modular nature of the components allows for straightforward assembly and potential replacement of parts if needed. The inclusion of Allen wrenches for adjustments means users have the necessary tools readily available for setup and ongoing maintenance.
| Model | STAND-V001O |
|---|---|
| Category | Racks & Stands |
| Type | Monitor Stand |
| Color | Black |
| VESA Compatibility | 75x75mm, 100x100mm |
| Rotation | 360° |
| Adjustable Height | Yes |
| Material | Steel |
| Weight Capacity | 22 lbs |