CAUTION
Risk of crushing injury from moving and rotating components of
wiper mounting.
– Do not hold wiper mounting in area of rotating parts.
– Handle wiper mounting with care when removed.
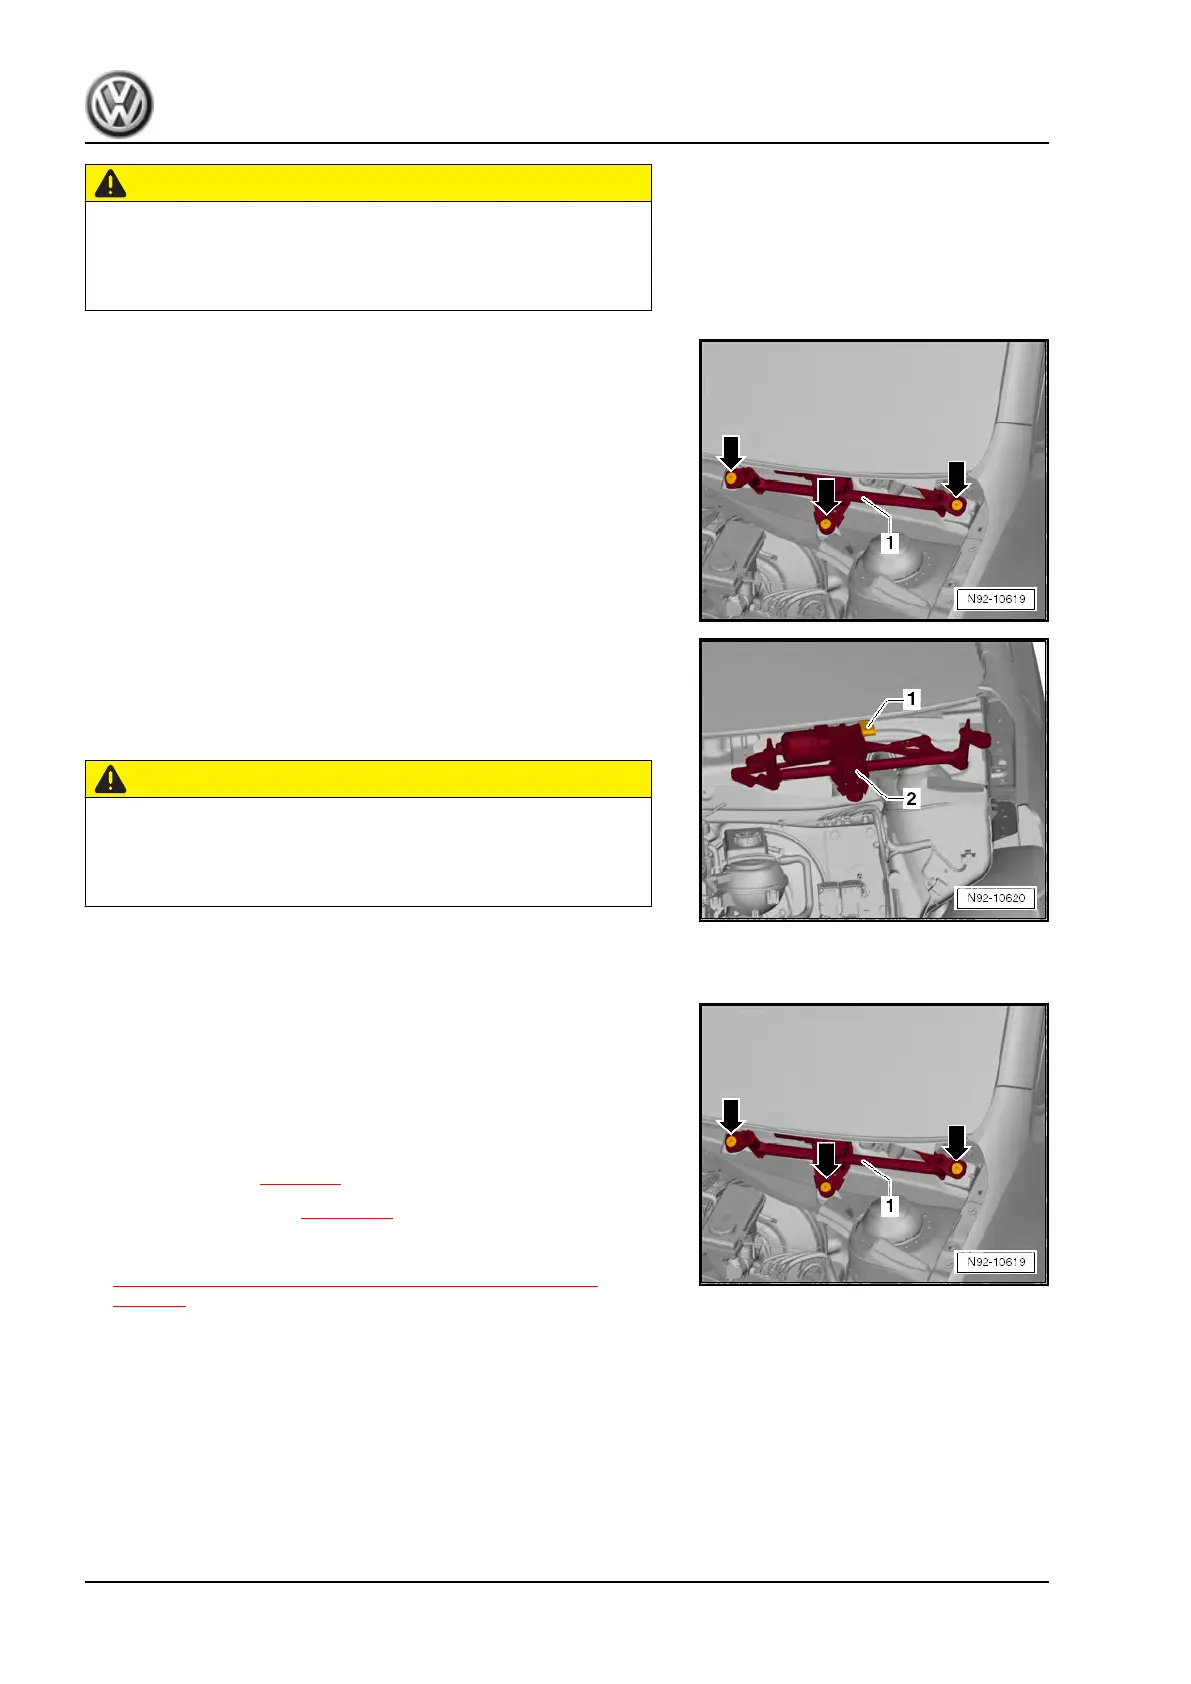
– Unscrew bolts -arrows- and pull wiper frame together with
linkage and motor -1- sideways so that they come out of the
plenum chamber a little, taking connected wiring lengths into
consideration.
– Release and pull off connector -1-, and remove wiper frame
together with linkage and motor -2- from vehicle.
Installing
Install in the reverse order of removal observing the following:
CAUTION
Risk of crushing injury from moving and rotating components of
wiper mounting.
– Do not hold wiper mounting in area of rotating parts.
– Handle wiper mounting with care when removed.
– Insert wiper frame together with linkage and wiper motor -1-
into plenum chamber.
– Screw in securing bolts -arrows-.
– Push connector onto connection on wiper motor so that con‐
nector latches into place.
– Install plenum chamber cover ⇒ General body repairs, exte‐
rior; Rep. gr. 50 ; Bulkhead; Assembly overview - plenum
chamber cover .
– Connect battery ⇒ page 7 .
– Installing wiper arms ⇒ page 46 .
Specified torques
♦ ⇒ “1.1 Assembly overview - windscreen wiper system”,
page 44
1.7 Renewing wiper motor
Special tools and workshop equipment required
up! 2017 ➤ , up! 2020 ➤
Electrical system - Edition 10.2019
50 Rep. gr.92 - Windscreen wash/wipe system
 Loading...