To turn the camera off, press and hold the Home/On/Off button for two seconds. The camera will also automatically turn off after a few minutes without
input.
TRANSFERRING FILES TO A COMPUTER
You can connect the KidiZoom®Studio camera to a PC or Mac using the included Micro-USB Cable. Once a computer is connected, you can transfer files
between the camera and computer. Please follow these steps:
Insert the Micro-USB Cable (small end) into the Micro-USB Port on the camera.
Insert the larger end of the Micro-USB cable into a USB port on the computer.
If your camera was off, wait until you are asked to enter the Computer Connection mode, then select the tick icon to connect to the computer.
On the computer, you will see a removable drive called VTech 5318. Please use this to transfer files to and from the camera. There is another removable
drive called VT SYSTEM, which is for the storage of system data only. Do not use or remove the VT SYSTEM drive.
Note
Once the camera is connected to your computer, keep it connected while files are transferring. After you finish, safely eject the camera electronically from your
computer and then physically disconnect the camera.
To avoid potential damage to your KidiZoom®Studio, ensure that the rubber cover of the Micro-USB Port is firmly closed when the camera is not
connected to a cable.
To back up photos or videos:
Open the DCIM folder on the removable drive VTech 5318.
Copy and paste your photos or videos from their subfolders to a location on your computer to back them up.
To transfer photos or videos to KidiZoom ®Studio:
Select the photo or video files you would like to upload from your computer first.
Open the DOWNLOAD folder on the removable drive VTech 5318. copy and paste your photos into the PHOTO folder, and videos into the VIDEO folder.
Note
Do not transfer photo or video files created by other cameras onto the KidiZoom® Studio camera, as these file formats may not be compatible.
Minimum System Requirements
Microsoft
®
Windows
®
8 or Windows
®
10 Operating System, Mac OS X 10.10, 10.11, macOS 10.12 to 10.15. USB port required.
Microsoft
®
and Windows logos are trademarks of Microsoft Corporation in the United States and other countries. Macintosh and Mac’s logos are trademarks of
Apple Inc. in the United States and other countries. All other trademarks are the property of their respective owners.
MODES
Video
Record Video
Press the Left and Right buttons to cycle through video themes and effects.
Press the Shutter button or OK button to start recording a video. Press either button to stop recording.
Press the Up or Down button to take a recording.
After recording completes, press the OK button to play your video or press the Delete button to delete the video. When a video is playing, press the
OK or Shutter button to skip the review and return to Record mode.
NOTE
You can record 720p HD video only when a memory card is inserted and you have set the video resolution to High in Settings.
Timer Modes
In the video preview screen, press the Star button to pop up the options menu. In Timer mode, select Self-timer to use a 10-second countdown timer before
video capture begins, or select Face-timer to automatically start capturing when a stable face is detected.
NOTE: Timer mode will be disabled every time the camera is switched off.
Microphone Volume
In the camera preview screen, press the Star button to pop up the options menu, press the Up or Down button to select the Microphone , then
press the Left or Right button to adjust the Microphone volume.
NOTE
Increasing the Microphone volume will also increase the background noise on the video’s soundtrack. The Microphone volume will reset to the default volume
every time the camera is switched off.
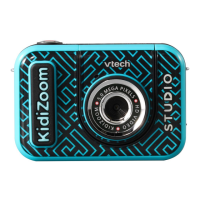
Green Screen Studio
Use the included Green Screen cloth in this mode to record videos in front of simulated backgrounds.
Please refer to the earlier Green Screen cloth setup section for instructions on the best placement of the cloth.