33373-001 Version A
6.2.2 Gas pressure release for calibration
1. Select Solenoids on SVT Test Screen.
2. Select “O2-0” it will read “ON” exit screen.
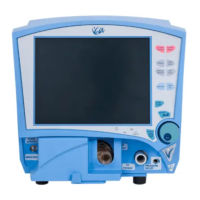
6.2.3 Screen Calibration
1. Select Touch Screen Calibration.
2. Using a stylus pen touch all three points as they appear on the screen. Verify calibration
passed.
3. If calibration does not pass, repeat calibration process until it does pass.
CAUTION
Do not remove tubing from the transducers or the solenoids mounted below the transducers.
Damage may occur to these components if tubing is removed.
6.2.4 Exhalation Pressure Transducer Calibration
1. Follow the tube connected to the bottom port of solenoid S904 and disconnect tubing at the
larger side 1/8
th
end of the luer-lock connecter (Figure 6-4).
2. Select “EXLPRESS XDCR” on screen.
3. Select “PRESSURE APPLIED” to set the zero pressure reference.
4. Verify “OK” appears next to “0” press.
5. Connect test set-up #1, as shown in Figure 6-1.
6. Connect calibration tubing to the tube listed in Figure 6-4 labeled “to exhalation valve dryer
tube” (S904)
7. Apply 60 cmH
2
O of pressure to the transducer. Allow pressure to stabilize for 3–4 seconds.
Press the “PRESSURE APPLIED” button to confirm the 60 cmH
2
O span calibration.
8. Verify “O.K.” is displayed next to the 60. Select “Save Calibration” to store settings.
9. Reconnect the tubing to the luer-lock connecter.
6.2.5 Turbine Pressure Transducer Calibration
1. Follow the tube connected to the bottom port of the solenoid S903 and disconnect the tube at
the larger end of the 1/8
th
end of the tube assembly connecter.
2. Select “TURB PRESS XDCR” on screen.
3. Select “PRESSURE APPLIED” to set the zero pressure reference.
4. Verify “OK” appears next to “0” press.
5. Connect test set-up #1, as shown in Figure 6-1.
6. Connect calibration tubing to the tube listed in Figure 6-4 labeled “To Tube Assy” (S903).
7. Apply 60 cmH
2
O of pressure to the transducer. Allow pressure to stabilize for 3–4 seconds.
Press the “PRESSURE APPLIED” button to confirm the 60 cmH
2
O span calibration (± 0.6
cmH
2
O).
8. Verify “O.K.” is displayed next to the 60. Select “Save Calibration” to store settings.
9. Reconnect the tubing to the tube assembly connecter.
 Loading...