Changing the presser foot
Changing the presser foot and the presser foot holder
44
Manual • Sewing machine W6 N 2000 Exklusive W6 N 2000 Exklusive • 27/04/2018 • 1.0 • GBR
Carry out the following steps:
1.
W6 Tip
Take note:
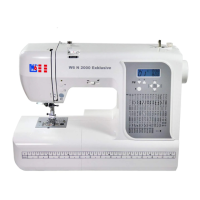
It must be ensured that the thread take-up lever, covered by the head
cover, and the needle are in a particular position before threading and any
program change.
In order to fulfil this requirement, press the “Needle Up - Needle Down”
button twice. The thread take-up lever and the needle are moved
automatically to the correct starting position.
• Failure to do so will always lead to a sloppy seam, blockages or damage
to the sewing machine. In the event of any lack of clarity, further informa-
tion can be found at the VIDEO menu item at www.w6-wertarbeit.eu: Cri-
teria for optimal threading.
The lower thread has been pulled tightly and carefully to the 7 and 9 o’clock
positions in the silver slot of the black hook race. When pulling it in, you will
hear a definite clicking at the 7 and 9 o’clock positions. Lower thread
tension is active. You have performed a tension test.
• Failure to do so will always lead to a sloppy seam, blockages or
damage to the sewing machine. In the event of any lack of clarity,
further information can be found at the VIDEO menu item at www.w6-
wertarbeit.eu: Criteria for optimal threading.
Press the Needle Up - Needle Down button twice
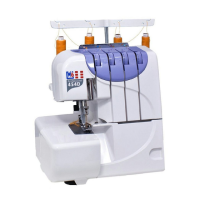
2. Push the ‹presser foot lifter› upwards
▼ In the case of certain presser feet, the ‹presser foot lifter› can also
be lifted. The presser foot lifter does not engage in this position.
 Loading...