Disassembly and Assembly WM 80 Repair
112 wc_tx000523gb.fm
10.9 Removing Clutch
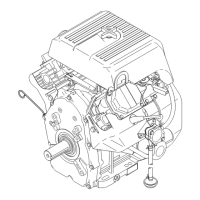
See Graphic: wc_gr002941
This procedure requires special tool P/N 0117972, puller.
DO NOT run the engine while it is off the machine unless the clutch has
been removed. Running the engine with the clutch attached to the
crankshaft will cause the clutch shoes to separate and fly off.
Removal:
10.9.1 Stop the machine and allow it to cool.
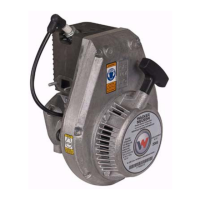
10.9.2 Remove the engine from the machine. See section Removing Engine.
10.9.3 Check the condition of the clutch shoes (a) and replace them if
necessary. The clutch shoes should be absolutely dry. If oil is present,
inspect the engine shaft seal.
10.9.4 Prevent the clutch from turning and use an air impact wrench and 17
mm socket to loosen the clutch nut (b). If an impact wrench is not
available, rap the wrench handle sharply to help break the nut loose.
Note: Loosen the nut but do not completely remove it from the engine
crankshaft. This will protect the crankshaft threads from the clutch
puller screw.
10.9.5 Screw the clutch puller (P/N 0117972) (c) (or other suitable puller) into
the small holes in the clutch and turn the center screw against the end
of the crankshaft until the clutch hub breaks free of the taper.
Note: When reinstalling the clutch, make sure the taper in the clutch
hub and on the engine crankshaft is absolutely free of any oil or
grease.
Installation:
10.9.6 Place the clutch on the engine crankshaft.
10.9.7 Reinstall the clutch nut and torque to 35 Nm (25 ft.lbs.).
10.9.8 Reinstall the engine on the crankcase. Torque the screws to 27 Nm (20
ft.lbs.).
10.9.9 Perform an operation check. Clutch should be disengaged with the
throttle at the idle position.
Engine Speed (idle) (rpm): 1500 ± 200
Clutch Engagement (rpm): 2800 ± 200
WARNING