Do you have a question about the WANHAO D12 300 and is the answer not in the manual?
Read the manual carefully for easier setup.
Details warranty for defects, materials, and extruder, plus consumer rights.
Follow all warnings and instructions for safe operation and connection.
Guidelines for electrical connections, extension cords, and professional repairs.
Caution about moving parts, unattended operation, and sharp tools.
Printer specifications for water exposure, temperature (15-30°C), and humidity (20-50%).
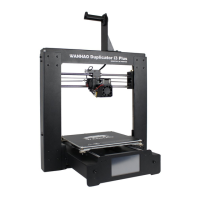
Important steps for correct setup, unboxing, and levelling your 3D printer.
Prepare components, remove protection, attach printer tower, and install printing head.
Install E1 extrusion mechanism, filament holder, and sensor.
Gently push the printing head to ensure it is well secured.
Adjust X and Y axis belt tension and insert reinforcing ribs.
Install E2 extrusion mechanism, filament holder, sensor, and connect motor connector.
Insert filament tubes and N connector for the second extruder.
Introduction to WANHAO Cura software for D12 300, with community features.
Process of saving Gcode and sending print jobs via WiFi.
Connect printer to WiFi, then computer to the same router.
Use Cura to connect to the printer via IP and send print jobs.
Importance of setting up the printer before each print operation.
Detailed steps for ensuring the heated print bed is level and at the correct distance.
Step-by-step guide on how to insert filament into the extruder.
Instructions on how to safely remove filament from the extruder.
Instructions for inserting SD card and initiating printing from a file.
Steps for safely removing printed objects from the heated bed.
| Build Volume | 300 x 300 x 400 mm |
|---|---|
| Nozzle Diameter | 0.4 mm |
| Filament Diameter | 1.75 mm |
| Connectivity | USB, SD card |
| Supported Materials | PLA, ABS, PETG, TPU |
| Weight | 25kg |
| Number of Extruders | 2 |
| Extruder Type | Direct Drive |
| Heated Bed | Yes |
| Bed Temperature | up to 100°C |
| Nozzle Temperature | up to 260°C |
| Machine Weight | 25kg |
| Frame Material | Aluminum |