EasyManua.ls Logo

WANHAO Duplicator 6 - User Manual

WANHAO Duplicator 6
3 pages
Print Icon
To Next Page IconTo Next Page
Loading...
Fixing the cover of your Duplicator 6.
1
.
To install the cover of D6 printe,
you need the 1 front cover,2 side
covers,2 top covers and a tool bag
where you can nd one handle,two
hinges,ten M4*16 screws, five
M4 nuts,ten M5*10 screws,M4*5
screws, one 2.5mm hex wrench, one
3mm hex wrench and one 4mm hex
wrench.
2
.
To install the front cover, you
need one front cover,two M4*5
screws,eight M4*16 screws,four M4
nuts,one 2.5mm hex wrench,3.0mm
hex wrench,two hinges, and one
handle.
3
.
To install the side cover, you
need two side covers,eight M5*10
screw and a 4mm hex wrench.
4
.
Use M4*16 screw and M4 nut To
x the hinge on the front cover. In
this step, you need 4 M4*16 screws
and 4 M4 nuts for the two handles.
5
.
Use M4*5 screw and 3mm hex
wrench to fix the handle on the
front cover. In this step, you need
two M4*5 screws.
6
.
Fix the front cover on the printer
with the 2.5mm hex wrench and
another four M4*16 screws.
Question and Answer IconNeed help?

Do you have a question about the WANHAO Duplicator 6 and is the answer not in the manual?

Summary

Fixing the Cover of Your Duplicator 6

Prepare for Cover Installation

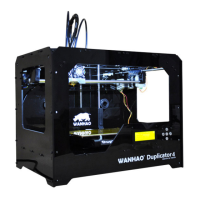
Lists components and tools required for installing the printer cover.

Install Front Cover Components

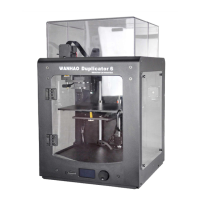
Details parts and steps for attaching the front cover.

Install Side Covers

Outlines the procedure and parts for fitting the side covers.

Attach Hinges to Front Cover

Explains how to attach hinges to the front cover using specific screws and nuts.

Attach Handles to Front Cover

Describes attaching the handles to the front cover with screws and a wrench.

Mount Front Cover to Printer

Details securing the front cover to the printer using screws and a hex wrench.

Attach Second Handle

Repeat the handle attachment process for the other side.

Verify Front Cover Functionality

Check if the front cover operates correctly after installation.

Secure Side Cover

Fasten the side cover, advising not to overtighten initial screws.

Tighten Remaining Side Cover Screws

Tighten the remaining screws for the side cover installation.

Install Other Side Cover

Repeat the process for installing the second side cover.

Position Top Cover

Align and place the top cover onto the printer.

Install Other Top Cover

Repeat the process for installing the second top cover.

Final Check and Spares

Indicates completion and lists spare parts included in the tool bag.

WANHAO Duplicator 6 Specifications

General IconGeneral
Build Volume200 x 200 x 180 mm
Nozzle Diameter0.4 mm
Filament Diameter1.75 mm
ConnectivityUSB, SD Card
Frame MaterialMetal
Print TechnologyFused Deposition Modeling (FDM)
Heated BedYes
Bed TemperatureUp to 100°C
Nozzle TemperatureUp to 260°C
Supported MaterialsPLA, ABS, PETG
DisplayLCD
Power Supply220V
Machine Weight15 kg
Layer Resolution20 - 400 microns

Related product manuals