(NOT USED)
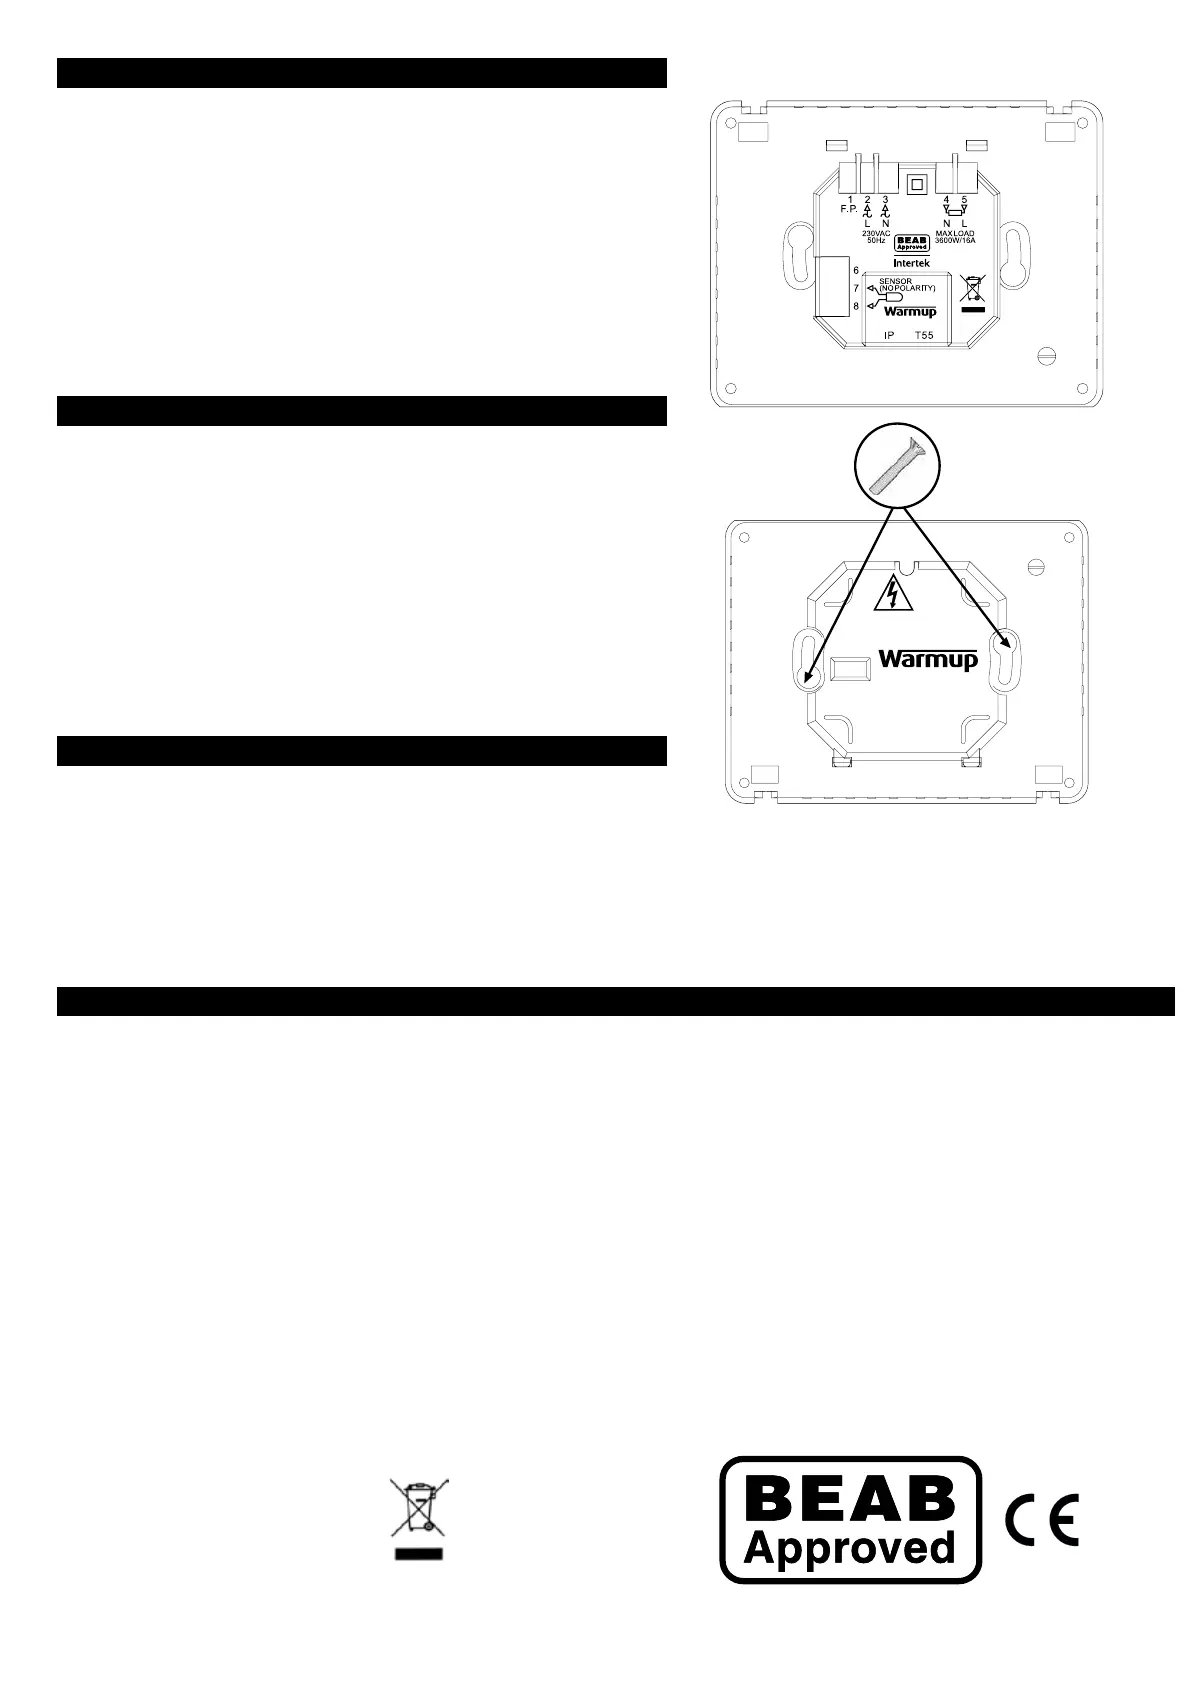
Normal electrical installation (see numbering on diagram to right)
1. Connect to Fil Pilote (F.P.) - only for use in France
2. Connect to Power Supply (Live – MAX 240V)
3. Connect to Power Supply (Neutral – MAX 240V)
4. Connect to Warmup heater(s) (Neutral – MAX 3600W/ 16 Amps)
5. Connect to Warmup heater(s) (Live – MAX 3600W/ 16 Amps)
6. Not Used
7. Connect to 1st wire of oor sensor (colour not important)
8. Connect to 2nd wire of oor sensor (colour not important)
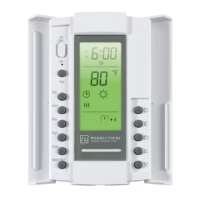
Mounting thermostat into the wall box
1. Push excess wire back through the wall box and insert
thermostat back module into wall box.
2. Put xing screws through mounting holes and tighten.
3. Ensure that thermostat is straight before tightening completely.
4. Replace thermostat front housing:
5. Ensure front housing is securely xed.
6. IMPORTANT: Tighten both retaining screws.
Powering-up
You can now power-up the thermostat and begin the programming
process.
UK
Warmup Plc
702 Tudor Estate
Abbey Road
London
NW10 7UW
T: 0845 345 2288
International: + 44 208 453 6868
F: 0845 345 2299
E-mail: uk@warmup.com
Website: www.warmup.co.uk
Disposal
Appliances with this symbol must
not be disposed of with general
waste. Seek guidance from your local
government or the retailer where you
purchased the product.
Contact Warmup
ELT-01-XX-01 - Installation guide V1.0 © Warmup plc - 2013
20
• Align and sit front housing on to hinges
• Push lower half of front housing until a ‘click’ is heard.
Patent Pending