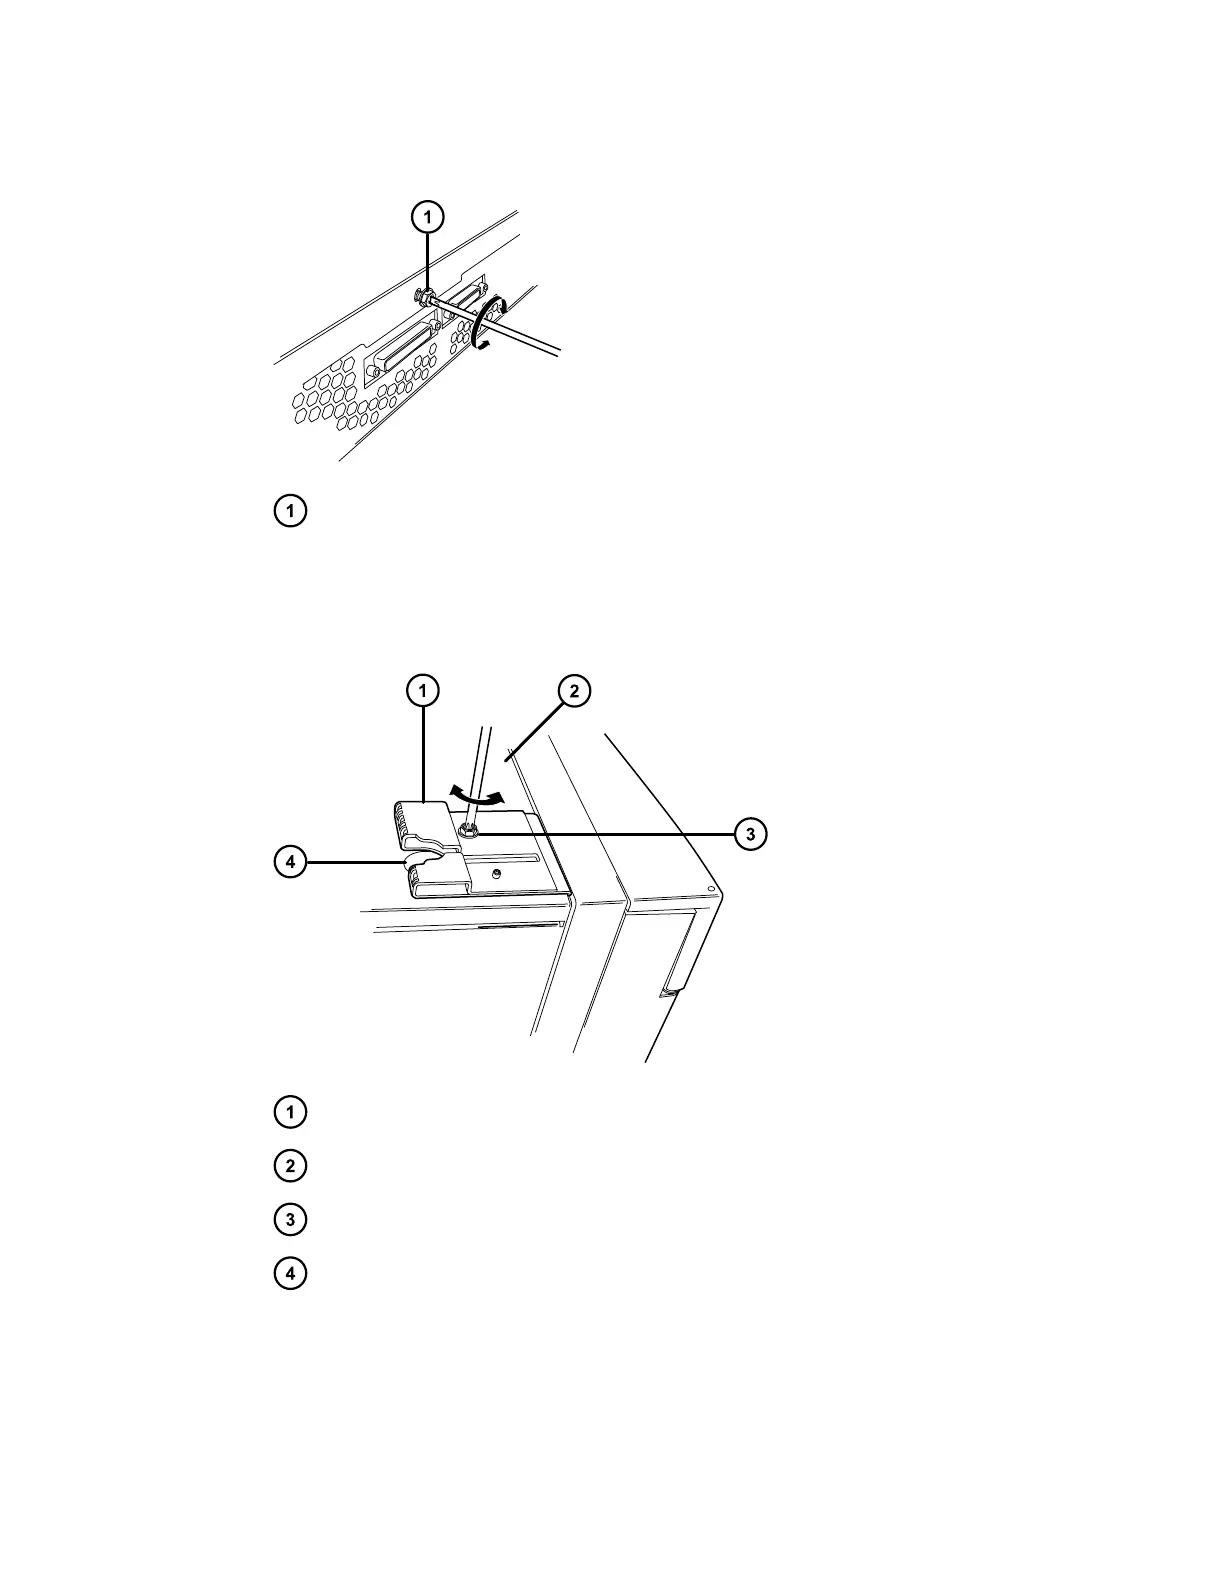
Figure 2–12: Removing the TORX screw
TORX screw in sample manager's rear panel
19. Carefully lift and remove the CH-A rear enclosure from the sample manager.
20. From the CH-A start-up kit, locate the CH-A–to–SM retainer bracket and TORX screw.
Figure 2–13: Installing the retainer bracket on the sample-manager chassis
CH-A–to–SM retainer bracket
Sample manager's top cover
TORX screw
Cutout in bracket
21. As shown in the figure above, position the bracket so that the openings in the bracket align
with the openings in the sample manager's top cover, and the cutout in the bracket faces
toward the sample manager's rear panel.
December 4, 2019, 715005052 Version 02 (previously released as Rev.B)
Page 28