11
TnP-500 User Manual Wavecom
Connecting via USB
You can also connect to your TnP-500 via USB if needed. Follow the following diagrams to connect your TnP-500
to your tablet or PC, with or without your printer. Please note that you need to connect your printer in addition
to your TnP-500 as shown.
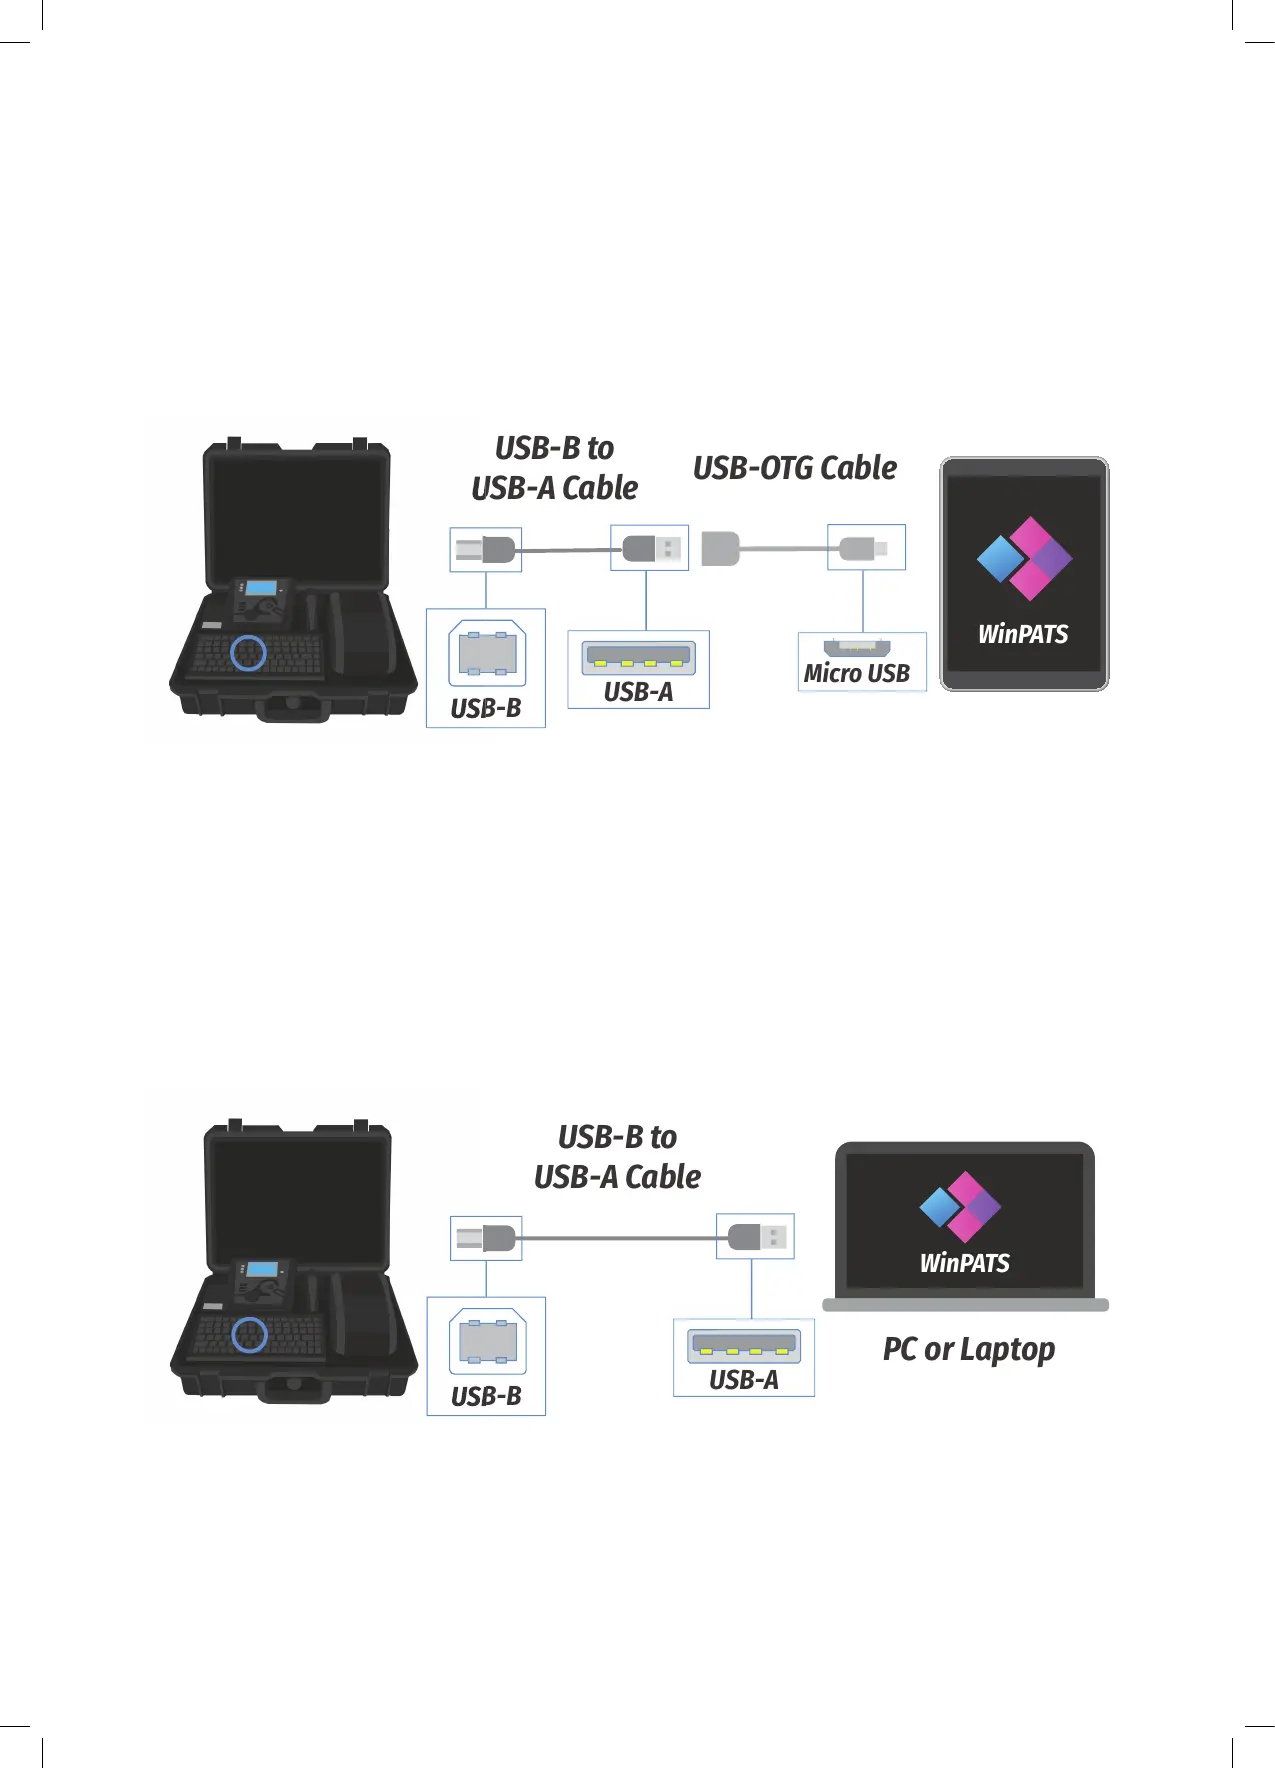
Connecting your TnP-500 to your Tablet via USB
To connect your TnP-500 to your tablet via USB, you will need:
• A USB-A to USB-B cable (Included)
• A USB-OTG Cable (Included)
Connect your cables in the sequence shown below. Your TnP-500 USB-B port is located inside the storage
compartment under the keyboard. Once connected, open WinPATS on your tablet. You should see the Test icon
and the Print icon (if you connect the printer) at the top of the screen change to green.
Connecting your TnP-500 to your PC via USB
To connect your TnP-500 to your PC via USB, you will need:
• A USB-A to USB-B cable (Included)
Connect your cables in the sequence shown below. Your TnP-500 USB-B port is located inside the storage
compartment under the keyboard. You may need to update your USB Driver on your PC - you can download this
driver from our website: https://www.wavecom.com.au/support_download-software.php
WinPATS
USB-OTG Cable
USB-B to
USB-A Cable
Micro USB
USB-B
USB-A
USB-B to
USB-A Cable
USB-B
USB-A
PC or Laptop
WinPATS