DBW 2010 / 2016 8 Servicing Work
806
The combustion air inlet and exhaust-gas outlet location
must be chosen so that no air pressure difference results in
any vehicle operating mode.
Rigid pipes of unalloyed or alloyed steel with a minimum wall
thickness of 1.0 mm or flexible piping of alloyed steel only
must be used as exhaust line.
The exhaust pipe is secured on the heater, e.g. with clamps.
Permissible dimensions of exhaust pipe:
– Inside diameter:
DBW 2010 / 2016 = 38 mm
– Maximum permissible line length: 5 m
– Maximum permissible bend: 270 °C
As an alternative, an exhaust-gas deflection approved by
Webasto can be installed.
8.7 Removal and installation
IMPORTANT
When installed, only the following dismantling and removal
procedures are approved, provided sufficient space is availa-
ble for removal:
– Replacing temperature limiter
– Replacing temperature sensor
– Replacing fan or control thermostat
– Replacing thermal fuse
– Replacing thermal fusible link
– Replacing burner head
– Replacing ignition spark generator
– Replacing flame monitor
– Replacing combustion chamber
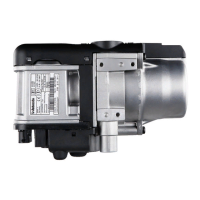
8.7.1 Heater, removal and installation
8.7.1.1 Removal
1. Disconnect the wiring harness plug from the control unit.
2. Disconnect the combustion-air inlet line from the heater.
3. Loosen the clamp on the exhaust-gas outlet.
4. Disconnect the fuel supply and return line and pull off the
fuel lines and seal off with blind plugs.
Close water valves if present.
5. Loosen the hose clamps on the coolant hoses, pull off the
hoses and seal off with blind plugs.
6. Remove the corresponding fastening elements (screws,
nuts and washers) from the stand.
7. Remove heater.
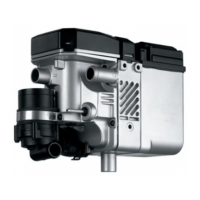
8.7.1.2 Installation
1. Position heater in installation position and fasten with
appropriate screws, washers and nuts.
2. Secure the line on the exhaust-gas outlet with a clamp.
3. Connect the coolant hoses and secure them with hose
clamps. Open the water valves.
4. Connect the fuel supply and return line and secure.
5. Fasten the combustion-air inlet line on the heater.
6. Connect the wiring harness plug to the control unit.
7. Bleed the fuel supply system.
8. Bleed coolant circuit.
8.7.2 Replacing temperature limiter
NOTE
The procedure for replacing the temperature limiter with the
heater installed or removed is identical.
Replacing must be carried out according to 9.2.1.
WARNING
Before replacing the temperature limiter on heaters with the
1563/1564 control unit while installed, the pressure in the
cooling system must be released by opening the radiator cap.
Also allow the heater to cool and provide a catch container
for the escaping coolant if necessary.
8.7.3 Replacing temperature sensor
NOTE
The procedure for replacing the temperature sensor with the
heater installed or removed is identical.
Replacing must be carried out according to 9.2.2.
WARNING
Before replacing the temperature sensor on heaters with the
1563/1564 control unit while installed, the pressure in the
cooling system must be released by opening the radiator cap.
Also allow the heater to cool and provide a catch container
for the escaping coolant if necessary.
 Loading...