Dynamic Load Management – Stand-alone mode (DLM) | 10
5111232C OI-II Webasto Next_EN 13 / 23
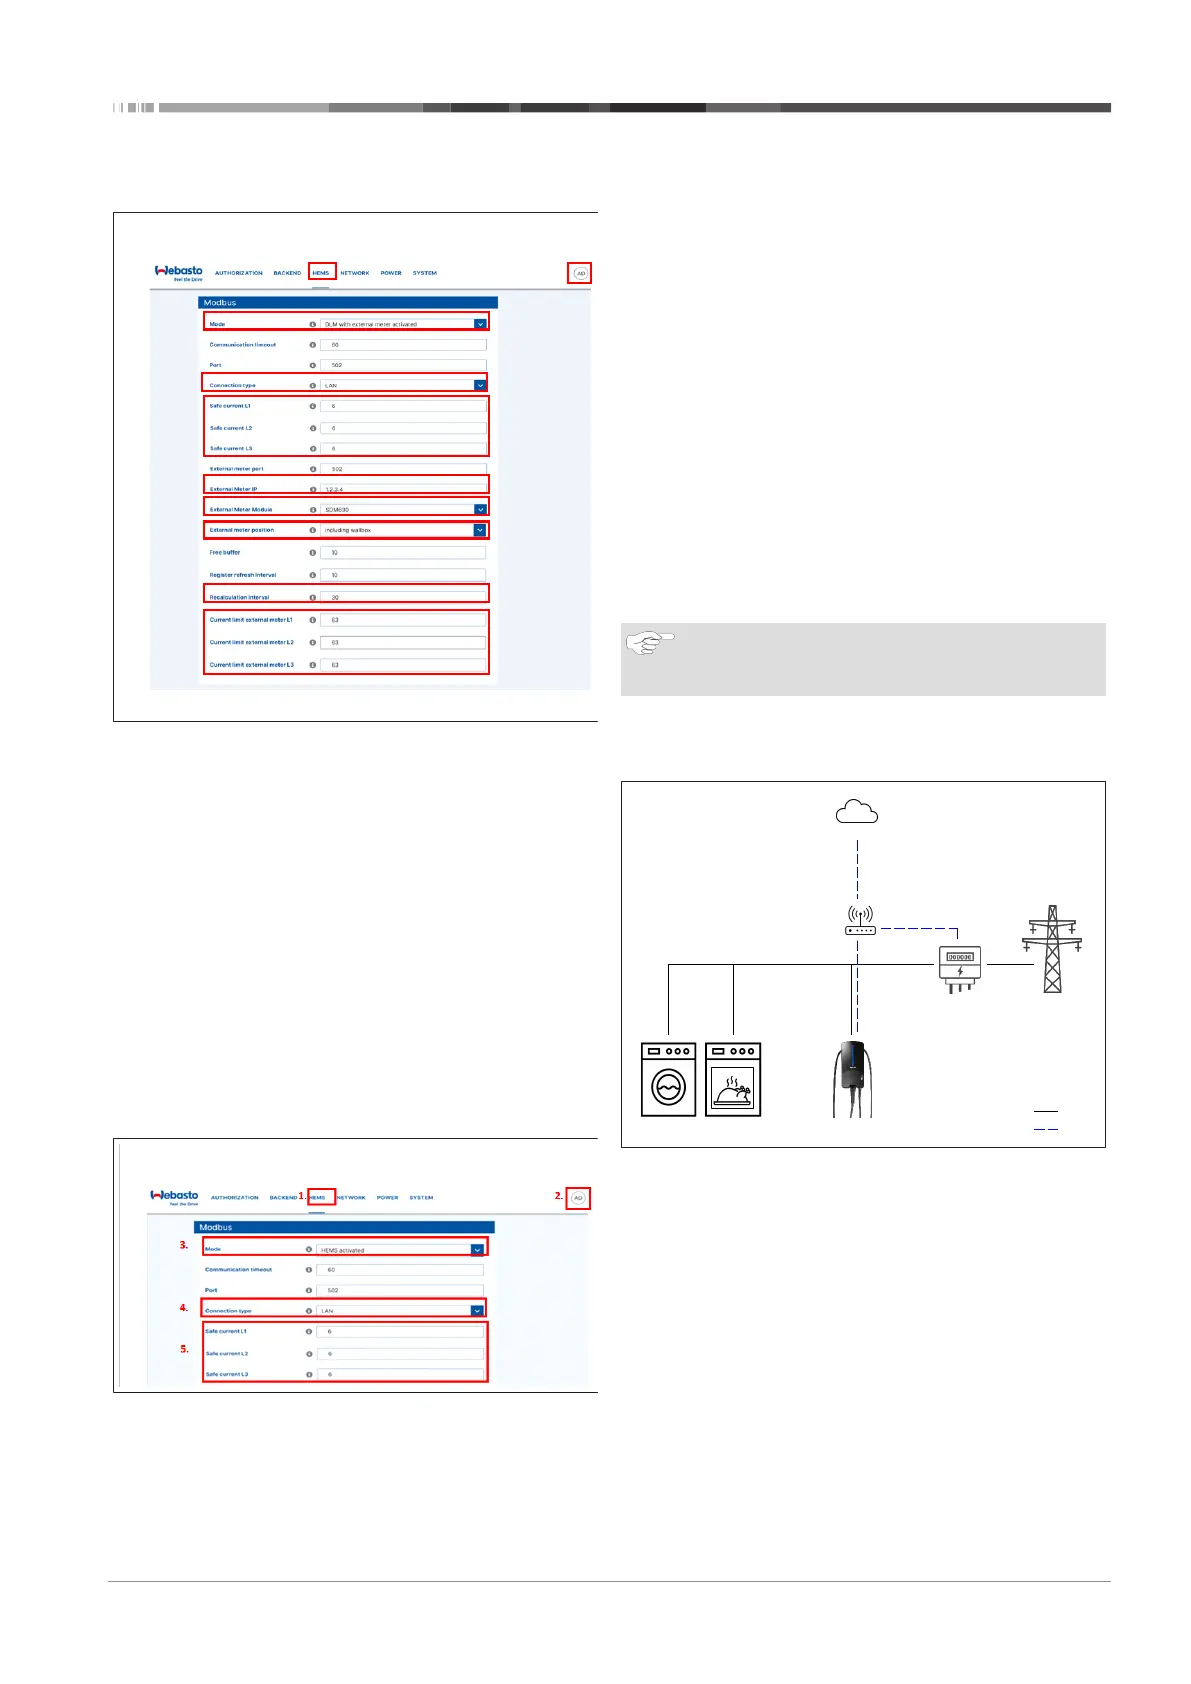
9. Under Recalculation interval enter 30.
10. Under Current limit external meter enter the maximum
current.
Fig.14 Settings in the WebUI for DLM
9.2 Settings in the WebUI for HEMS
The configuration of the HEMS in the WebUI will be described
in the following chapter. For more information see chapter11,
"Home Energy Management System (HEMS)" on page 14.
1. Select the HEMS tab in the WebUI.
2. Enable expert mode.
3. Under Mode select HEMS activated.
4. Under Connection type select LAN or WLAN.
5. Under Safe current L1/L2/L3 select the maximum possible
current when there is no connection to the smart meter.
6. Under Recalculation interval enter '30'.
7. Under Current limit external meter enter the maximum
current.
8. Then apply the settings in the EMS system.
Fig.15 Settings in the WebUI for HEMS
10 Dynamic Load Management
– Stand-alone mode (DLM)
The Webasto Next has a local, dynamic load management
stand-alone function. Here, one smart meter per Charging Sta-
tion is connected to the wall box via a router or DHCP switch.
This communication makes use of the Modbus TCP protocol via
the RJ45 port. A connection between the wall box and router
can also be made using WLAN, but this setup is not recommen-
ded when using a smart meter on account of the potentially un-
stable connection.
A list of compatible smart meters can be found at https://char-
ging.webasto.com/en-uk/products/webasto-next/.
The DLM communication protocol for the Webasto Next can be
enabled in the Setup app https://charging.webasto.com/en-
uk/products/webasto-next/ or via the integrated WebUI
chapter9, "WebUI" on page 12.
Alternatively, the Webasto Next can be connected to the smart
meter directly using an Ethernet cable. However, this type of
connection is not recommended as both devices required a
static IP address.
NOTE
Assign a static IP address to all Webasto Next wall
boxes using the settings on your Internet router.
There are two possible locations for the smart meter in the
house:
1. Smart meter before wall box (including wall box).
Power consumers Webasto Next
Router
(DSL or 4G)
Internet
Smart Meter
(compatible with EMS)
Grid
AC
Data
Fig.16
2. Smart meter after wall box (excluding wall box).