5INSTALLATION
W
EBASTO
S
CHOLASTIC
S
ERIES
5-8
2. Install the universal fuel standpipe and 3/8” check valve. Check valve directional indication mark (arrow or
symbol) must point in direction of fuel source (fuel tank).
- use 1/4” or 1/2” spare port on fuel tank and install fuel standpipe securely in fuel tank, use pipe thread sealant
on all pipe threads.
3. Route and secure fuel line from heater to fuel tank. Do not route fuel line over frame rails, always route through
or under the frame rail. Use grommets to protect fuel line whenever routed through holes.
4. Connect fuel line to fuel standpipe using 6 mm (1/4”) fuel hose meeting SAE 30RI specifications.
CAUTION
On School Bus applications, fuel lines must not cross over top of the vehicle frame rails. Check local and State
codes and regulations for exceptions.
CAUTION
Fuel lines must be secured every 30 cm (12 inches) or less and kept clear of hot exhaust components and moving
parts (driveshaft, wheels, etc.).
NOTE:
Use supplied hose clamps to secure fuel line connections.
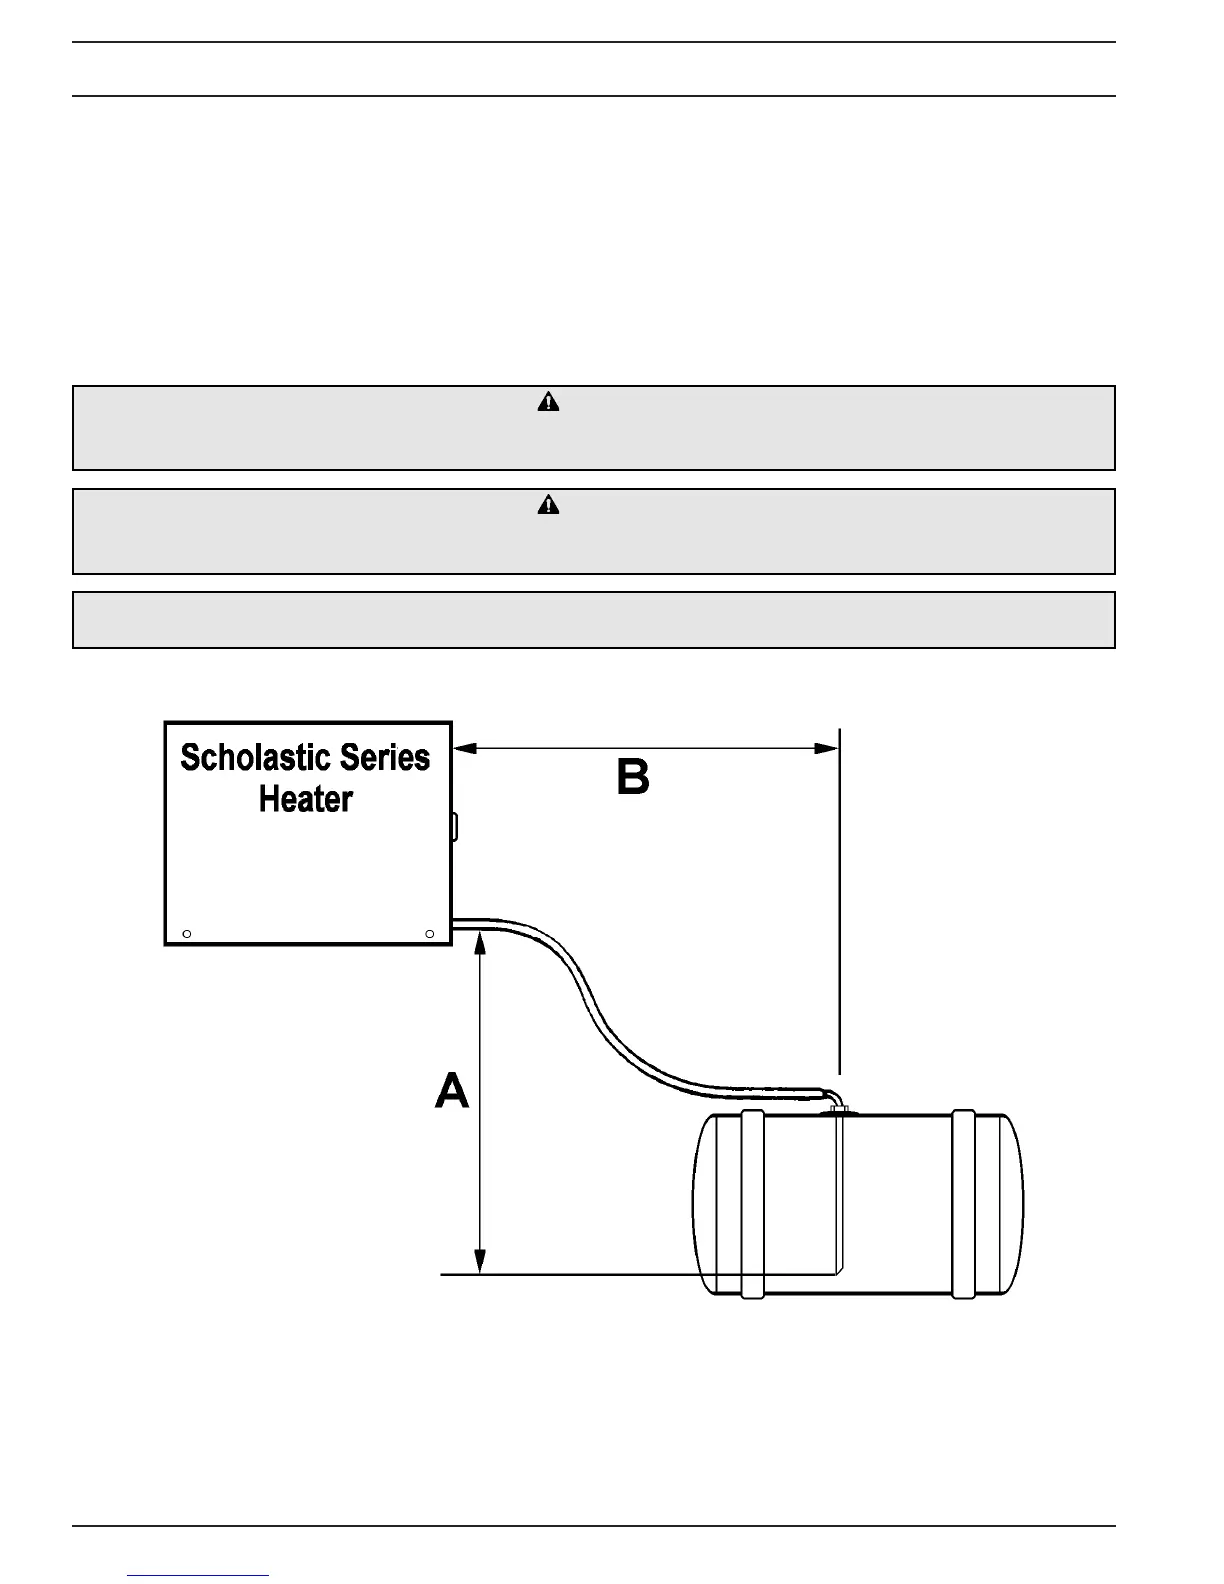
Fig. 5-8: Fuel Line Parameters
A = Suction height 2.0 m (6’6”) maximum
A+B = Suction length 10 m (33’) maximum
 Loading...