6 | Installation and electrical connection
18 / 37 5111967A OI-II Webasto Unite
– in the ON position to enable the web configuration in-
terface.
4. Close the charging station’s front cover.
5. Switch on the charging station again.
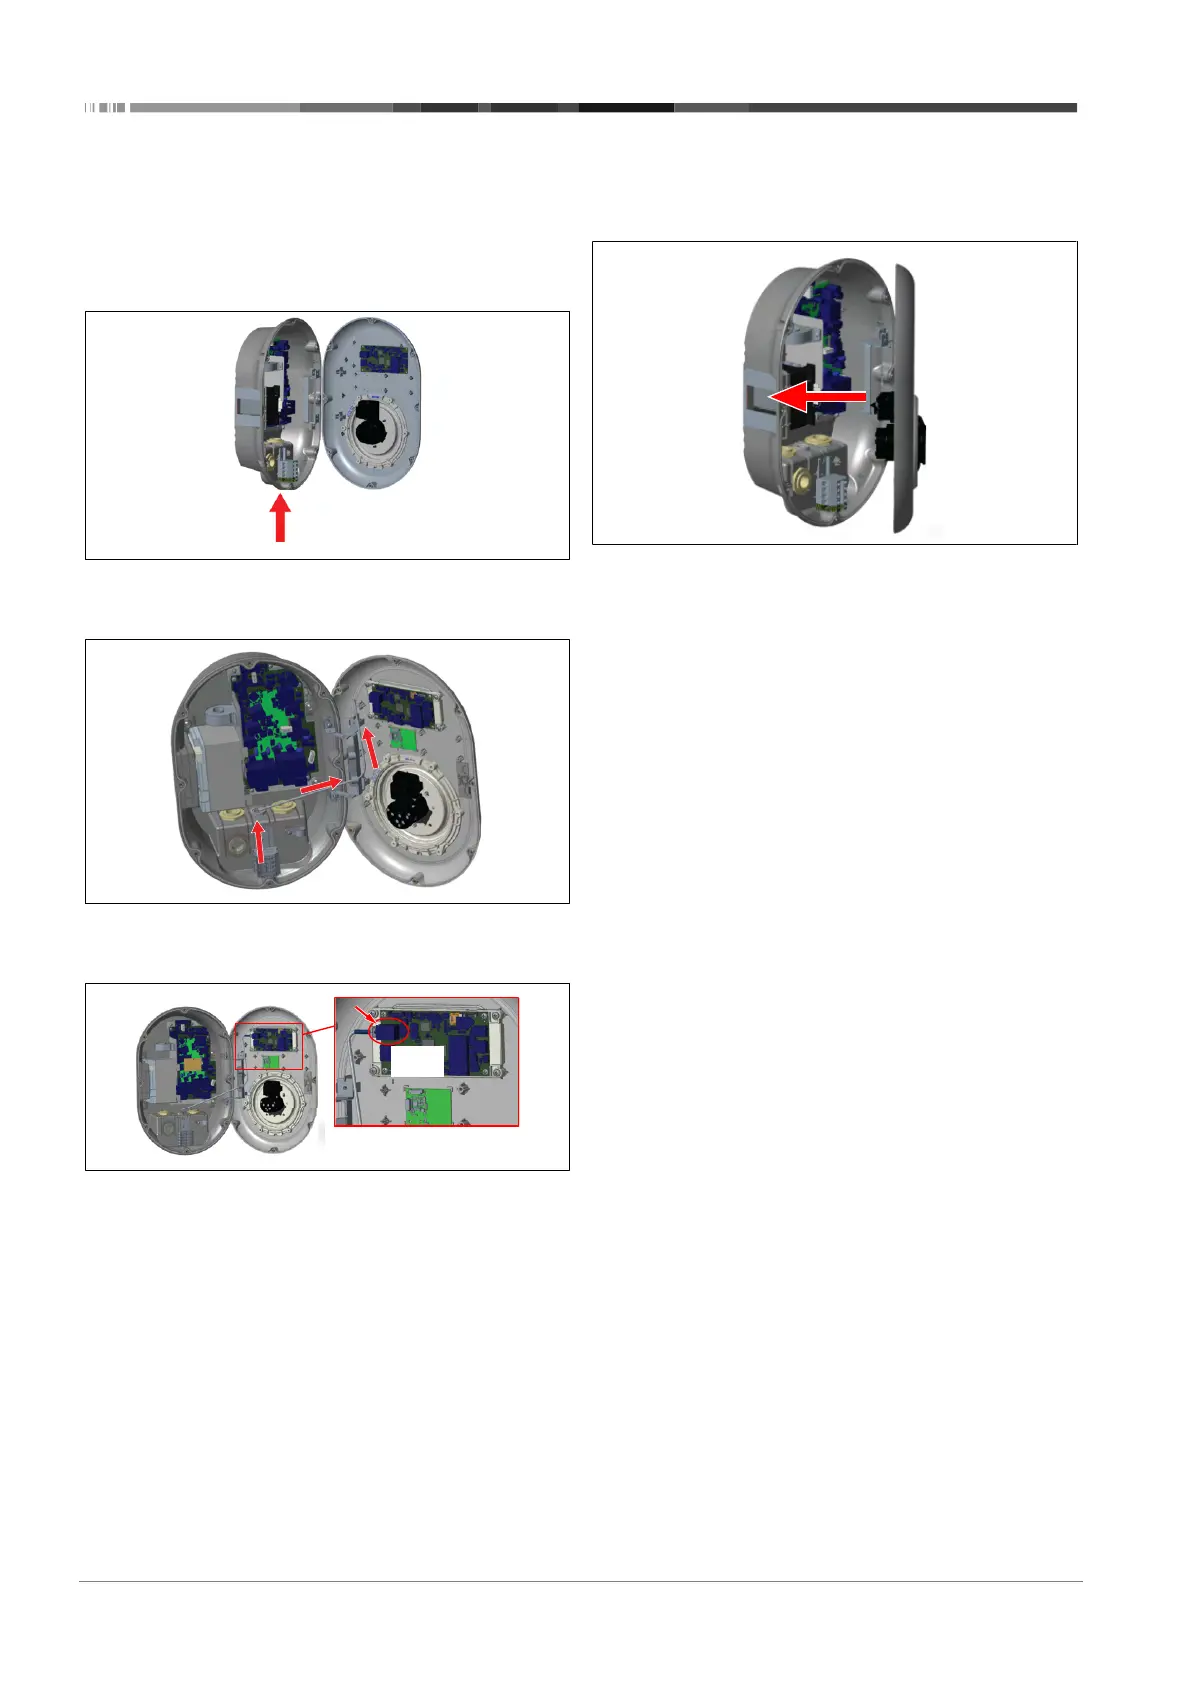
6.14 Configuring an OCPP connection
6.14.1 Connecting OCPP via Ethernet
Fig.45
1. Feed the Ethernet cable through the cable gland as shown
above.
Fig.46
2. Pull the Ethernet cable through the cable clamps as shown
by the arrows above.
Fig.47
3. Insert the RJ45 connector into the socket as shown in fig-
ure below.
6.15 Final step
After completing all relevant installation and configuration steps
and before powering up the charging station, you must
close the front cover.
Fig.48
1. Close the charging station cover.
2. Mount all 8 cover screws (which were removed at the be-
ginning of the installation).
– Tighten all cover screws, using a Torx T20 Security L-
wrench or a right-angle screwdriver adapter with a Torx
T20 Security bit.