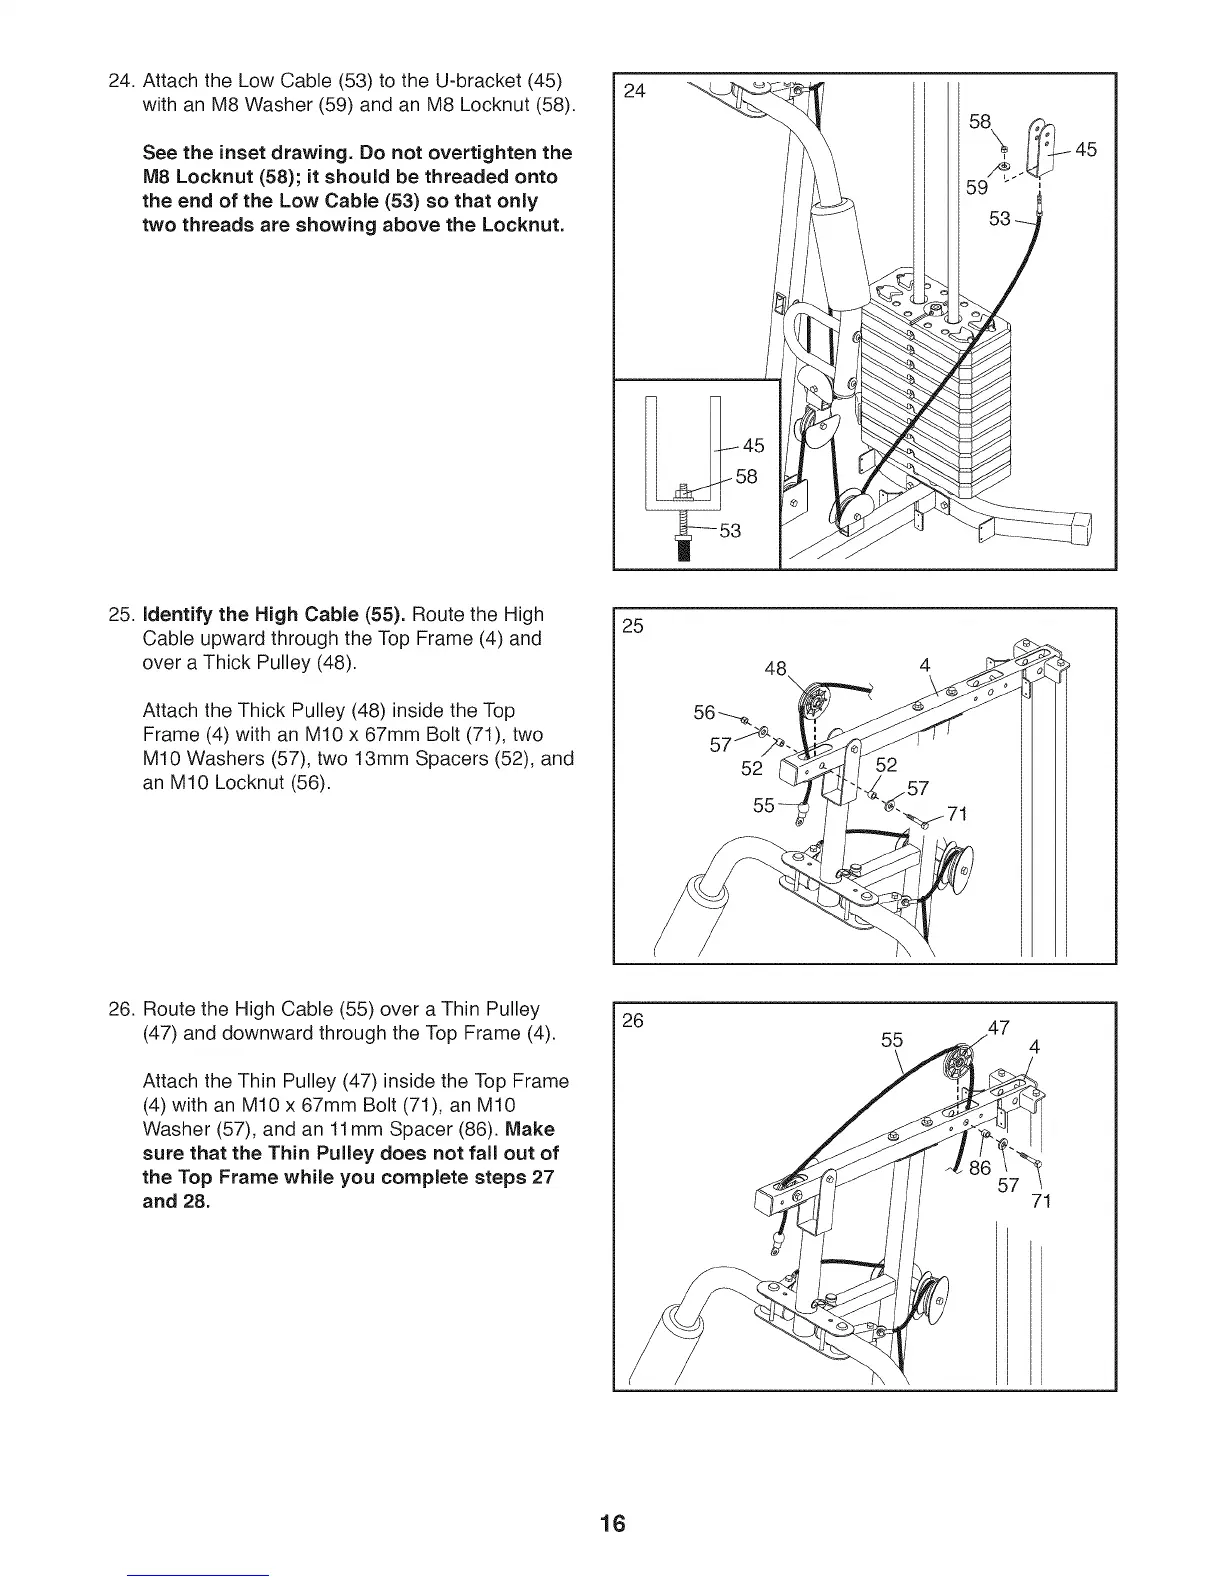
24. Attach the Low Cable (53) to the U-bracket (45)
with an M8 Washer (59) and an M8 Locknut (58).
See the inset drawing. Do not overtighten the
M8 Locknut (58); it should be threaded onto
the end of the Low Cable (53) so that only
two threads are showing above the Locknut.
24
45
58
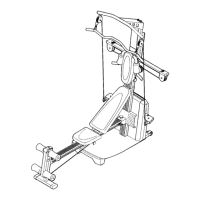
25. identify the High Cable (55). Route the High
Cable upward through the Top Frame (4) and
over a Thick Pulley (48).
Attach the Thick Pulley (48) inside the Top
Frame (4) with an M10 x 67mm Bolt (71), two
M10 Washers (57), two 13mm Spacers (52), and
an M10 Locknut (56).
25
48
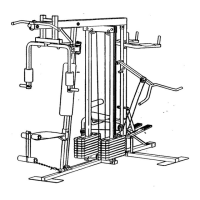
26. Route the High Cable (55) over a Thin Pulley
(47) and downward through the Top Frame (4).
Attach the Thin Pulley (47) inside the Top Frame
(4) with an M10 x 67mm Bolt (71), an M10
Washer (57), and an 11mm Spacer (86). Make
sure that the Thin Pulley does not fall out of
the Top Frame while you complete steps 27
and 28.
26
55
47
57
4
71
16