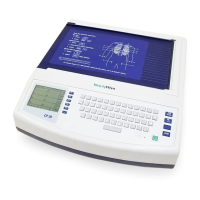
CP 20_________________________________________________________________Section 4
Use (F1) to navigate down the Directory list and Shift (F1) to move up the list. Similarly, use (F2) to
page down and Shift (F2) to page up through the directory. To quickly select a patient name, use the
keyboard to enter the first letter of the last name. Once the desired name is highlighted, press Selec (F3)
and the patient ID screen will return with all demographic fields populated. Return to Real-Time ECG
View by selecting Done (F6).
When time is of the essence or if patient demographics are not available, ID information can be added to
the ECG after it has been acquired. Acquiring an emergency or unidentified ECG is explained below.
ECG Acquisition, Printing, Storage
Acquisition
When a patient is connected to the electrocardiograph, the CP 20 is continuously collecting and processing
the ECG data; therefore, you should first instruct the patient to relax in a recumbent position to ensure that
the ECG is free from noise and artifact due to patient activity before you press the Auto ECG or RHY key.
To acquire an emergency ECG or unidentified ECG for a new patient press the Auto ECG key.
The Real-Time ECG View is replaced with the patient ID menu. Select Done (F6) and the ECG is
acquired. “Collecting 10 seconds of data” is displayed on the top of the LCD and “captured, analyzed,
formatted” is displayed on the bottom of the LCD. The Real-Time ECG View is then replaced with the
Acquired ECG View. Select ID (F1) to enter patient demographics.
When workflow permits patient demographic entry prior to acquisition, connect the patient to the CP 20
and enter the patient identification information as explained above. After you complete the last data entry
field select Done (F6) to return to the Real-Time ECG View.
Examine the display for artifact (noise), or baseline drift. Re-prep and replace electrodes if necessary to
obtain satisfactory waveforms. (See Patient Preparation, in Section 2). If a lead fail condition exists
square waves appear on the display for that lead and the lead in fault displays in the upper-left corner of the
screen (one at a time). This is to alert the operator of a lead fail condition. The screen display "LEAD V2
OFF" identifies a lead fail V2 chest lead. When the problem is corrected, the CP 20 waits for 10 seconds of
good data before analyzing the ECG. Please refer to the following troubleshooting guide based on
Einthoven’s Triangle:
Artifact
Check Electrode
Lead II and III artifact
Poor LL electrode
Lead I and II artifact
Poor RA electrode
Lead I and III artifact
Poor LA electrode
V Leads
Re-prep site &
replace electrode
Finally, select the Auto ECG key
. After the ECG is acquired, the Real-Time ECG View is then
replaced with the Acquired ECG View.
4-5
 Loading...