10
ASSEMBLY AND ADJUSTMENTS
SETTING UP THE TRACK
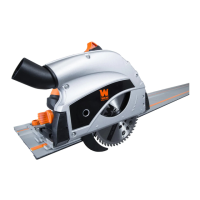
1. Using the track adapters, link together enough track to account for the entire workpiece. To do so, insert the
track adapters into the inner grooves of each rail. Once the tracks have been connected together, flip the track
over and check that the adapter is split evenly between the two tracks. Tighten the adapter’s set screws in place
using a hex wrench.
2. Align the rail track along the workpiece, the right-hand (flat) side of the track being where the actual cut will oc-
cur. Clamp down the track to the work surface until the track is secure.
3. Place the saw onto the rail, making sure the blade will correctly contact the workpiece as intended.
4. Adjust the rail adjustment knobs to correctly line up the rail’s edge and the saw’s cutting path with one another.
NOTE: Always maintain the correct blade-depth setting. All cuts should not exceed 1/8 in. below the material
being cut, as excessive blade depth increases the chance of saw kickback and contact with hidden surfaces beneath
the workpiece.
PREPARING THE TRACK
The rubber strip running along the edge of the track has been shipped in its uncut original state. This rubber strip
has two main applications. First, it acts as a straightedge, allowing users to visualize the exact location of the cut.
Secondly, it helps prevent dust from flying up during sawing operations. Because of the precision required for
these two applications, users must cut this rubber strip themselves before using the track saw on any work pieces.
This ensures every track perfectly complements a particular track saw.
The following instructions will help you to properly prepare your track for maximum efficiency as both a dust
control device and as a guiding straightedge. Refer to page 12 for information about starting and stopping the saw.
1. Set the depth stop to 1/2 inch, limiting the blade’s maximum cutting depth.
2. Clamp the track into place so that you can cut the full length of the track in one go.
3. Position the saw onto the end of the track with the back two-thirds of the saw hanging off. The goal should be to
maximize the amount of the saw’s base that is on the track while still being able to plunge the full 1/2 inch down-
wards without yet contacting the rubber strip with the blade.
4. Start the saw and then plunge downwards, making sure to not yet contact the rubber strip. Once the saw has
reached full speed and is plunged the full 1/2 inch, progress forward along the track so that the blade makes con-
tact with the rubber strip.
5. Cut the rubber strip along the full length of the track. Once you have made it all the way down the track, the
strip should be precision cut to meet the specifications of your particular track saw.
Replacement rubber strips can be ordered at wenproducts.com under part number 36027-001.

 Loading...