14
3. Press the safety release switch to allow the saw to plunge downwards, not allowing the blade to actually contact
the work piece.
4. Power the saw on by pulling the trigger switch, allowing it to reach full speed.
5. Once the blade has reached its maximum RPM, lower the blade down into the workpiece until the set cutting
depth has been reached. Once the saw cannot be lowered anymore, move the saw along the desired cut in an even
and steady motion.
WARNING: Always cut in a forward direction when pocket cutting. Cutting in the reverse direction
could cause the saw to climb up on the work piece and back toward you.
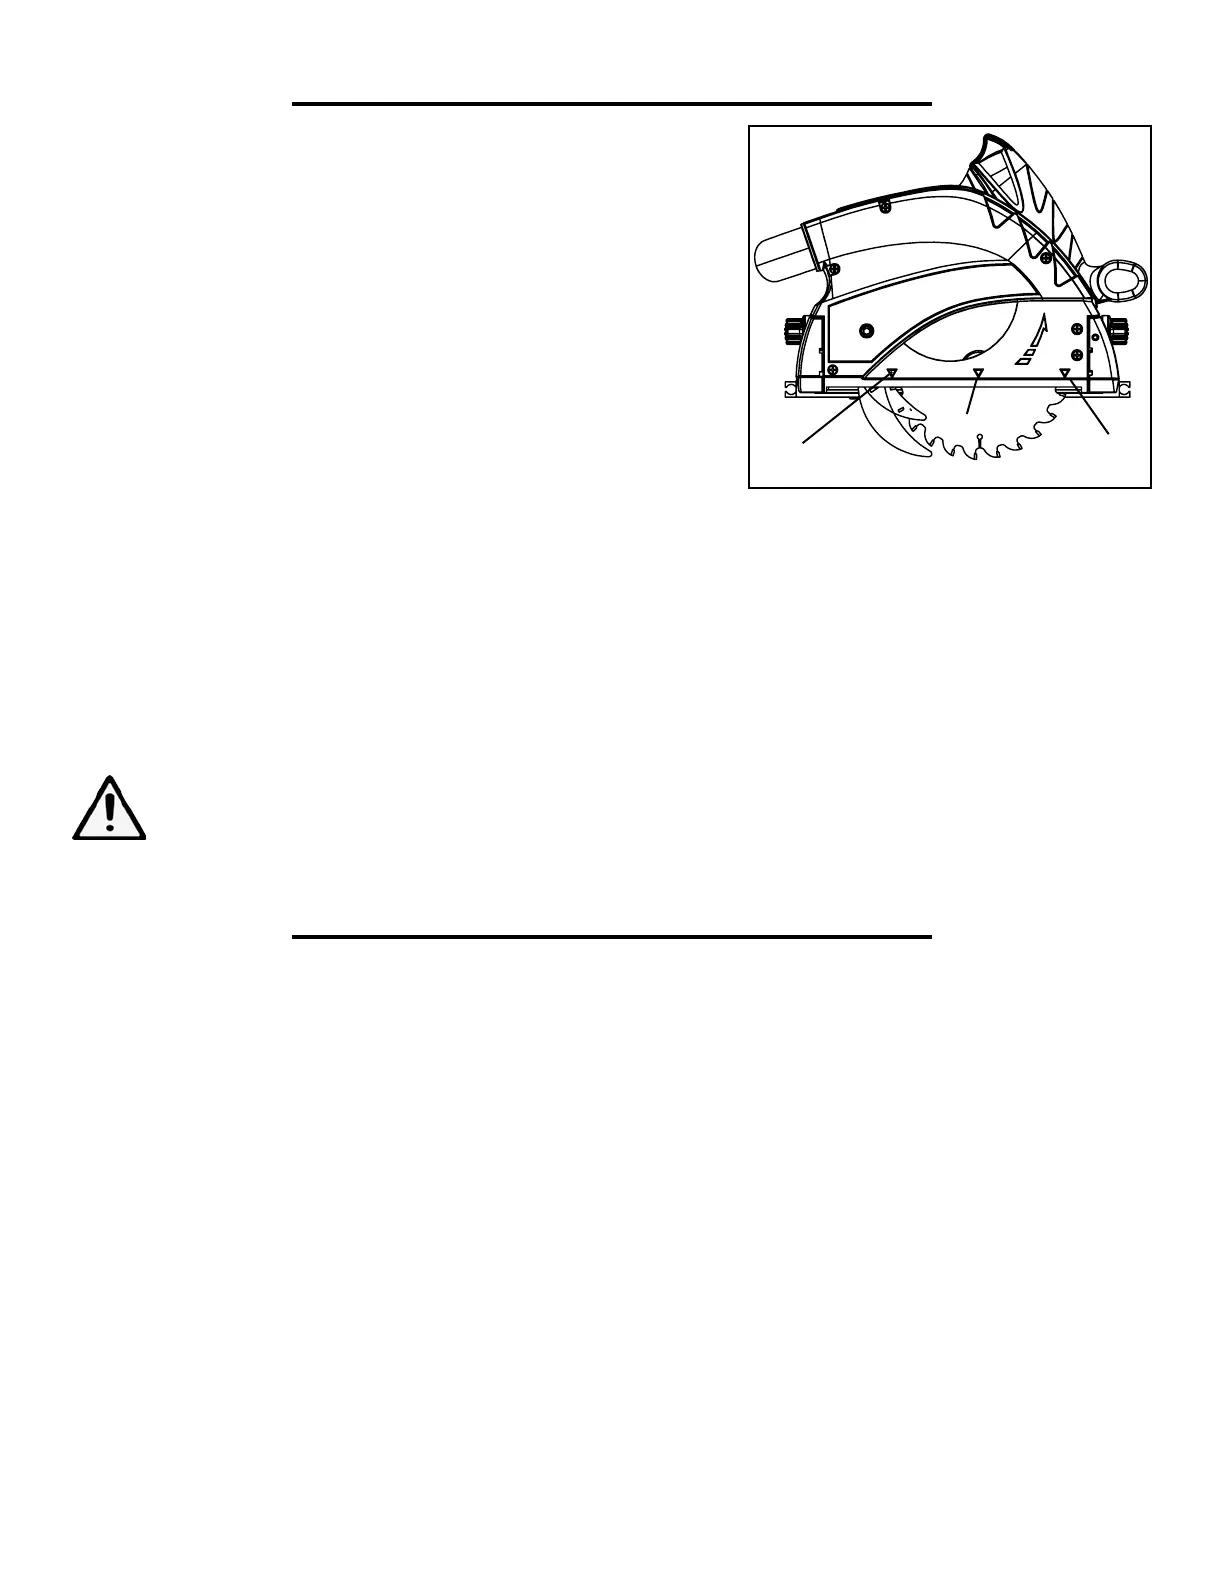
PLUNGE CUTS
A plunge cut is a cut that must be made inside the area of the work-
piece rather than starting from an outside edge and working inward.
Adjust the cutting depth and the riving knife accordingly.
1. Adjust the bevel setting to zero.
2. Set the blade to the correct blade depth setting and position it
where you would like your cut to occur. You will find three arrows
along the side of the saw. The rear arrow (Fig. A - 1) and the front
arrow (Fig. A - 3) show the maximum points that the saw’s blade will
reach while the center arrow (Fig. A - 2) marks the location of the
blade’s center.
OPERATION
MAINTENANCE
1
3
2
CHANGING THE BLADE
NOTE: Always make sure your replacement blade has a correctly matching arbor that can handle speeds of at
least 6000 RPM.
1. Unplug your track saw.
2. Press the plunge release and lower the blade down low enough to where the arbor and arbor bolt can be seen
through the window on the right-hand side of the machine.
3. Press and hold the spindle lock found on the right-hand side of the front handle. This will prevent the blade
from rotating.
4. Using the provided hex wrench, unscrew the arbor bolt. Carefully remove the loosened bolt and washer from
the arbor flange and set them to the side.
5. Swap the old blade out with the new one. Once the new blade has been properly mounted on the arbor flange,
replace the arbor washer and the arbor bolt. Engage the spindle lock and tighten the bolt into place with the hex
wrench.

 Loading...