ASSEMBLY & ADJUSTMENTS
CHANGING THE BAND SAW BLADE
1. Remove the M6x24 hex bolt, spring washer, flat washer and wing
nut from the work table assembly.
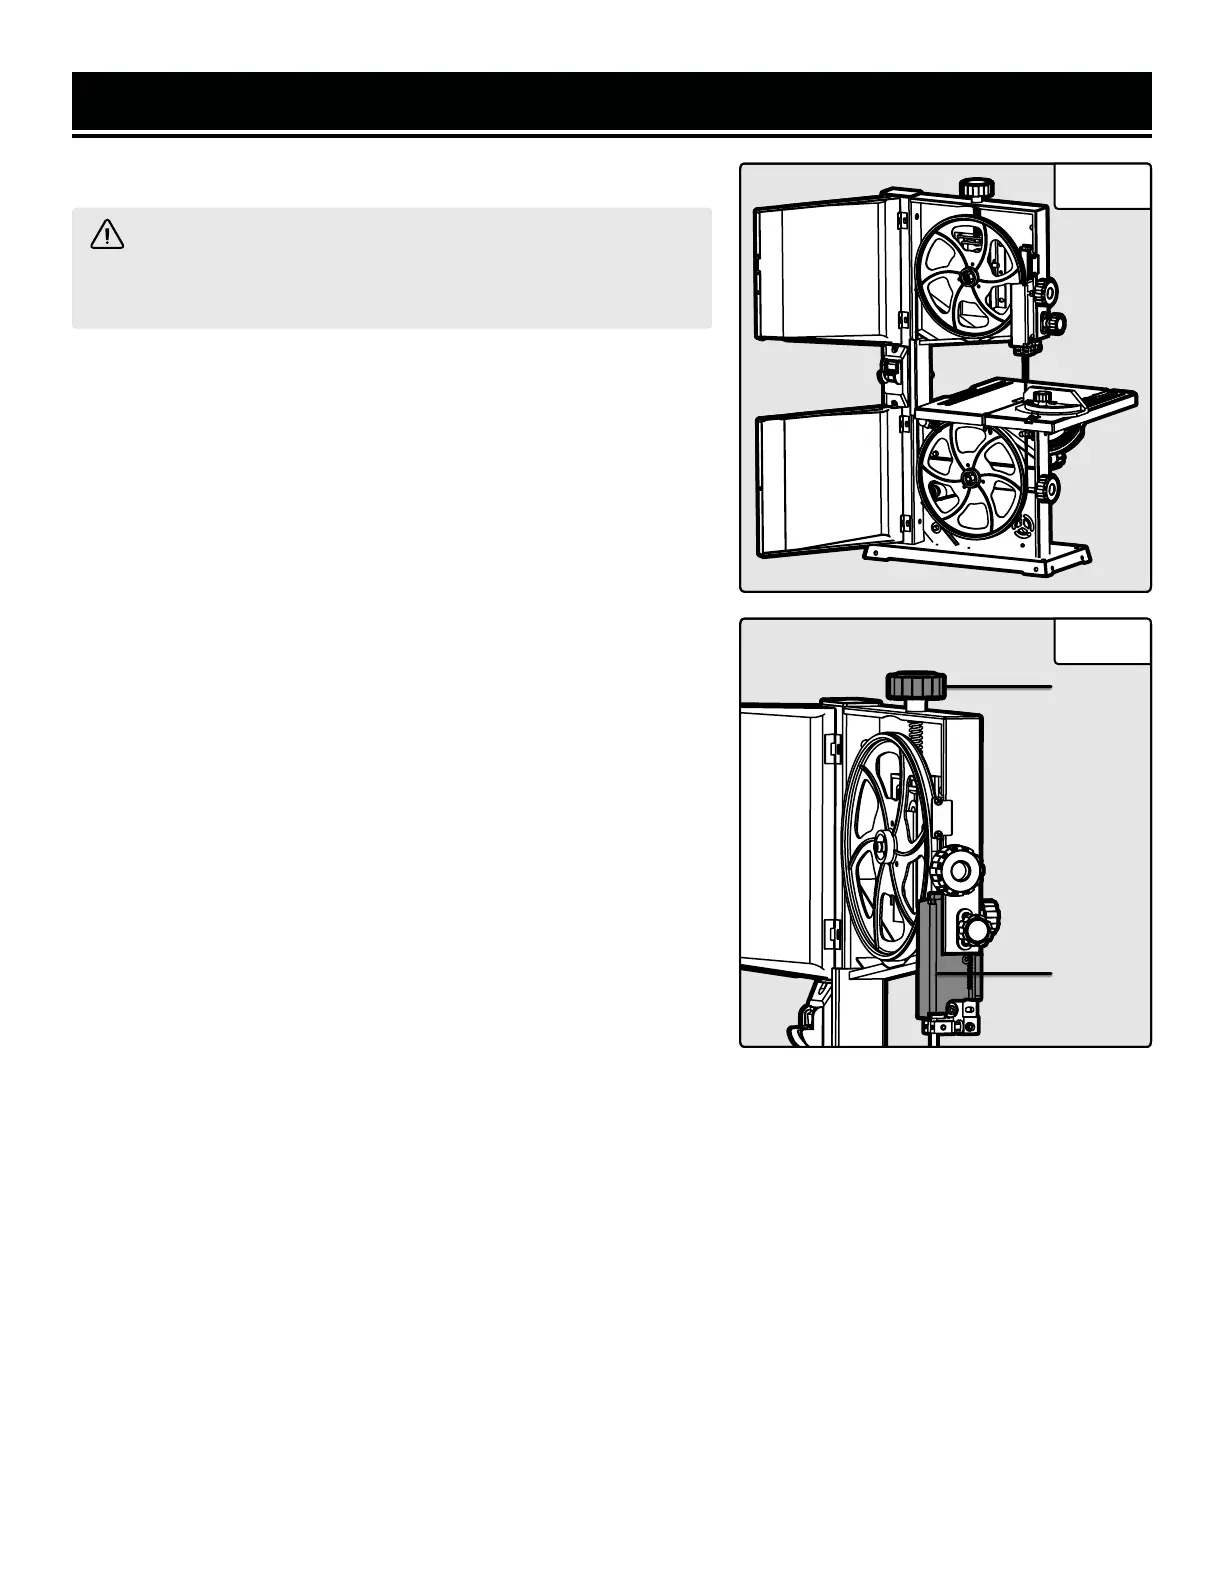
2. Open the upper and lower blade covers (Fig. 13).
3. Set the upper blade guard to its lowest position, minimizing the
space between the bottom of the blade guard and the table assembly.
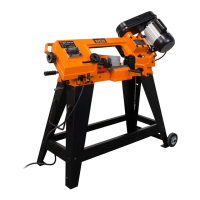
4. Open the blade guard cover (Fig. 14 - 1) by pinching the ridged
surface on the bottom left of the cover and pulling it outwards.
5. Loosen the tension knob (Fig. 14 - 2) until you can remove the
blade from the machine.
NOTE: Now is a good time to clean out your band saw to ensure the
best performance. Clear out any sawdust, wood chips, etc. with a
shop vacuum. Ensure that the wheels and tires are free of sawdust
and chips. This promotes good wheel balance and good blade track-
ing.
6. Fit the new blade through the guiding slots on both the left and
right sides of the machine onto the upper and lower rubber tires.
Position the blade in the center of the rubber tires. Ensure that the
blade teeth are pointing down towards the table.
7. Turn the blade tensioning knob clockwise to put the new blade
under tension.
8. Close the upper blade guide assembly cover by pushing in until it
clicks in place.
WARNING! Saw blades can be dangerous. Wear work gloves
while handling the blade or when moving new blades from the
packaging.
9. Replace the M6x24 hex bolt, spring washer, flat washer and wing nut onto the work table assembly.
10. After every blade change, make sure to follow the instructions on page 10 and 11 to adjust the tracking of the
blade, the blade tension, and the upper and lower blade guides. Proper tuning of your band saw is necessary to
ensure optimum performance of the machine.
11. After all adjustments and tuning are complete, close the upper and lower wheel covers.
We also made a video that takes you through the steps of installing and adjusting a bandsaw blade.
Check it out at: http://bit.ly/WENbandsaw
Fig. 13
Fig. 14
2
1