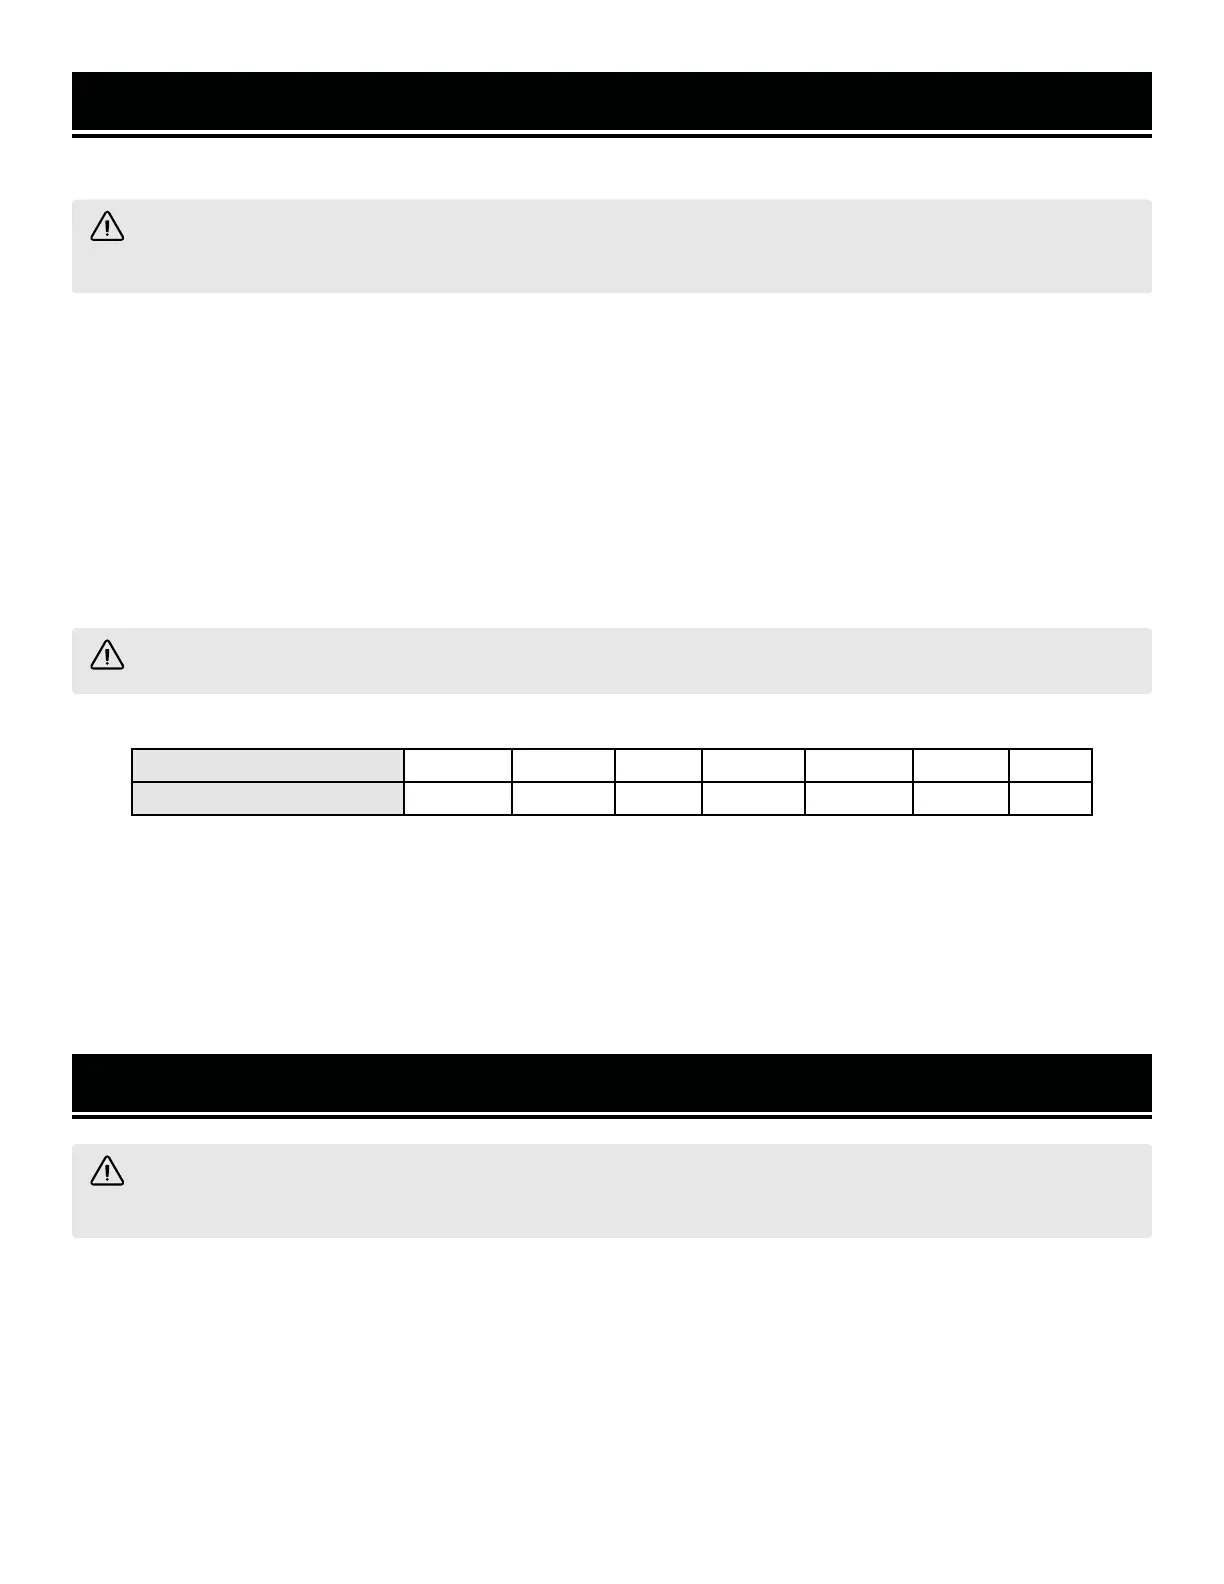
BLADE WIDTH 1/8 in. 3/16 in. 1/4 in. 3/8 in. 1/2 in. 3/4 in. 1 in.
MINIMUM RADIUS 3/16 in. 5/16 in. 5/8 in. 1-1/2 in. 2-1/2 in. 5-1/2 in. 7 in.
OPERATION
GENERAL CUTTING
NOTE: Before cutting the actual workpiece, it’s best to use a scrap piece of lumber to check the settings and to get
the feel of operating the band saw.
1. Your band saw should now have been properly set up and tuned according to the instructions on page 9 - 11.
Position the workpiece on the table and adjust the upper blade guard so that it barely clears the workpiece. The
blade guard should be no more than 1/8 of an inch from the upper surface of the workpiece. Do not turn the power
on until all adjustments have been made.
2. Use the band saw for straight line operations such as cross-cutting, ripping, miter cutting, beveling, compound
cutting, and resawing. To avoid twisting the blade, do not turn sharp corners; instead, saw around corners. A band
saw is not capable of doing intricate inside cutting as can be done with a scroll saw. Refer to the “Circle Cutting
Guide for the minimum radius you can cut based on the width of the blade installed on your band saw.
WARNING! Operating a band saw involves a certain amount of risk. Make sure to read all the instructions
and plan your work before cutting a workpiece. Wear safety goggles to protect your eyes from possible injury.
WARNING! Do not use this band saw to cut ferrous metals.
CIRCLE CUTTING GUIDE
3. Slowly feed the workpiece into the saw blade. Light contact permits easier cutting and prevents unwanted friction
and heating of the blade. Steadily move the workpiece through the blade without forcing it against the blade. Never
position your hand in line with the cut. Always keep your hand at a safe distance from the saw blade. Use a push
stick to assist cutting small workpieces.
4. When the cutting operation is complete, turn off the machine and wait for the blade to come to a complete stop
before leaving the work area.
MAINTENANCE
1. Clean off the pitch and dust which accumulates on the table, blade guides, and bearings.
2. Remove pitch and dust from the upper and lower wheels using a stiff brush. Do not use solvents.
3. Routinely remove the sawdust from the inside of the housing. Blow out the sawdust from the motor.
4. Apply a thin coat of automotive polish to the table top for a slick surface.
5. Regularly inspect the machine for any damaged or missing parts. Replace blades and the wheel tires when worn.
Replace the power cord immediately if it is worn, cut, or damaged in any way. Release tension on the blade if the
saw will not be used for longer than a week.
WARNING! For your own safety, turn the switch OFF and remove the plug from the electrical outlet before
performing maintenance or lubricating the band saw.