OPERATOR’S)MANUAL))
Page!12!)
!
!
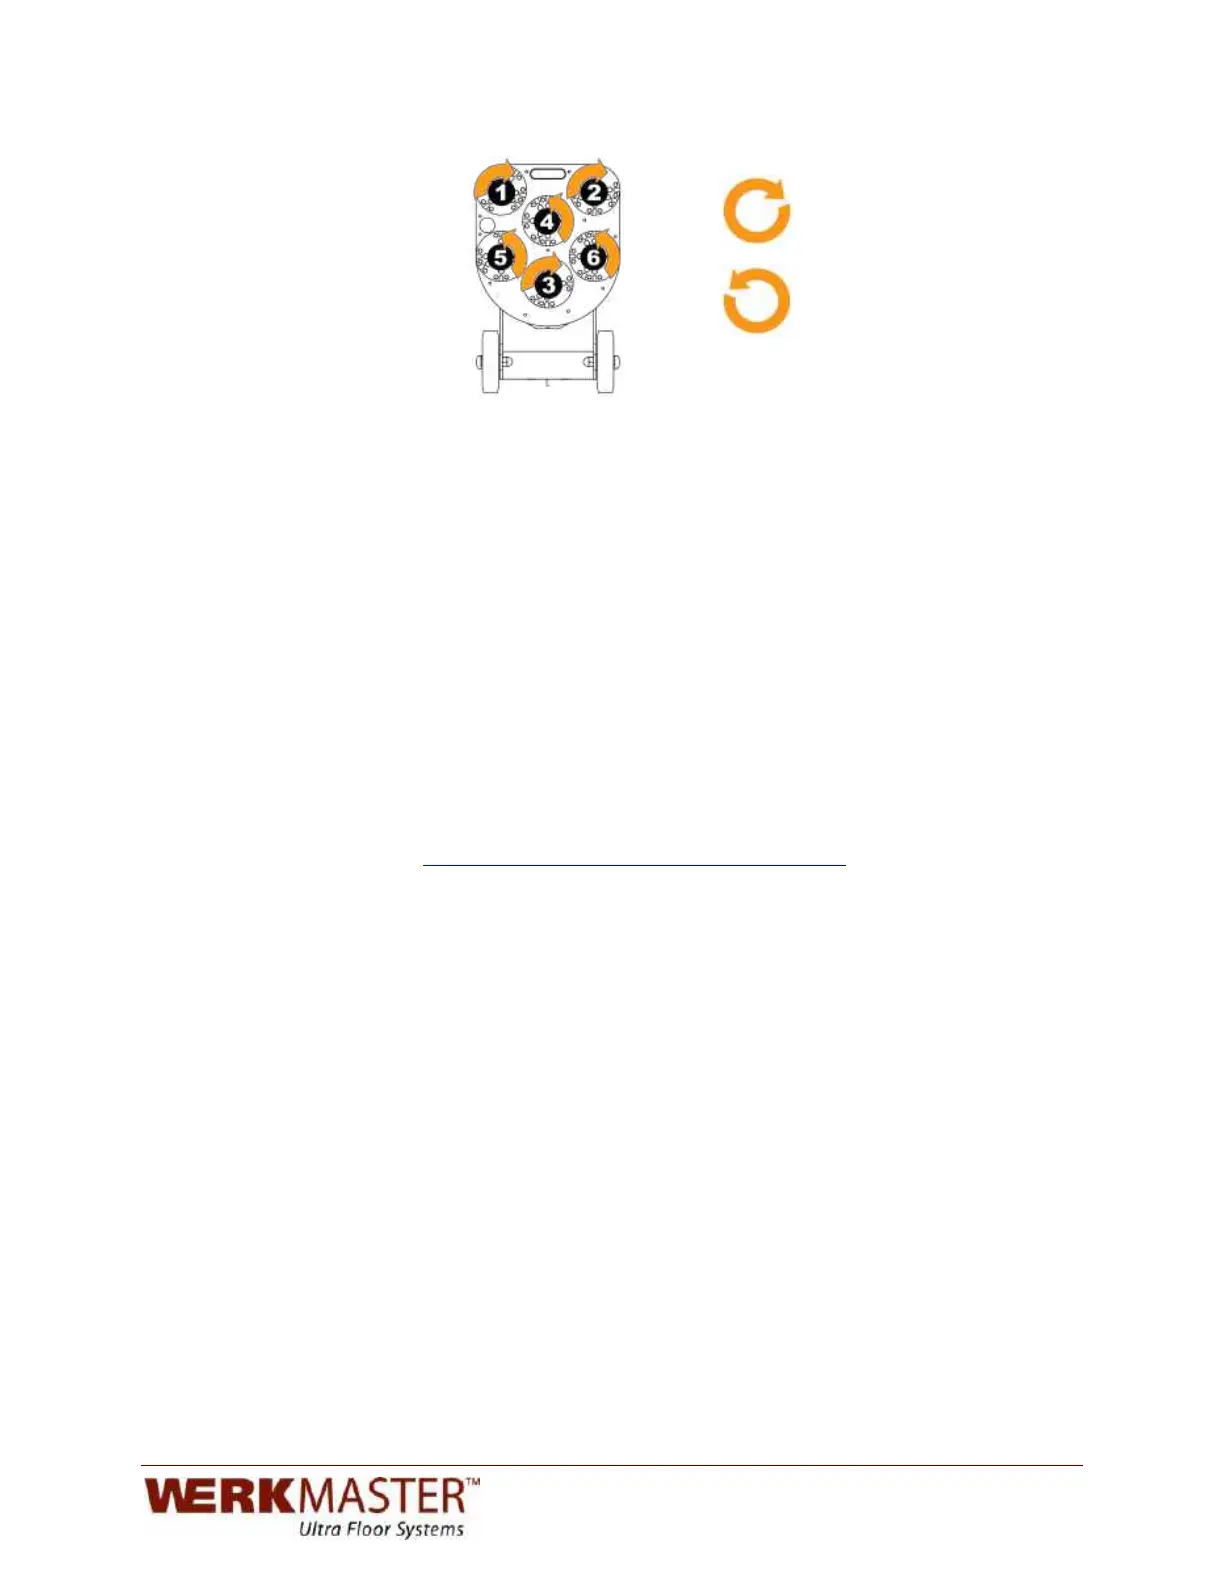
Discs 1, 2, and 3 rotate
clockwise CW
)
)
Discs 4, 5, and 6 rotate
counter-clockwise CCW
)
)
)
!!!!!!!!Bottom!of!WerkMaster!with!numbered!tooling!plates!and!clockwise!and!counterclockwise!labeling.!
!
!
To replace a broken shear pin:
1. Remove the Plug ‘N Go plate (D) (Fig 4) from the pad driver (F). Before
replacing the shear pin apply a generous amount of permanent red thread
locker (Loctite 266) on the screw and into the hole.
2. Hold the shear pin securely and firmly tighten the screw until the shear pin
cannot spin. Replace the Plug ‘N Go plate.
To replace a bent shear pin:
1. Remove the Plug ‘N Go plate (D). Remove the bent shear pin by hitting with a
hammer. Before replacing the shear pin apply a generous amount of
permanent red thread locker (Loctite 266) on the screw and into the hole;
tighten.
2. Hold the shear pin securely and firmly tighten the screw until the shear pin
cannot spin. Replace the Plug ‘N Go plate.
SEE: How To Series: Replacing a Shear Pin
at http://www.werkmaster.com/replacing-a-shear-pin/
 Loading...