Issue 2.0
4850 / 4860 Master Clock
Operating and Installation Instructions
12-2
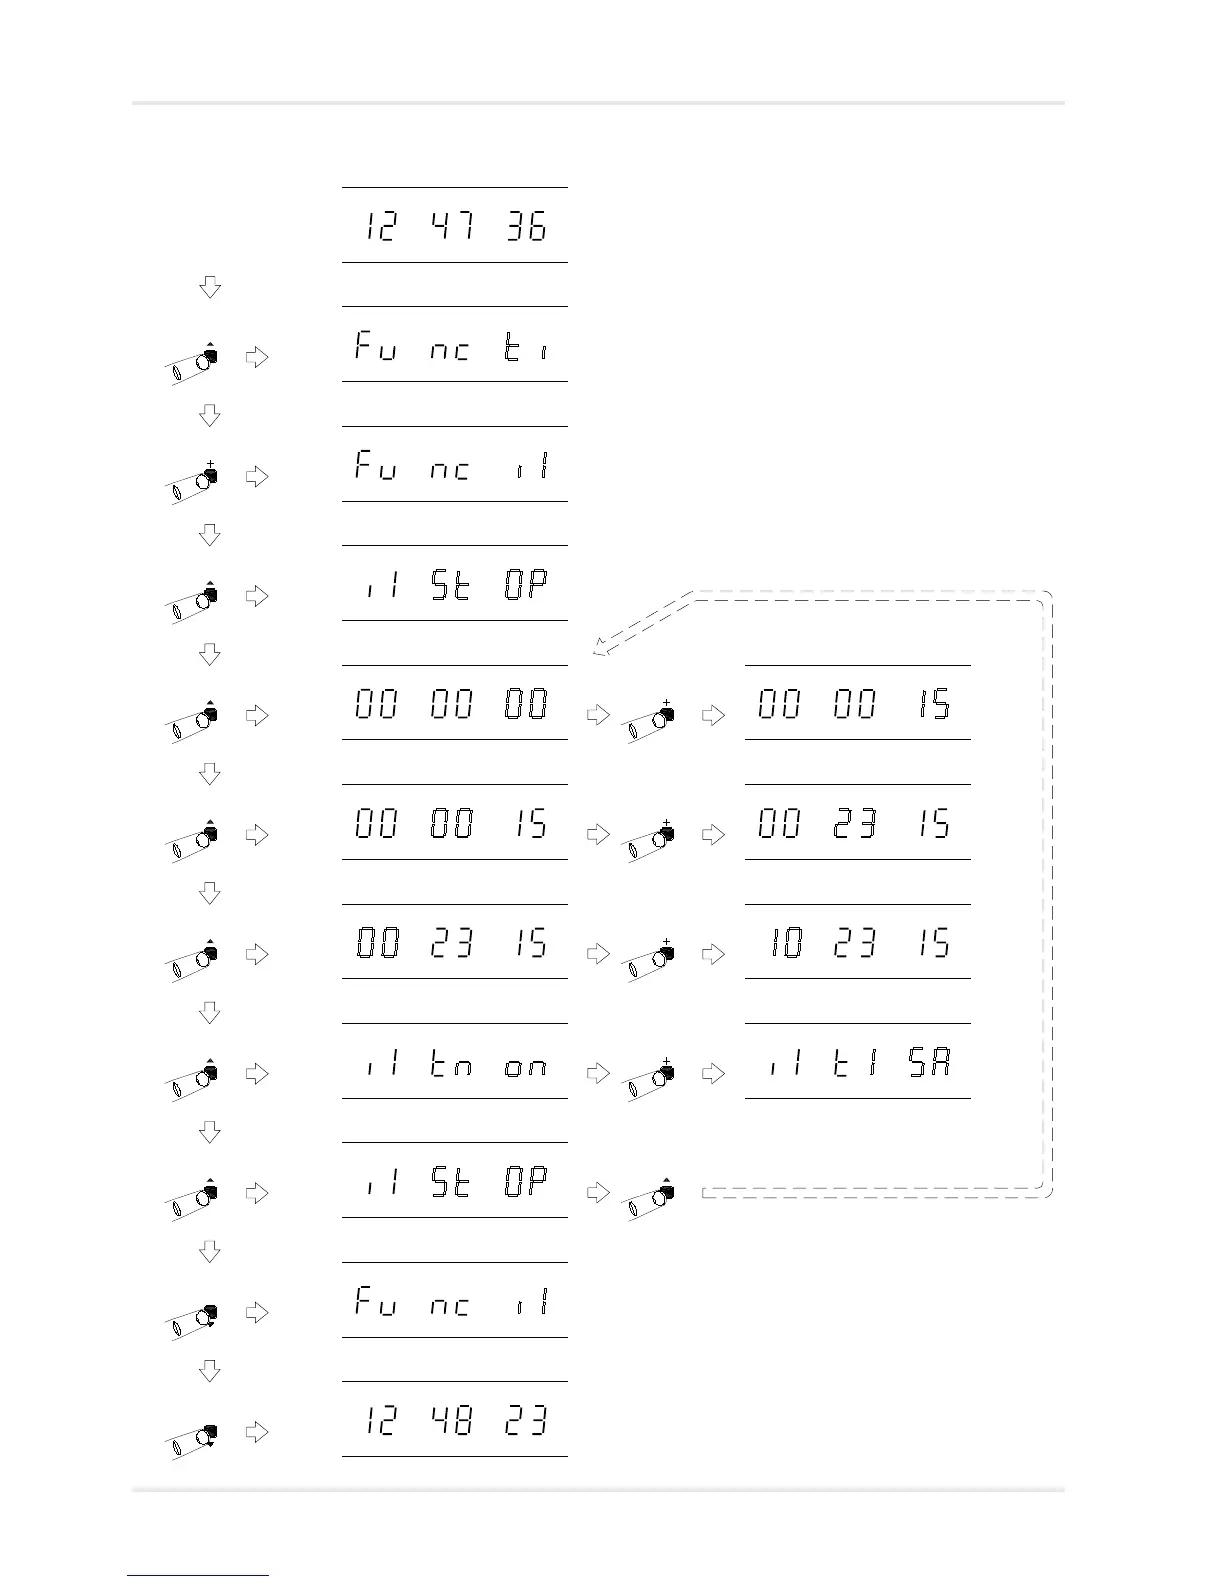
Normal time display
Function ‘Time Setting Mode’. Press ‘+’ eight times
to move to Impulse channel 1 setting mode.
Function ‘Impulse Channel 1 Setting
Mode’. Press ‘^’ to select.
Impulse Channel 1 setting mode, with
current operation status flashing.
Impulse Channel 1 setting mode, with
impulse time seconds count flashing.
Use ‘+’ and ‘-’ to program the channel 1
impulse time seconds count.
Impulse Channel 1 setting mode, with
impulse time minutes count flashing.
Use ‘+’ and ‘-’ to program the channel 1
impulse time minutes count.
Use ‘+’ and ‘-’ to program the channel 1
impulse time hours count.
Impulse Channel 1 setting mode, with
impulse time hours count flashing.
Impulse Channel 1 setting mode, with
impulse type flashing.
Use ‘+’ and ‘-’ to alter the channel 1
impulse output type. (Please refer to
table on page 12-1).
Normal time display
If your 4860 is
fitted with
EBU, S2 or S4
options, you
will need to
press the ‘+’
switch more
than 8 times.
Impulse Channel 1 setting mode. Press ‘^’ to amend the
settings or ‘v’ to exit.
Function ‘Impulse Channel 1 Setting
Mode’. Press ‘v’ to exit.
Impulse channel setup procedure
This procedure enables the master clock to know what time the
slave clocks are displaying and thus calculate the required
number of catch-up pulses. It also ensures that the correct
type of impulses are output. This procedure must be
performed for both channels (if used) on initial
commissioning.