Issue 2.0
4850 / 4860 Master Clock
Operating and Installation Instructions
2-4
4850 / 4860 Progamming
The 4850 / 4860 Master Clock has a user friendly interface
based on the use of four buttons.
The buttons are located to the right hand side of the display
and are labelled and .
The
and buttons are used to step between and save
mode settings whereas the
and buttons are used to
alter the values of settings.
On pressing the button the function mode is entered. By
pressing the and buttons the user can scroll through all
the available modes for set up of the 4850 / 4860.
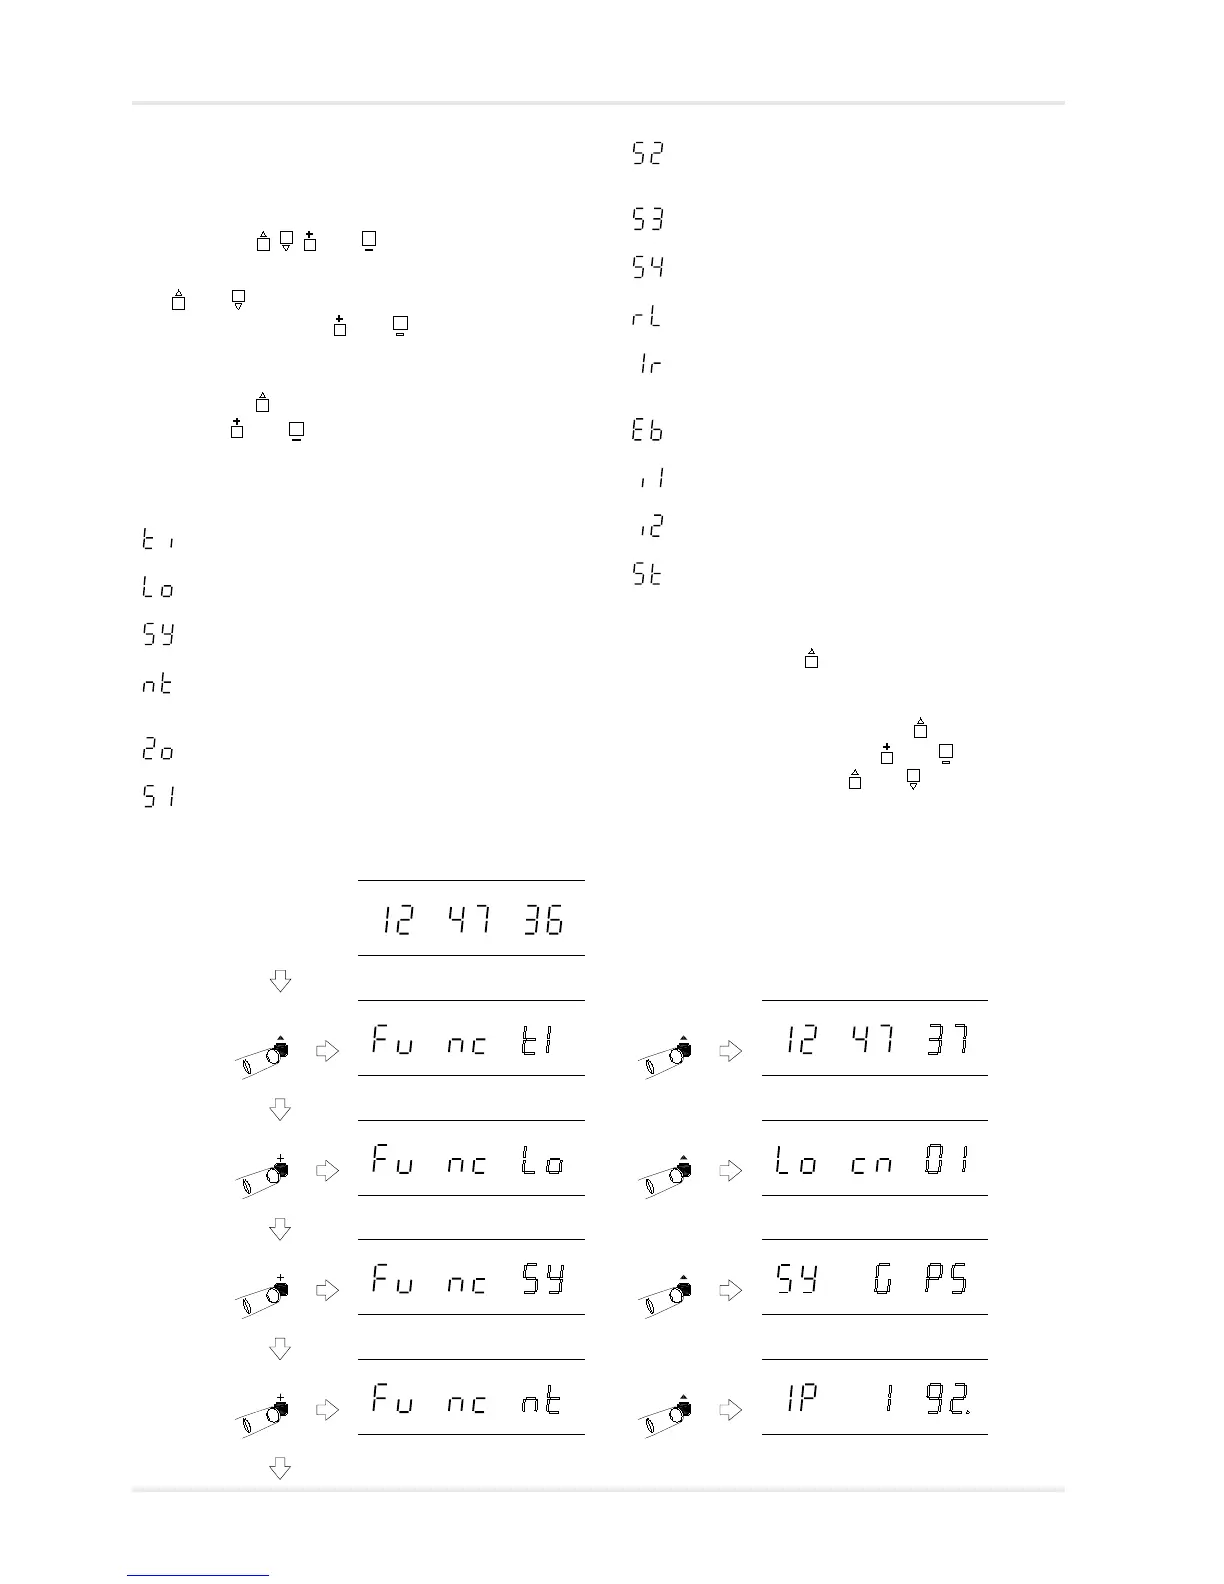
The modes will be displayed in the following order:
Time Setting Mode
Location Setting Mode
Synchronisation Setting Mode
Network Setting Mode (visible on all 4860 versions -
usable on 486xnet versions only)
Zone Setting Mode
S1 Serial Output Setting Mode
S2 Serial Output Setting mode (4860.S2 & .S4 versions
only)
S3 Serial Output Setting mode (4860.S4 versions only)
S4 Serial Output Setting mode (4860.S4 versions only)
Relay Setting Mode
IRIG Setting Mode (visible on all versions - usable on
4861 and 4850.x.I versions only)
EBU Setting Mode (4862/4862net versions only)
Impulse Channel 1 Setting mode (.IMP versions only)
Impulse Channel 2 Setting mode (.IMP versions only)
System Setting Mode
To select any of the modes whilst they are displayed in the
function mode press the button. This allows the user to
enter a specific mode and make any necessary changes to the
related settings.
To progress through the options use the button and to alter
the values for these options use the and buttons. On
completion of any changes the and buttons can be
used to save the settings and to either step forward or
backward through any other options before returning to the
normal time display.
Continued on page 2-5
Programming menus
Normal time display
Function ‘Time Setting Mode’.
‘^’ to select, ‘+’ or ‘-’ to change.
Function ‘Location Setting Mode’.
‘^’ to select, ‘+’ or ‘-’ to change.
Function ‘Synchronisation Mode’.
‘^’ to select, ‘+’ or ‘-’ to change.
Function ‘Network Setting Mode’.
‘^’ to select, ‘+’ or ‘-’ to change.
Time Setting Mode selected, with
seconds flashing. See page 2-6.
Location Setting Mode selected,
with zone flashing. See page 4-1.
Synchronisation Mode selected.
See page 5-1.
Network Setting Mode selected, with
IP address flashing. See page 9-1.
‘Network Setting
Mode’ will appear
on all 4860
versions, but only
be usable on net
versions.