Step F - Connect Tubes (cont.)
16
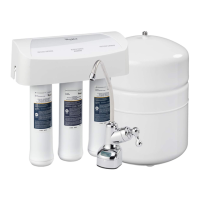
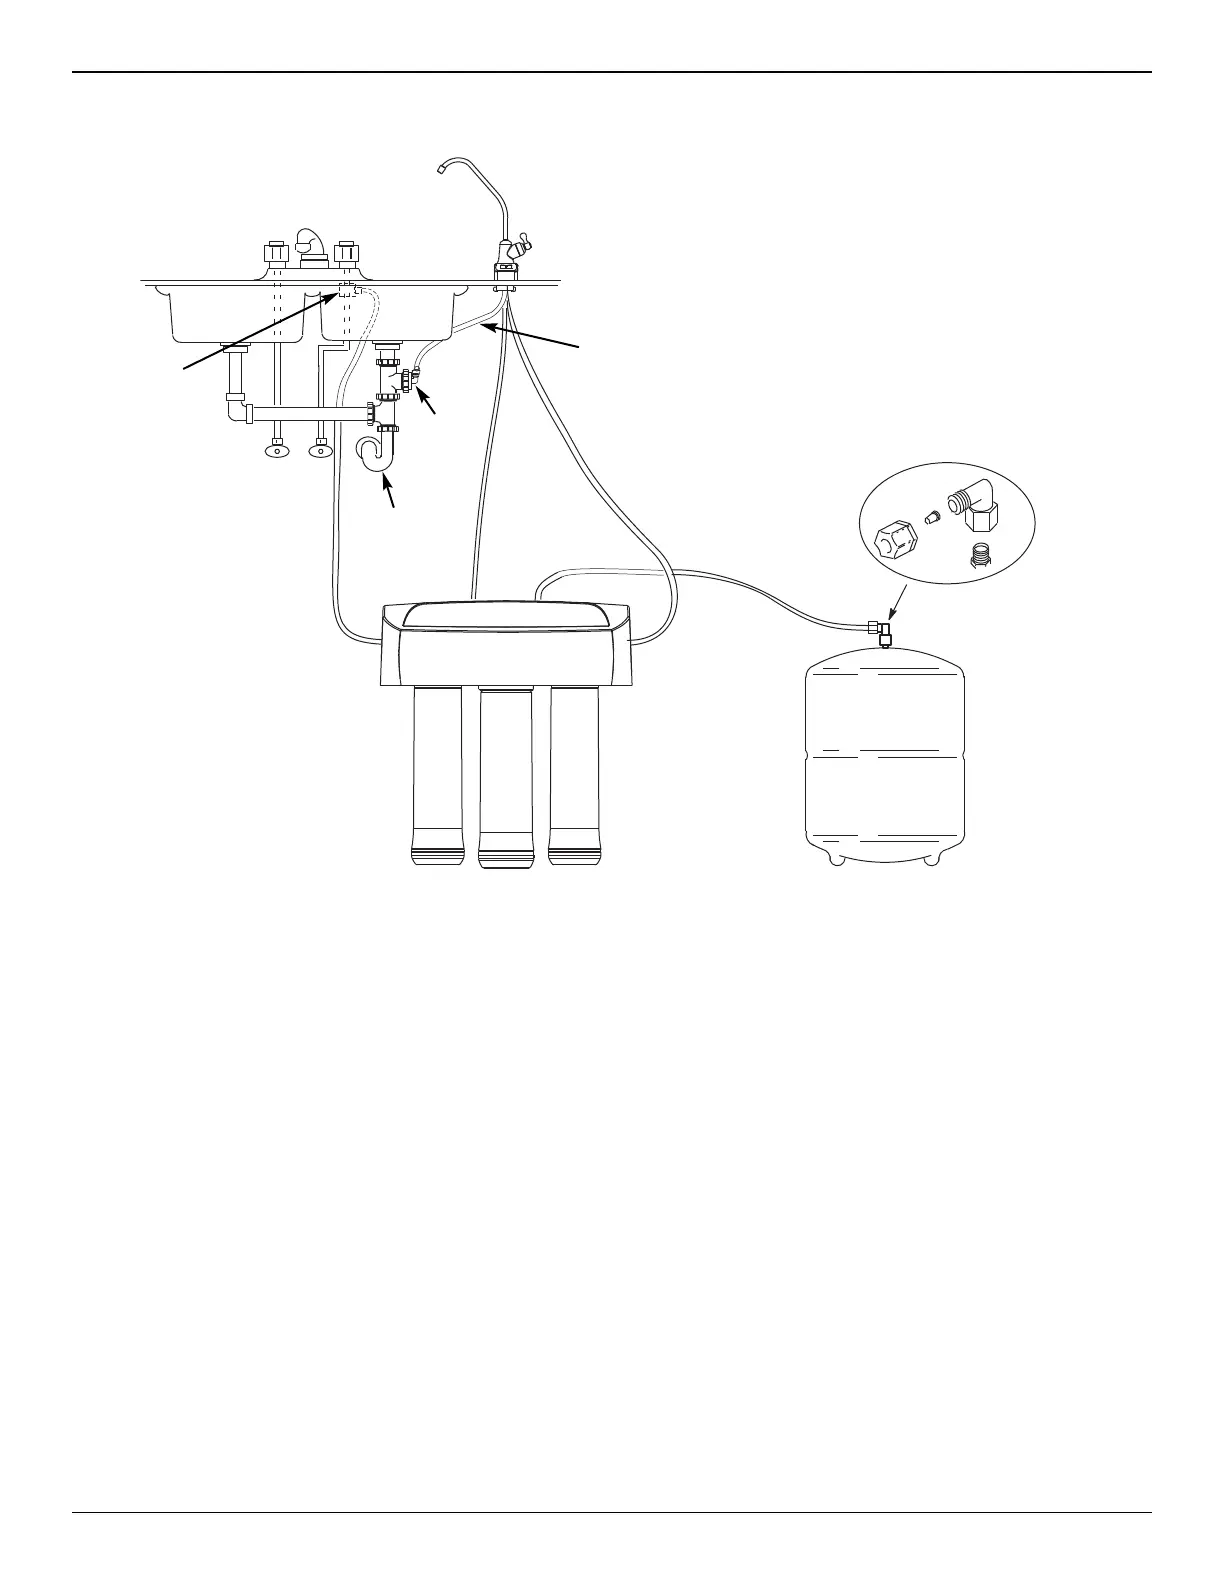
ROUTEYELLOWTUBETOSTORAGETANK
1. Locate the yellow tube attached to the Reverse Osmosis
filter assembly.
2. Route the loose end of the yellow tube to the fitting on top
of the storage tank. See Fig. 23.
3. Cut tube square and to length. See Fig. 18.
4. Do not connect at this time. This will occur in the sanitizing
step.
CONNECTGREENTUBETOCOLDWATER
SUPPLYPIPE
1. Route one end of the 1/4” green tube to the fitting on the
water supply pipe. See Fig. 23.
2. Cut tube square and to length. See Fig. 18.
3. Connect to cold water supply fitting. See Fig. 6.
4. Route the other end of the green tube to green collet to the
fitting on the left side of the Reverse Osmosis filter
assembly.
5. Cut tube square and to length. See Fig. 18.
6. Insert all the way into the fitting. See Figs. 19 & 20.
7. Pull on the tube to be sure it is held firmly in the fitting.
CONNECTBLUETUBETOREVERSEOSMOSIS
ASSEMBLY
1. Locate the blue tube attached to the faucet.
2. Route the loose end of the 3/8" blue tube to the blue collet
on the right side of the Reverse Osmosis filter assembly.
3. Cut tube square and to length. See Fig. 18.
4. Insert all the way into the fitting. See Figs. 19 & 20.
5. Pull on the tube to be sure it's held firmly in the fitting.
CONNECTBLACKTUBEFROMREVERSE
OSMOSISFAUCETTODRAINADAPTER
1. Locate the 3/8" black tube attached to the faucet. Fig 23.
2. The loose end needs to be attached to the black collet on
the sink drain adapter.
3. Cut this tube as needed to route it as straight as possible,
without loops, dips, or kinks.
4. Cut the end of the tube square. See Fig. 18.
5. Insert all the way into the fitting. See Figs. 19 & 20.
6. Pull on the tube to be sure it is held firmly in the fitting.
REDTUBETOREVERSEOSMOSISFAUCET
The red tube connection was completed in the faucet
assembly steps.
NOTE:Tubinglengthsshouldallowforthe
removaloftheassemblyfromthehanger
washersforservicing.Iftubinglengthsare
shortenedforneaterappearance,itmaybe
necessarytokeeptheassemblyonthe
hangerwashersforservice.
NOTE:CodesinthestateofMassachusetts
requireinstallationbyalicensedplumber
anddonotpermittheuseofsaddlevalves.
IfyouliveinthestateofMassachusetts,
reviewplumbingcode248-CMRofthe
CommonwealthofMassachusettsbefore
proceedingwiththeinstallation.
NOTE:Tubecolors
matchcolletcolors.
TubeConnections
FIG.23
Tubing Connector
Drain
Adapter
3/8” BLACK
Tubing
Sink
P–Trap
3/8” BLUE
1/4” RED
1/4” GREEN
3/8” YELLOW
HOT COLD
Tee, Feed
Adapter

 Loading...