Page 12
XLTP 041612
PREPARING THE UNIT FOR INSTALLATION
Applying Insulation Tape
Locate the (4) precut pieces of black foam tape included with the unit, two larger pieces
and two smaller pieces. To apply, simply peel back the white-paper adhesive covering
and place on the mounting bracket. The large pieces are applied to the top and bottom
while the smaller pieces are for the sides. This foam creates a tight seal between the
bracket and the wall.
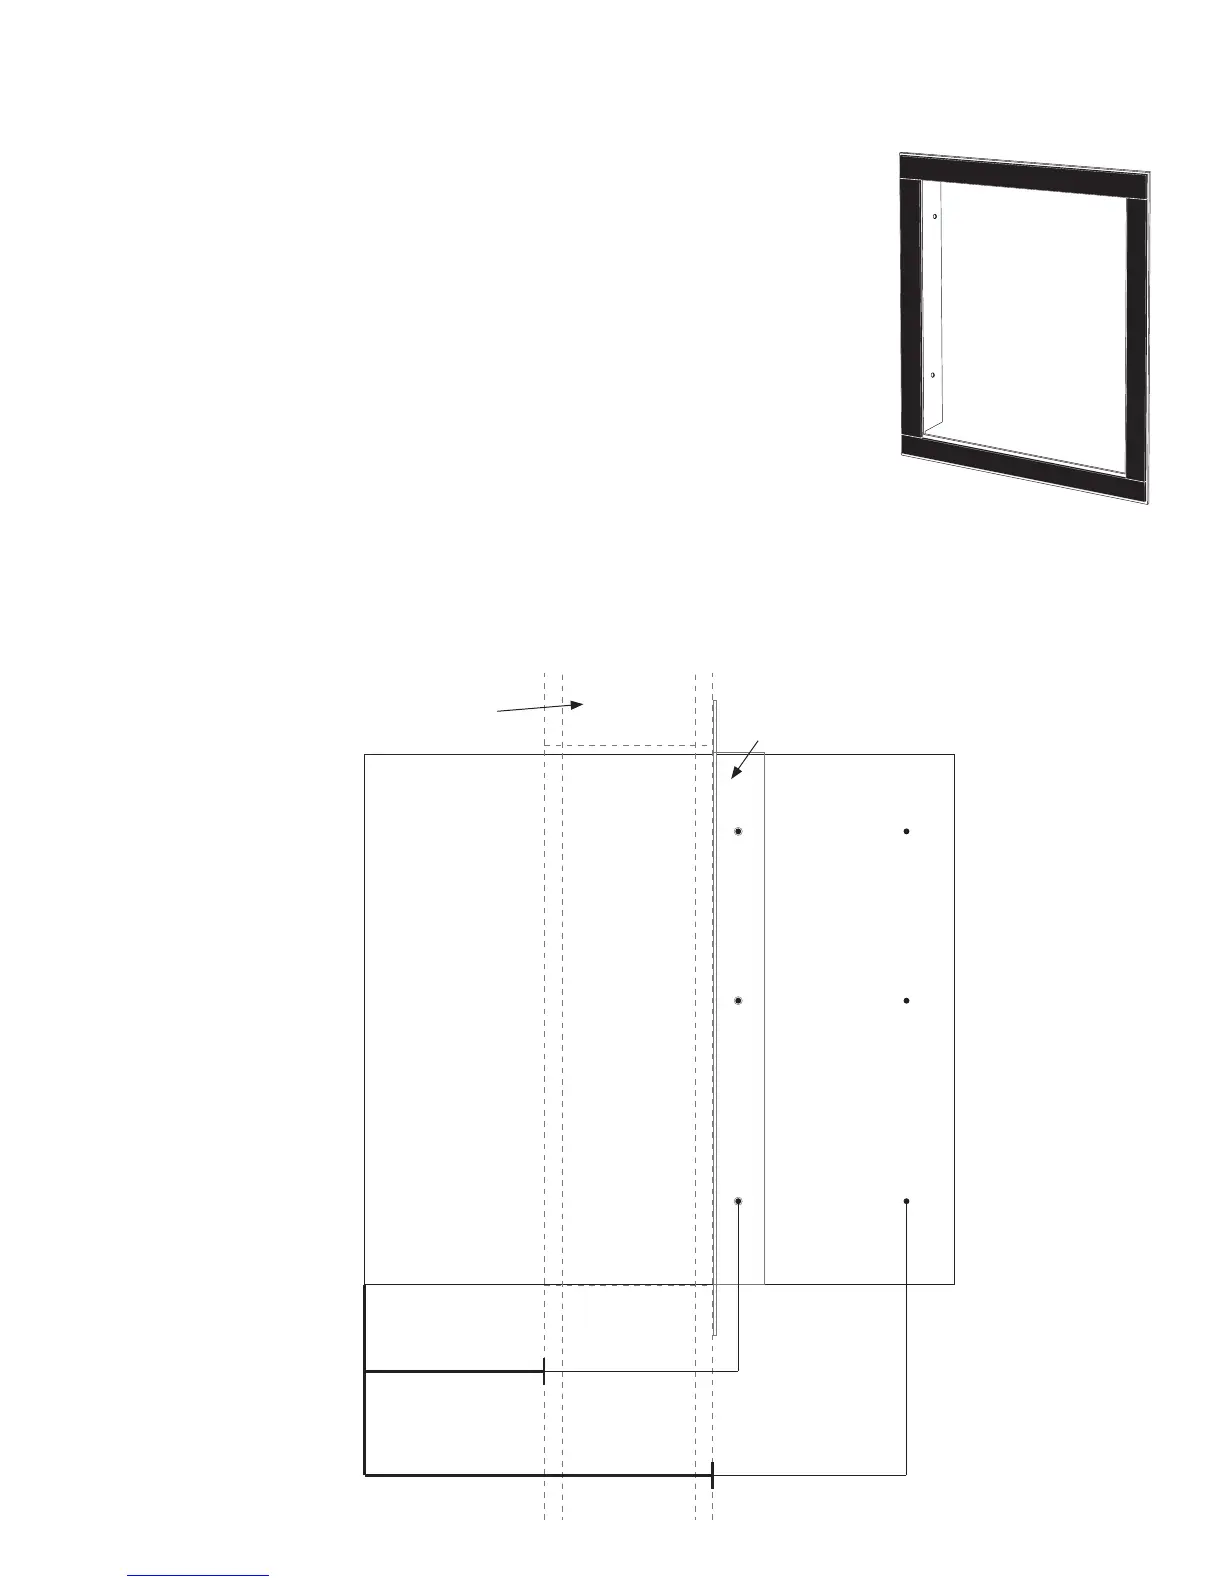
Single Piece Mounting Bracket
The XLT Plus utilizes a single piece mounting bracket, this sturdy bracket frames the
installation location and secures the unit to the wall.
Mounting Bracket Installation
Select your desired bracket mounting location (see diagram below), this location deter-
mines the depth of the installation. For example, position #1 keeps most of the unit out
of the cellar while position #2 makes the back of the unit near ush on the exterior wall. Slide bracket onto unit, pay
special attention to the anges for mounting to the unit and that they are pointing towards the back. Use the (6) sup-
plied 1/2” self tapping screws to fasten the bracket to the unit. It is imperative to not use self tapping screws longer
than 1/2” in length.
2000i/3000i/4000i
5-6” inches In Cellar
6000i/8000i
9.5-10.5” inches In Cellar
2000i/3000i/4000i
9-10” inches In Cellar
6000i/8000i
14-15” inches In Cellar
#
1
#
1
#
2
#
2
5” inch thick wall
(wall thickness may vary)
Mounting Bracket
Wine Cellar Exhaust Area