Typical Installations – Insert Stove
32
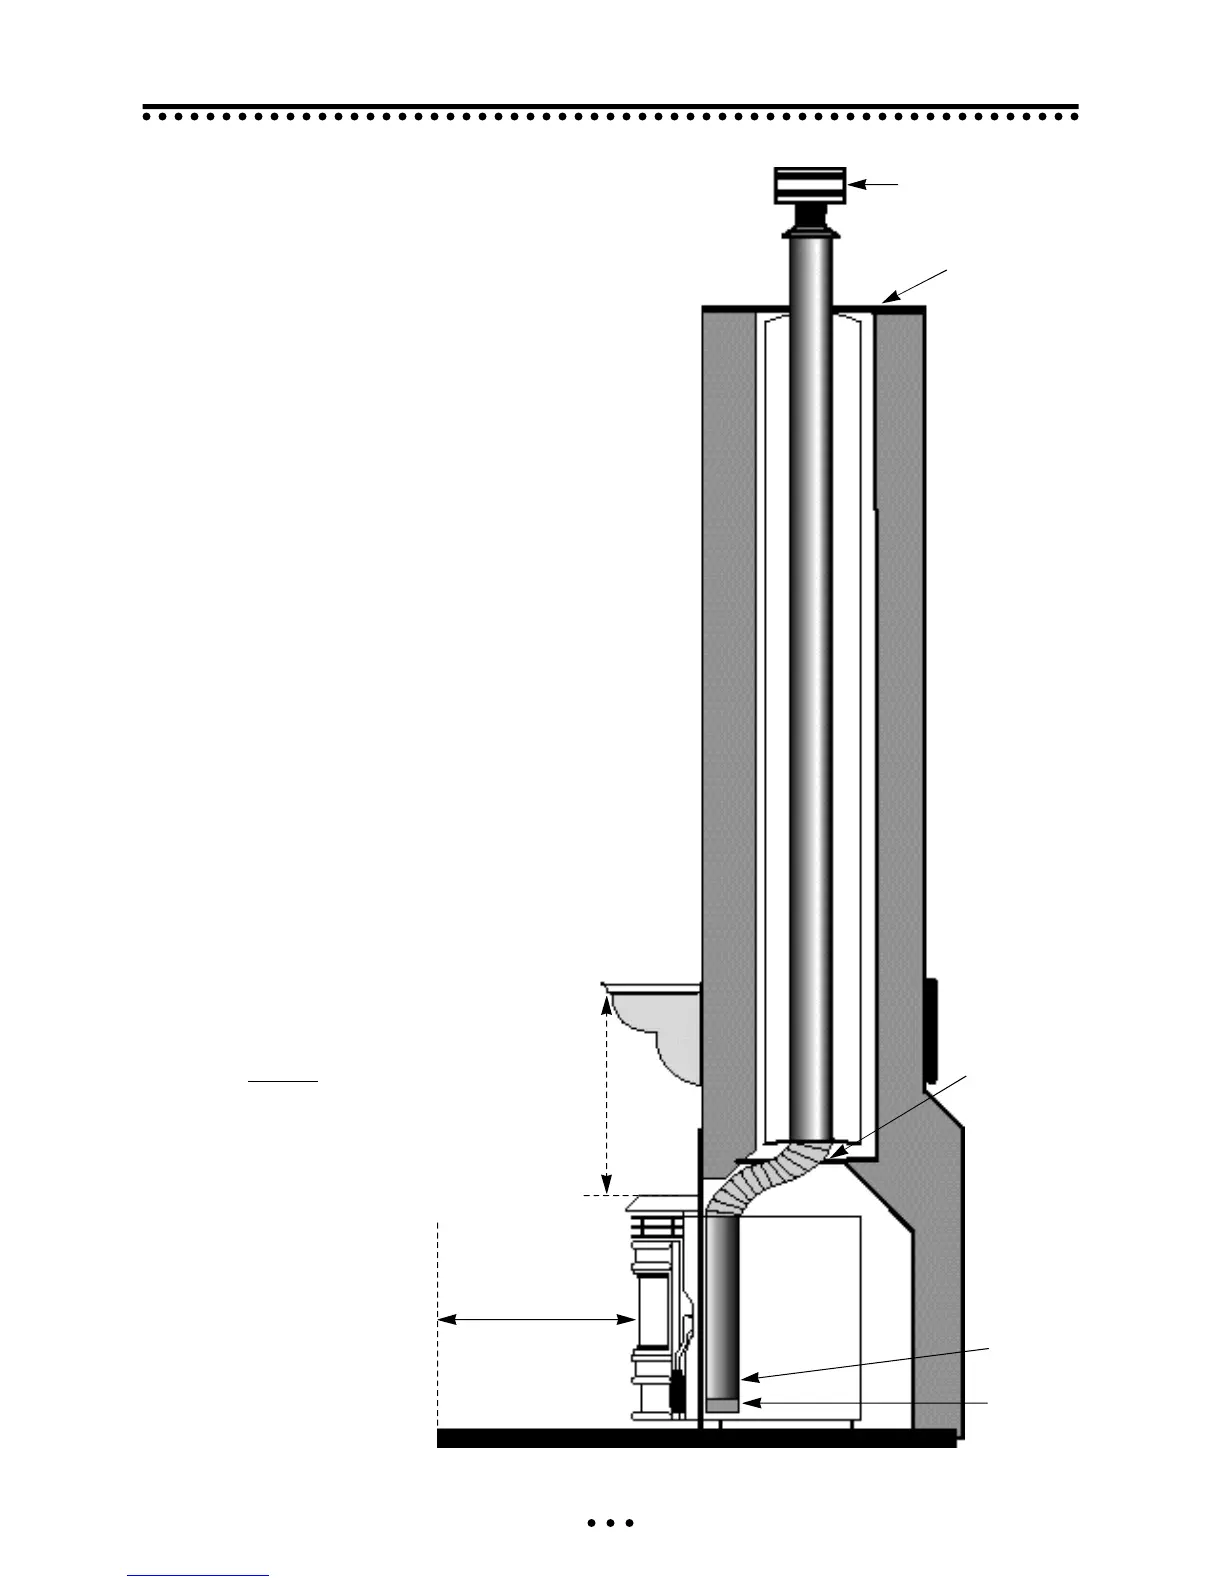
8” Minimum
clearance
6” Minimum
clearance
Seal chimney
top with
steel plate
and/or pipe
support
RAIN CAP
Optional
metal
Plate
Removable
Clean-out
cup
Clean-out Tee
INSERT STOVE VENTED INTO
EXISTING CHIMNEY
The Quest insert may be installed in a masonry
or factory built fireplace as shown below. When
installing into the existing chimney, the exhaust
venting system should be extended to the top of
the chimney as shown below. However, if the
vent pipe cannot be run to the top of the chim-
ney, the pipe must extend a minimum of 10
feet (3m) above the exhaust connection on the
stove and be sealed with a steel plate in the
damper area. Ensure that the end of any flex
pipe used in this type of installation is not
blocked, when terminated inside the existing
flue. Note: Any installation that does not run
all the way to the top of the chimney is not
recommended.
We also recommend that the fireplace cavity be
thoroughly cleaned and sealed with latex paint or
masonry sealer. The paint will seal in old soot
and creosote and help prevent fine dust from
being pulled into the stove's convection fan and
blown into the house.
IMPORTANT NOTE:
Make sure the chimney
and fireplace are clean
and free of soot and ashes
BEFORE installation
begins. Failure to do so
may result in the transfer
of soot into the room.